

Before reading this article, I recommend a “good” article: Spring MVC: From Beginner to Expert. This article is comprehensive, rich in examples, in-depth yet easy to understand, and provides detailed step-by-step guidance, making it an excellent choice for learning Spring MVC. I suggest everyone read it.
1. Introduction to Spring MVC
In the previous article, Hong Ge briefly explained and described Wireshark’s interface. If you want to understand more details, you can refer to the official documentation or search for information online. Today, Hong Ge will explain and share some basic operations of Wireshark with the friends or classmates. Of course, these are the ones we might often use or say we use more in our daily work. Hong Ge won’t explain the others.
Next, let’s learn some common basic operations of Wireshark together with Hong Ge.
2. Spring MVC: Display Interface Operations
2.1 Adjust Interface Size in Spring MVC
Sometimes we encounter situations where the data on the main interface is too small, making it very strenuous or eye-straining, especially for nearsighted or older individuals. By adjusting the interface size, we can easily solve this issue.
Method: 1. In the menu toolbar, there are three “magnifying glass” icons from left to right: enlarge, reduce, and restore default size. You can adjust the size of the main interface data. As shown below:
 />
/>
2.2 Configure Display Columns in Spring MVC
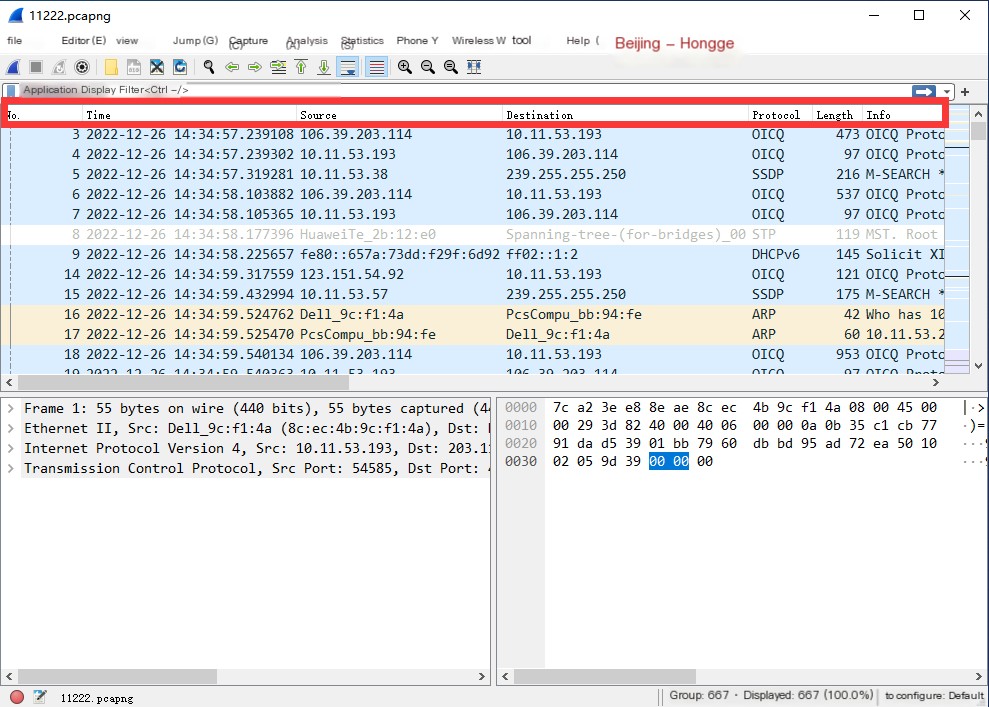
The packet list is one of the most commonly used modules in work. There are some columns displayed by default in the list, and we can add, delete, or modify the displayed columns.
2.2.1 Default Display Columns in Spring MVC
The default display columns are displayed before any columns are set up. In summary, it’s one sentence: When? Who sent to whom? What protocol was used? What content was sent? How much data was sent? As shown below:
 />
/>
“2.2.2 Add Display Column in Spring MVC”
If you want to display a certain field in the data list, this way you can clearly see this field instead of laboriously searching for it elsewhere. You can add this data field to the display column in the data list.
Method One: 1. Left-click on the field you want to add as a column, and right-click to select “Apply as Column.” For example: Hong Ge wants to display the Source Port in TCP in the data column, as shown below:
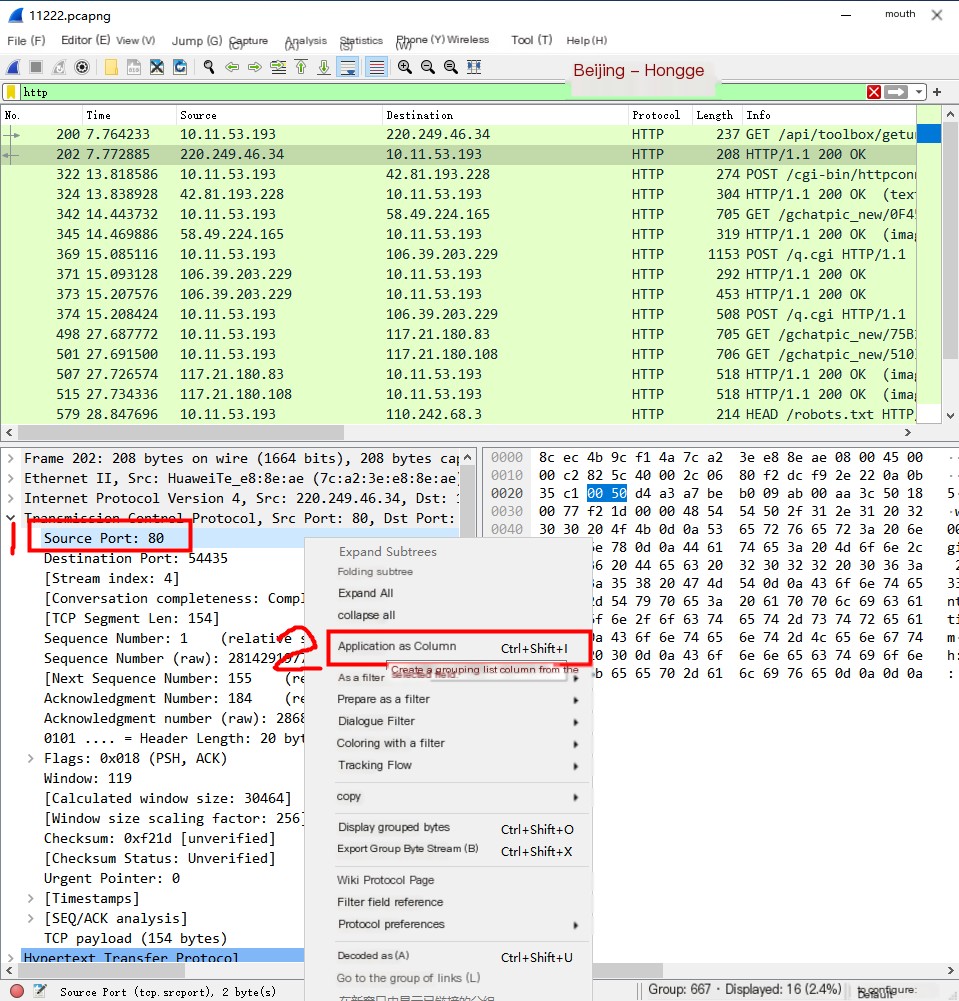
Method Two: 1. Use the shortcut key. Select the field and press Ctrl + Shift + I, which will achieve the same effect.
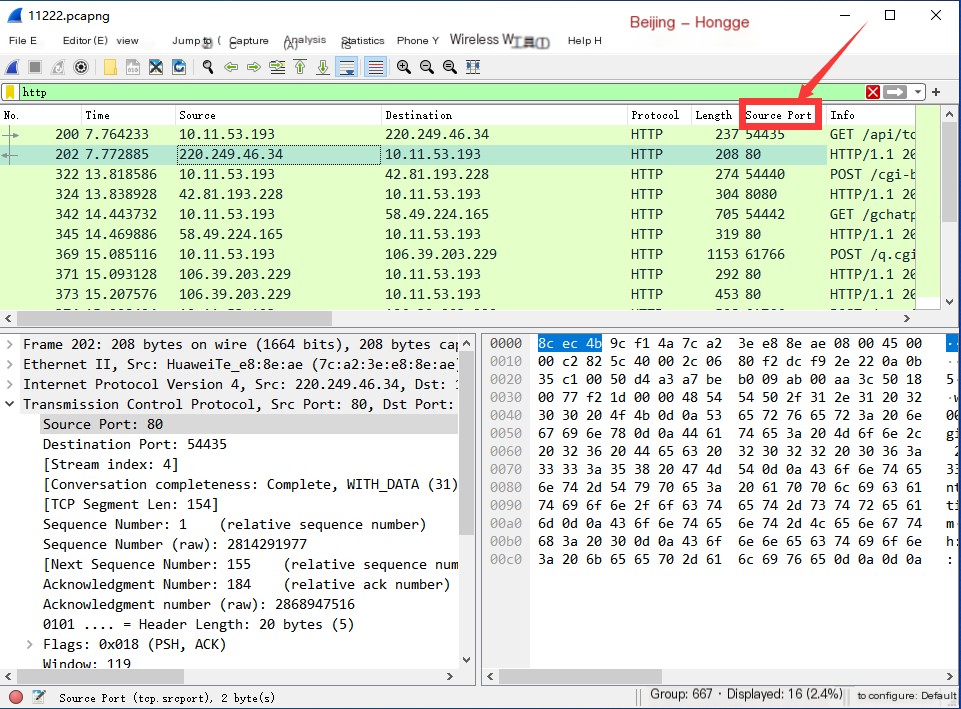
The field added as a column will be displayed in the data list. As shown below:
2.2.3 Modify Display Column
If you need to modify the column name, you can modify it in the display column.
Method: 1. Right-click on the column you need to modify and click on “Edit Column” at the bottom. As shown below:

2.2.4 Hide Display Column
If some columns are useless to you and you don’t want to view them temporarily, you can hide them temporarily.
Method: 1. Right-click anywhere in the display column and uncheck the column name to hide the display column. As shown below:

2.2.5 Delete Display Column
If you determine that you don’t need to view a field, you can delete it from the display column.
Method: 1. Right-click on the column you need to delete and click on “Remove this Column” at the very bottom. As shown below:
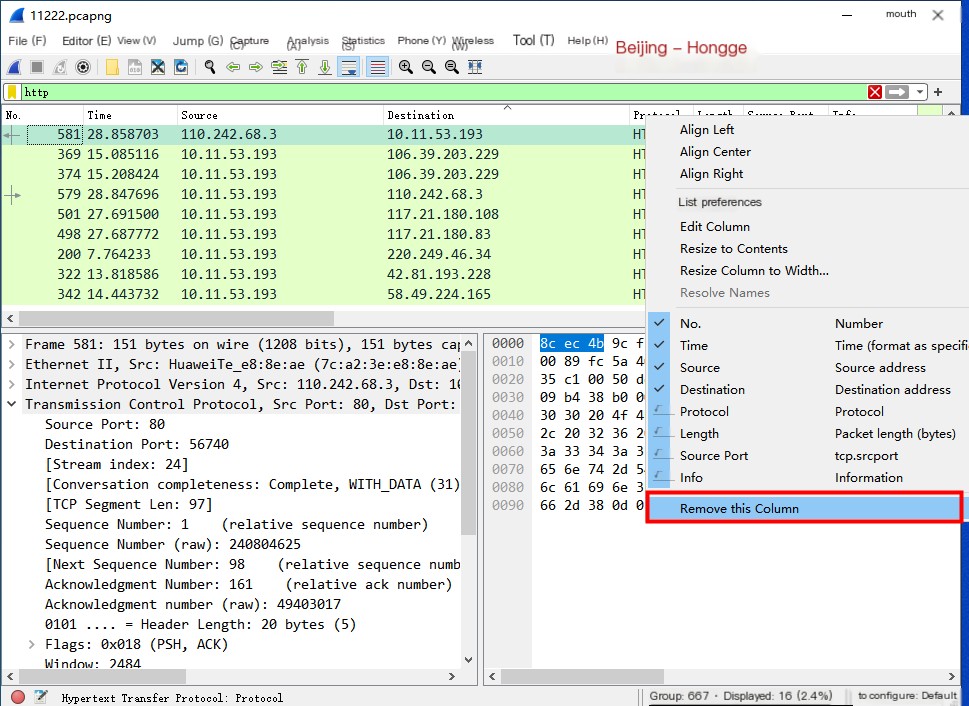
Note: To hide a field, right-click anywhere in the column name bar; but to delete a field, you need to right-click on the specified column name position to prevent accidental deletion.
2.3 Set Time
2.3.1 Set Time Format
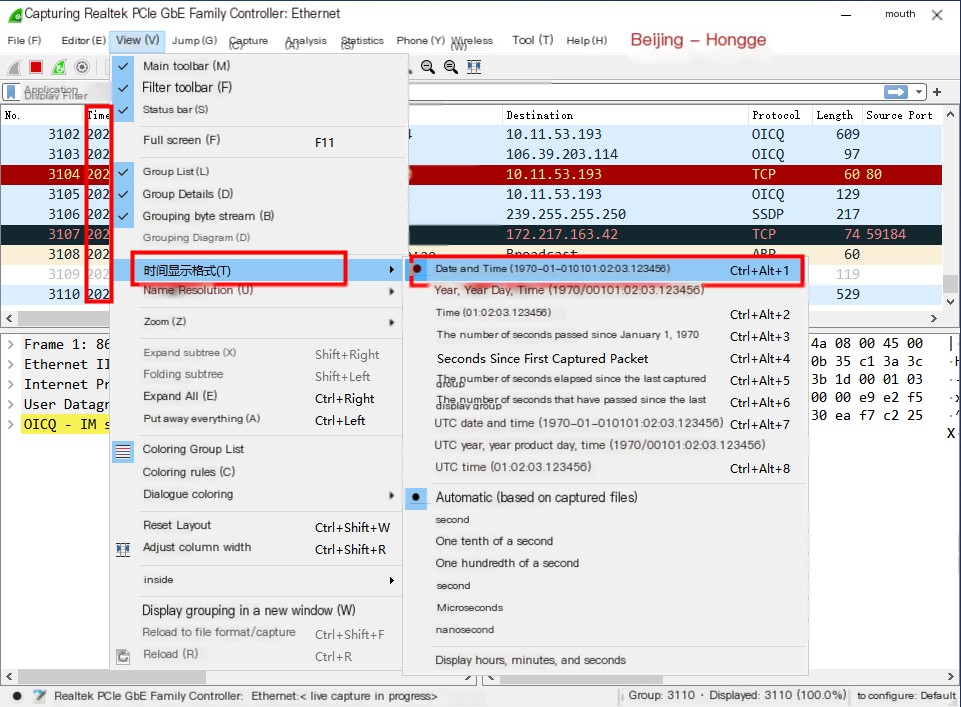
The time column in the packet list bar, by default, displays in a format that seems inconvenient, especially for beginners who might not understand the specific meaning of this time and its unit of measure. We can adjust the time display format.
Method: 1. Click “View” in the toolbar, select “Time Display Format,” and set your preferred format. As shown below:
2.3.2 Set Reference Time
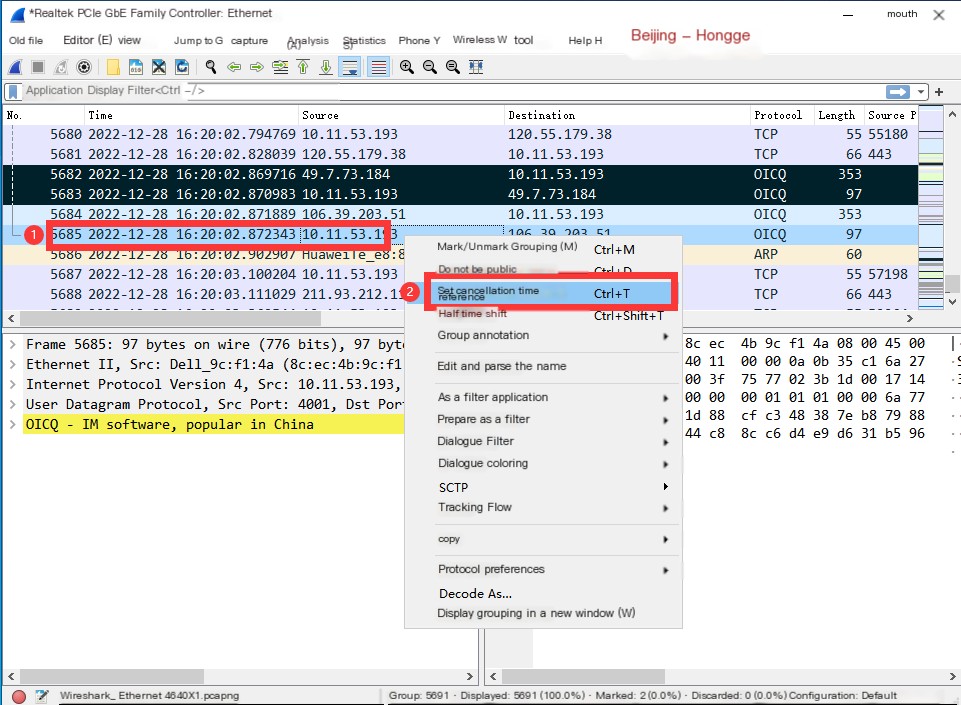
Select a certain packet time as the reference time 0, and the following packet times will offset relative to this message.
Method: 1. Select the message and right-click to choose “Set Time Reference.” Choose the packet that needs to be the reference time, and right-click to select the top option “Set/Unset.” As shown below:
2.4 Name Resolution
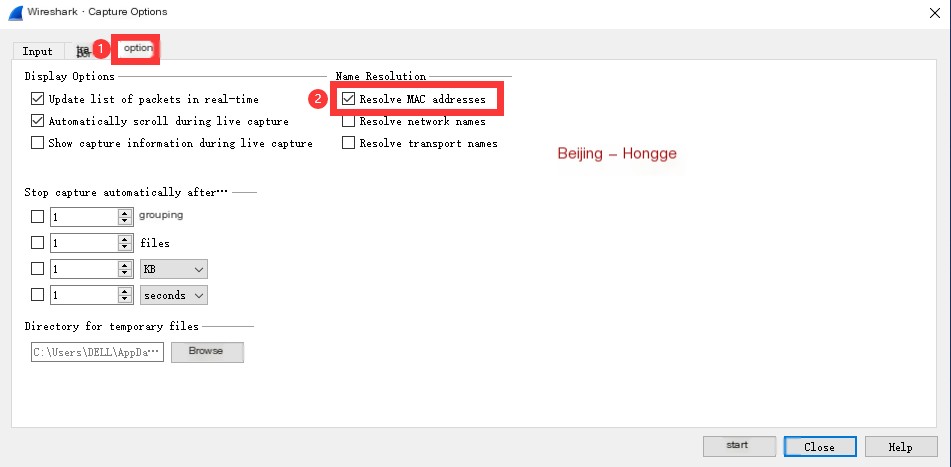
This function mainly does the following: (1) Converts MAC addresses, IP addresses, port numbers, etc., into names for easier memorization. By default, only MAC address resolution is enabled. For port numbers, IP addresses, MAC addresses, some have default names and can be selectively enabled, which will display their names, e.g., port 80 -> http. However, it is generally not recommended to enable resolution as it looks less intuitive. (2) IP or port number name resolution can improve readability, but resolution can go wrong, and the large resource consumption affects parsing performance. Name resolution includes three aspects: ① MAC address resolution, ② Network name resolution, ③ Transport name resolution.
2.4.1 Enable Name Resolution
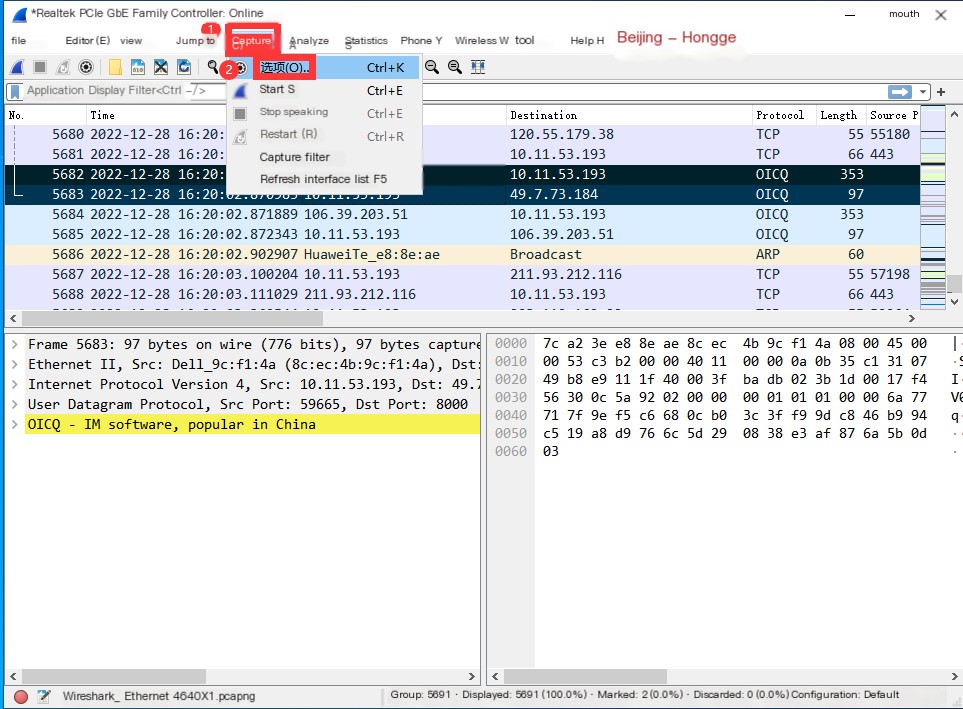
Method: 1. Click the “Capture” button in the menu bar and click “Options.” As shown below:
2. Click “Options” and check “Resolve MAC addresses.” As shown below:
2.4.2 Manual Resolution Settings
You can customize name resolution by right-clicking on the item you need to resolve and selecting “Edit Resolved Name,” as shown below:
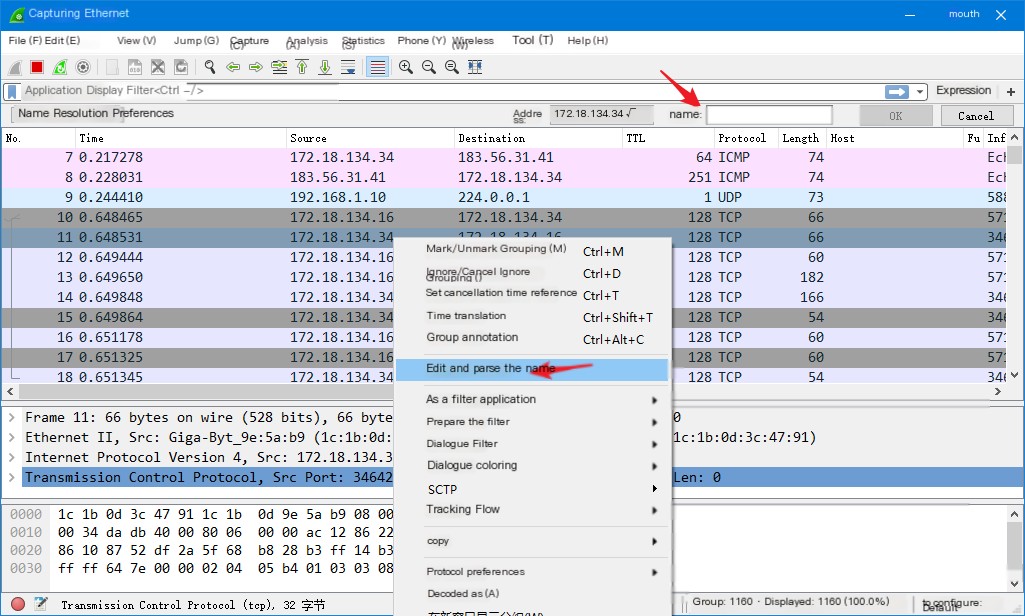
This setting will not be permanently saved, and it will be lost after restarting the software.
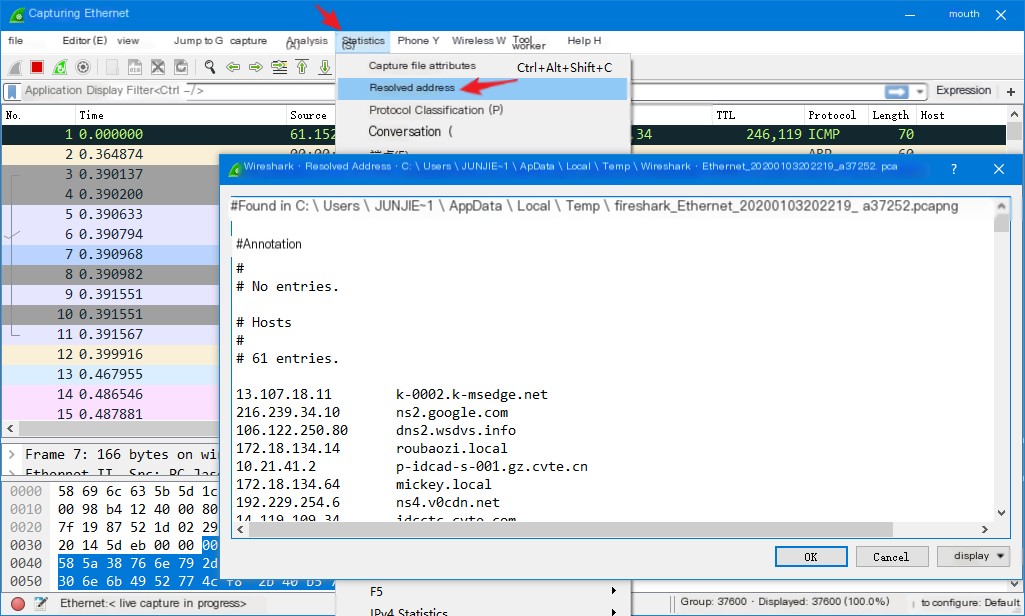
View wireshark’s resolved addresses:
3. Conclusion
Please note that when modifying the column name, it’s best not to change it to Chinese, as modifying to Chinese sometimes results in scrambled text or may result in scrambled text after restarting Wireshark.