

Introduction
First, we need to clarify the objectives of packet capturing for conference call troubleshooting.
- 1. Analyze data transmission protocols
- 2. Identify issues in network protocols
- 3. Extract desired information from packets
- 4. Modify, forge, and resend captured packets
For instance: During a conference call, the call suddenly disconnects. Upon reviewing the log, it is found that no heartbeat response was received. In this situation, packet capturing is needed to verify whether the response information was sent by the other device, thereby determining the root cause of the problem.
Methods of Packet Capturing:
1. Using a computer as a hotspot, connect a mobile device to the computer’s hotspot through Charles or Wireshark
The advantages of Charles are obvious: it is simple and has a low learning curve but can only capture HTTP protocols. Wireshark is powerful and has a higher learning cost but can capture TCP and UDP protocols, meeting our current business needs.
Specific steps:
1. Use the computer’s network as a hotspot 2. Connect the test device to the hotspot after enabling the WiFi hotspot; 3. Start Wireshark/Charles, select the network card used as the hotspot, and begin capturing packets; 4. Operate the mobile device to capture all packets that interact with the network 5. Stop capturing after the operation ends.
This method has significant limitations under our current development conditions, as currently, no laptops can be used to provide a hotspot for packet capturing (using a laptop as a hotspot requires obtaining permissions).
2. tcpdump
Android tcpdump download link: https://download.csdn.net/download/github_33304260/10820344
The prerequisite for using this method is that the device for packet capturing must have root permissions because writing to the data/local directory needs file permissions; non-eng or non-root versions may encounter permission issues as shown in the image:
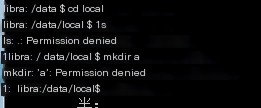 />
/>
Let’s start the packet capturing
1. Download tcpdump file
2. Place the downloaded tcpdump file in the device’s data/local directory
Execute the following command:
adb push path:/tcpdump /data/localeg:adb push c:/tcpdump /data/local3. Enter shell
Enter the shell with the following command
adb shell4. Assign permissions to tcpdump
Enter the /data/local directory and execute the following command:
chmod 777 tcpdumpIf you’re not clear on Linux permissions, you can Google it yourself.
5. Begin packet capturing
Enter the following command in the /data/local directory:
./tcpdump -p -s 0 -w filename.capeg:Capture packets and write them into a file named test.cap./tcpdump -p -s 0 -w test.cap />
/>
Once you see the command as above, it indicates that packet capturing was successful, and you can wait patiently.
6. End After waiting for the packet capturing to finish, directly press ctrl+c to end the capture
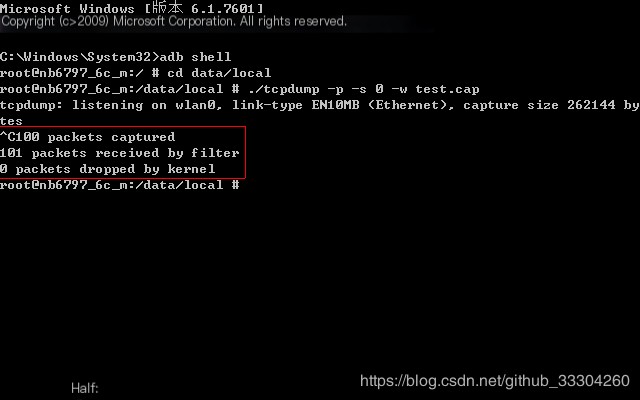
The above image indicates a successful completion of the packet capturing. 7. Exit shell
Execute the following command:
exit8. Export the cap file
Execute the following command:
adb pull cap file path destination patheg:Export the text.cap file from /data/local/ to the D drive's workSpace folderadb pull /data/local/test.cap D:\workSpaceAppendix: Common tcpdump commands
-a: Attempt to convert network and broadcast addresses to names;-c: Stop the dumping operation after receiving the specified number of packets;-d: Convert the compiled packet code into a readable format and dump it to standard output;-dd: Convert the compiled packet code into C language format and dump it to standard output;-ddd: Convert the compiled packet code into decimal numbers and dump it to standard output;-e: Display the link layer header on each dumped line;-f: Display the Internet address in numerical format;-F: Specify a file containing expressions;-i: Use the specified network interface to send packets;-l: Use standard output column buffering;-n: Do not convert network addresses to names;-N: Do not list domain names;-O: Do not optimize the packet code;-p: Prevent the network interface from entering promiscuous mode;-q: Quick output, only a few protocol headers are listed;-r: Read packet data from the specified file;-s: Set the length of each packet;-S: Display absolute rather than relative TCP sequence numbers;-t: Do not display a timestamp on each dumped line;-tt: Display unformatted timestamps on each dumped line;-T: Force the expression to interpret and convert the packet into the specified type;-v: Display detailed instruction execution processes;-vv: Display even more detailed instruction execution processes;-x: List the packet data in hexadecimal format;-w: Write packet data into the specified file.