Through the previous two articles, you have learned how to build the experimental environment and simulate network devices in EVE-NG. However, to operate these devices, you still need to connect using terminal software. For an efficient EVE-NG SecureCRT setup, you have two connection options: the HTML5 console and the Native console. The HTML5 console doesn’t require terminal software installations like SecureCRT or Putty but can be inconvenient to operate. If you are using a PC to connect to EVE-NG for extended periods, setting up SecureCRT is recommended for a more flexible and convenient experience.
1. Connect to EVE using HTML5 console

This method of connecting devices is inconvenient and is not recommended.
2. Connecting to EVE using Native console

When using Nativeconsole, if some related tools cannot log in to the device.

After clicking the device, a window for selecting the telnet program will pop up. At this time, you can select SecureCRT or putty.


But at this point you will find a problem, each device requires a window, and multi-device operation requires switching back and forth between windows, which is extremely inconvenient. So next you need to install EVE-NG-Win-Client-Pack .

3. Install EVE-NG-Win-Client-Pack
Check all, this is equivalent to a combination package, check which software you need to install

VNC only needs to install the Viewer, we only need the client

Wireshark installation, it is recommended to check all options, this software is not only used in EVE-NG, but also in daily work and study, so I selected all. The default installation is also OK!

Of course WinPcap must be installed, no explanation needed.

4. Connect to EVE using HTML5 console
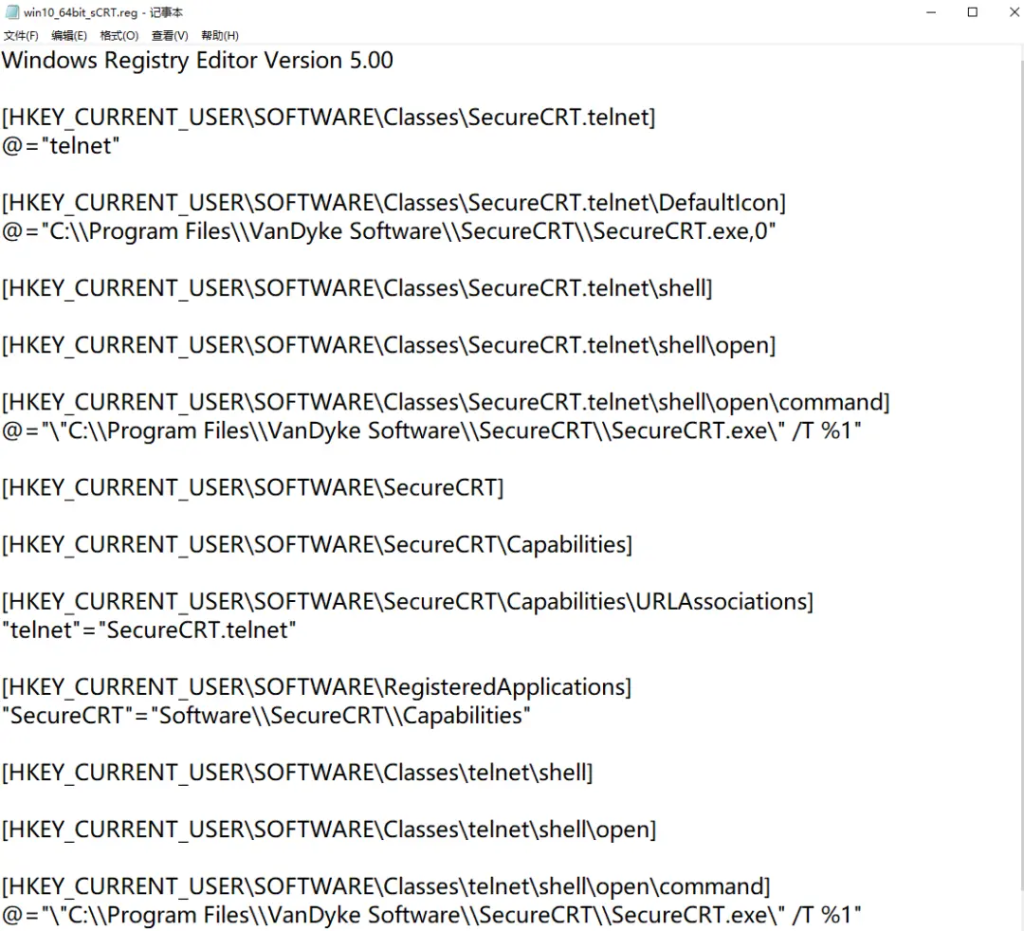
4.1. Edit the C:\ProgramFiles\EVE-NG\win10_64bit_sCRT.reg registry file
The default paths are as follows:

Note: Make sure the path to install SecureCRT is correct. The default path after SecureCRT version 8.0 is “C:\ProgramFiles\VanDyke Software\SecureCRT\SecureCRT.exe”
4.2. Double-click C:\ProgramFiles\EVE-NG\win10_64bit_crt.reg, select “Yes” to import the registry


4.3. Click the device again and re-associate SecureCRT

Note: Before associating, remove the CRT previously set in the Firefox browser, and then click the device to reassociate.

This method is relatively troublesome, so I will provide you with a very simple solution:
The first step is to download a program:

This program is written by myself, and the anti-virus software will report it as a virus. Don’t worry, I guarantee it with my own personality. You need to add this file to the exceptions in the anti-virus software.
The second step is to copy ConsoleTab.exe to the CRT installation directory.
The general path is here C:\ProgramFiles\VanDyke Software\SecureCRT\

Step 3: Set up Firefox
In the telnet option, select the path of the ConsoleTab.exe file just now, and then you’re done.


This method is simple and convenient to operate!
5. Wireshark capture
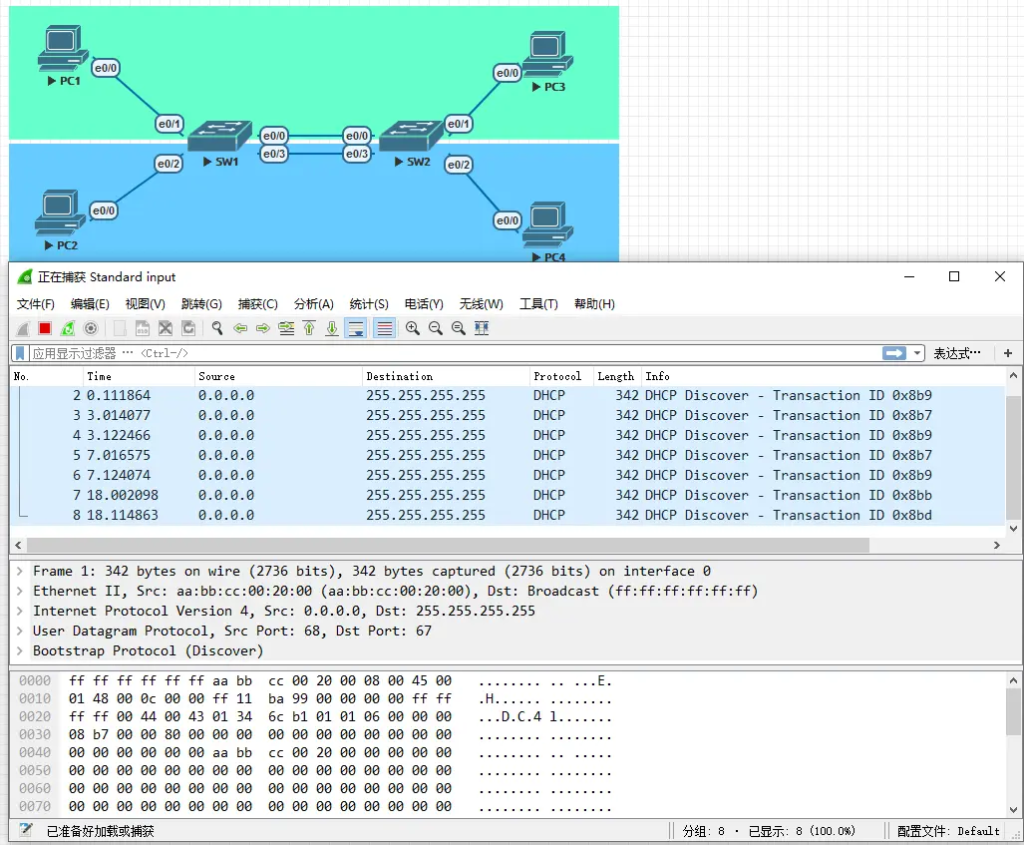
1. Right-click the device, move to Capture, then move to Interface, and click the corresponding interface (click whichever interface you want to capture)

2. At this time, Wireshark is started and a cmd window pops up. Enter y and press Enter

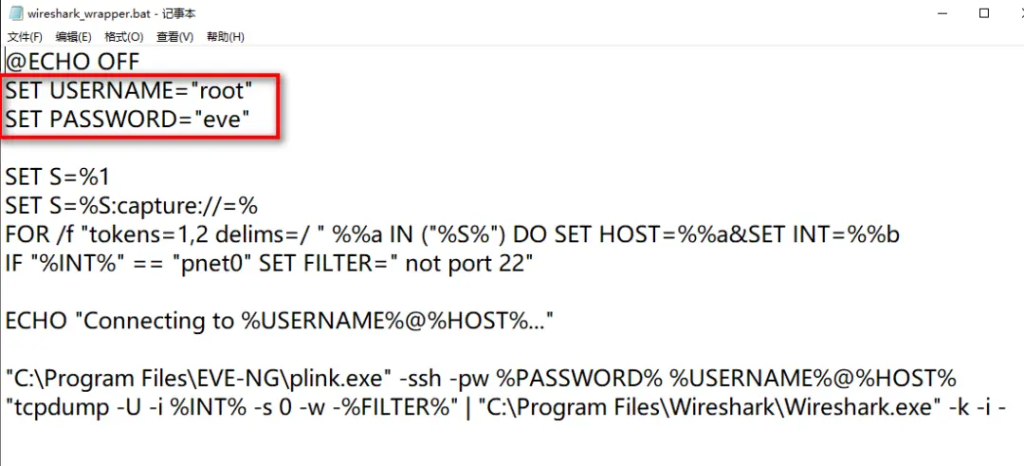
If you change the password to something other than eve when installing EVE-NG, you will be prompted with “access denied” because the account is not configured correctly.
3. Right-click and edit the C:\ProgramFiles\EVE-NG\wireshark_wrapper.bat file and modify your username and password:

The account and password here are changed to the EVE virtual machine background account and password. The default account is root and the password is eve.
Note: If you cannot modify the original file directly, you can copy the file to the desktop and then overwrite the original file after modifying it.
4. Close the previous wireshark window and cmd window, click the interface again to start packet capture, and you can see the data packets.

Note: Do not close the cmd window, as packet capture will stop after closing it.
6. Summary
This guide provides a detailed walkthrough on setting up an efficient EVE-NG SecureCRT connection. The article covers two main methods for connecting to network devices within EVE-NG: the HTML5 console and the Native console. While the HTML5 console allows easy access without additional software, it’s described as inconvenient. The use of SecureCRT or Putty along with the EVE-NG environment is recommended for extended connectivity and a smoother user experience. The document explains the steps to connect using the Native console, including pitfalls such as the need to switch between multiple windows for device management. To resolve this, installing the EVE-NG-Win-Client-Pack is suggested, which simplifies managing multiple device connections. Furthermore, the guide offers instructions on editing registry files for SecureCRT configuration, including importing registry entries to streamline the setup process. A simplified alternative method using a custom program (ConsoleTab.exe) is provided for managing telnet connections. The document also explains how to use Wireshark for network packet capture within EVE-NG. It includes steps for configuring user credentials for successful packet capture and troubleshooting potential access issues. Overall, this guide aims to enhance the user’s experience with EVE-NG by utilizing professional tools like SecureCRT and Wireshark, empowering both network professionals and learners to efficiently simulate and manage network environments.


