

Nessus is touted as the world’s most popular vulnerability scanner, used by over 75,000 organizations globally. This tool offers comprehensive computer vulnerability scanning services and continuously updates its vulnerability database. Unlike traditional vulnerability scanning software, Nessus can perform system vulnerability analysis and scans both locally and remotely. Nessus is also one of the essential tools for penetration testing. Therefore, this chapter will introduce the installation, configuration, and initiation of Nessus for you to easily use Nessus to scan a network for vulnerabilities.
Preparation: Install Nessus
To identify vulnerabilities on the target system, Nessus relies on feeds for vulnerability checks. The official Nessus website provides two versions: Home and Professional.
- Home Version: The Home version is for non-commercial or personal use. It is suitable for individual users and non-professional environments.
- Professional Version: The Professional version is for commercial use and includes support and additional features such as wireless concurrent connections.
This section uses the Home version of Nessus to demonstrate Nessus installation. The specific steps are as follows:
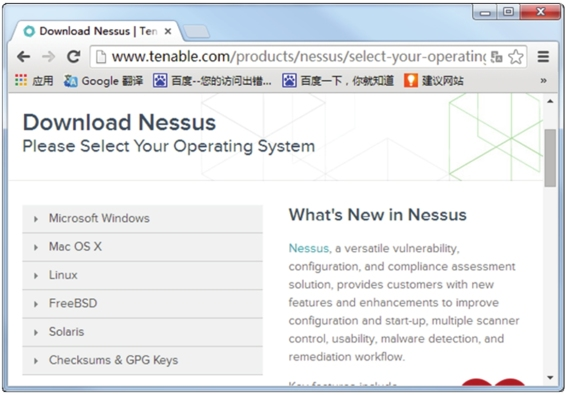
Step 1.Download the Nessus Package: Download Nessus. Enter this address in a browser to display the interface shown in Figure 1.1.
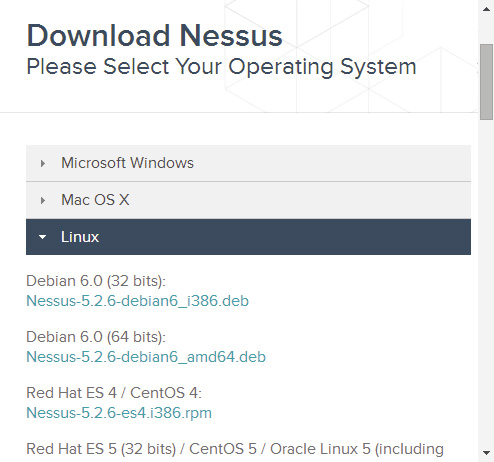
Step2. In the interface under “Download Nessus” on the left side, click on “Linux” and select the Nessus-5.2.6-debian6_i386.deb package, as shown in Figure 1.2.
Step3. Click the Nessus-5.2.6-debian6_i386.deb package to display the interface shown in Figure 1.3.
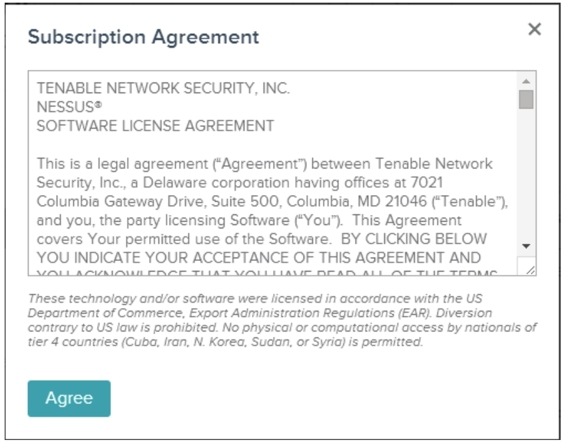
Step 4. Click the “Agree” button to start the download. Save the downloaded package to your desired location.
Step 5. Install the Nessus package using the following command:
root@kali:~# dpkg -i Nessus-5.2.6-debian6_i386.debIf you see similar output, the Nessus package has been successfully installed. Nessus is installed in the /opt/nessus directory by default.
Step 6. Start Nessus with the following command:
root@kali:~# /etc/init.d/nessusd startThe output will indicate that the Nessus service has started.
Note: Before using Nessus, you must have a registration code. The method to obtain an activation code was introduced in Chapter 2.
Step 7. Activate Nessus with the following command:
root@Kali:~# /opt/nessus/bin/nessus-fetch --register 9CC8-19A0-01A7-D4C1-4521Step 8. Create a user for Nessus with the following command:
root@Kali:~# /opt/nessus/sbin/nessus-adduserStep9. Log in to Nessus by entering the address https://:8834 or https://:8834 in your browser.
After these steps, Nessus is configured and ready to scan various vulnerabilities. Before scanning, create scan policies and tasks. The next section will introduce how to create policies and scan tasks.
How to Use Nessus to Scan a Network for Vulnerabilities: Step-byStep
Step 1. Add a Policy
The steps to add a policy are as follows:
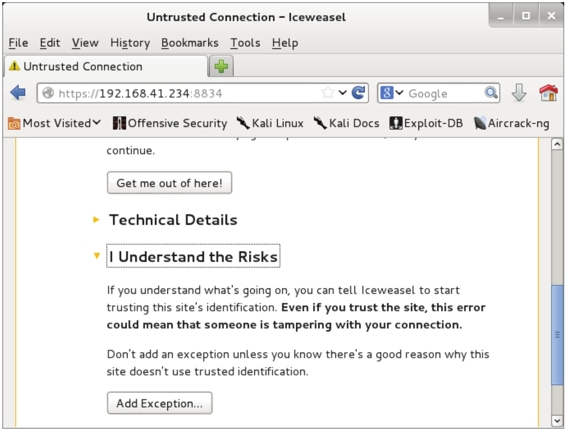
A. Log in to Nessus. Enter the address https://192.168.41.234:8834/ in the browser’s address bar to display the interface shown in Figure 1.4.
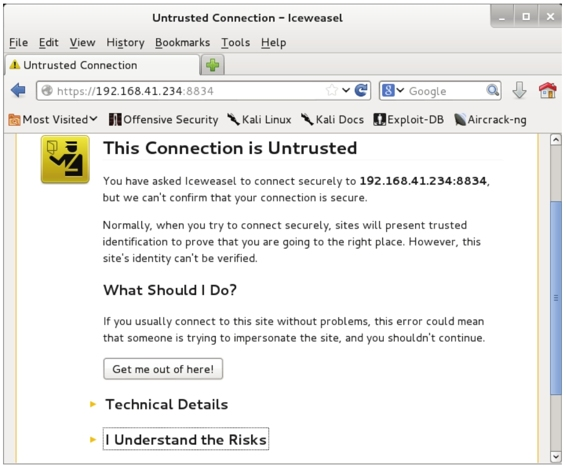
B. Click “I Understand the Risks” to display the interface shown in Figure 1.5.
C. Click “Add Exception” to display the interface shown in Figure 1.6.
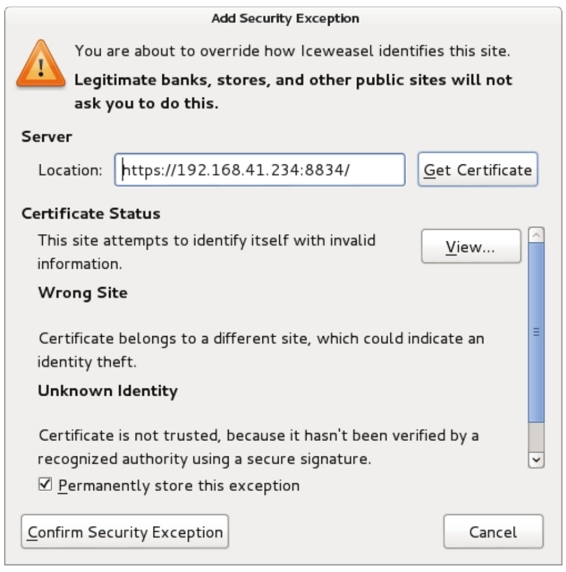
D. Click “Confirm Security Exception” to display the interface shown in Figure 1.7.
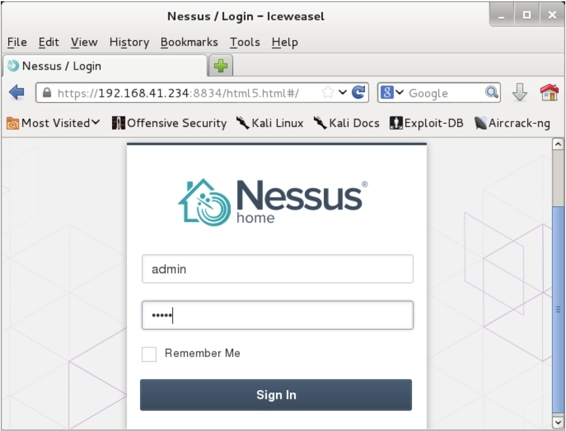
E. Enter the username and password you created earlier, then click “Sign In” to display the interface shown in Figure 1.8.
F. Switch to the “Policies” tab to display the interface shown in Figure 1.9.
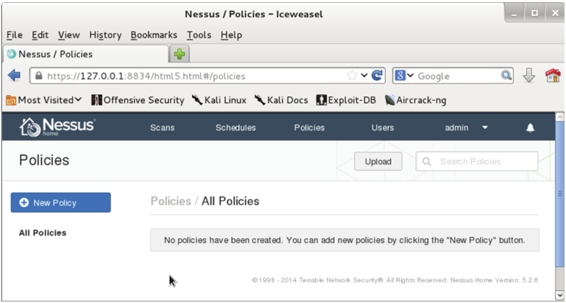
H. Click “New Policy” to display the interface shown in Figure 1.10.

I. Select the type of policy to create. Choose “Advanced Policy” and click the icon to display the interface shown in Figure 1.11.
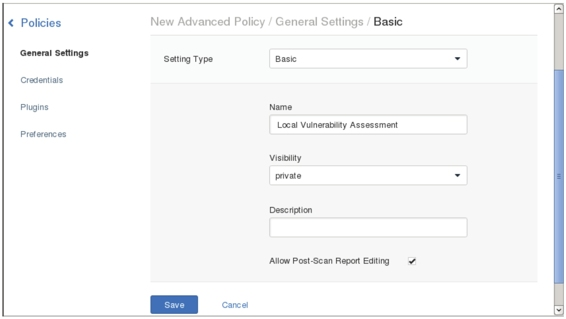
J. Set the policy name, visibility, and description (optional). Set the policy name to “Local Vulnerability Assessment” and visibility to “private.” Then click the “Plugins” tab on the left to display the interface shown in Figure 1.12.
Visibility options:
- Private: Only you can use this policy.
- Shared: Other users can also use this policy.
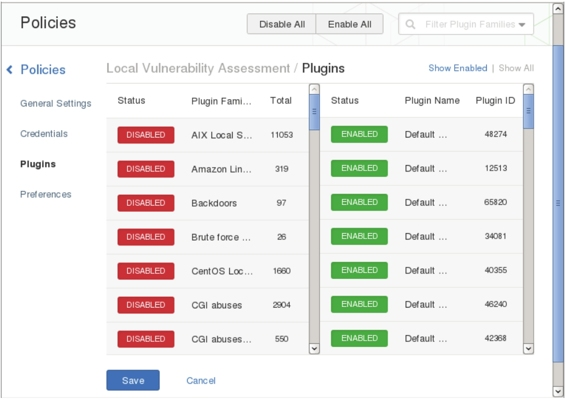
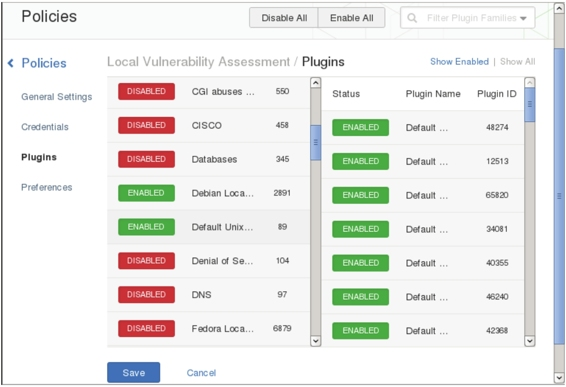
K. All plugins are enabled by default. Click “Disable All” to disable all plugins, then enable the specific plugins needed, such as “Debian Local Security Checks” and “Default Unix Accounts,” as shown in Figure 1.13
L .Click “Save” to display the interface shown in Figure 1.14.
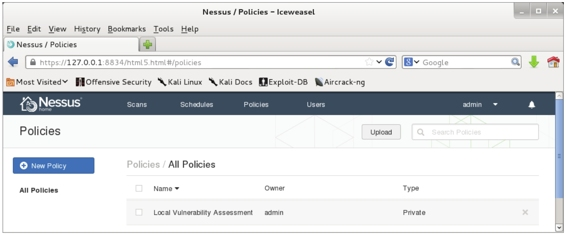
M. The new policy “Local Vulnerability Assessment” is now created successfully.
Step 2. Create a Nessus Scan Task
After creating a policy, you need to create a scan task to perform vulnerability scanning. The steps are as follows:
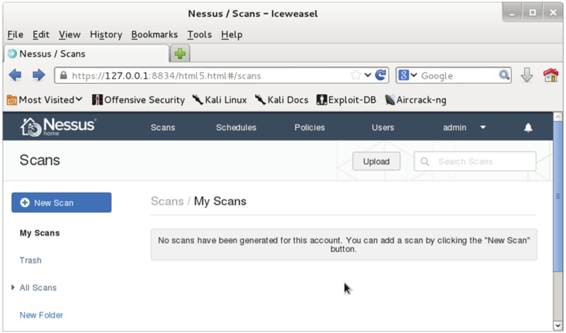
A. Switch to the “Scans” tab to display the interface shown in Figure 5.15.

Figure 5.15
B. Since no scan tasks exist, click “New Scan” to display the interface shown in Figure 5.16.
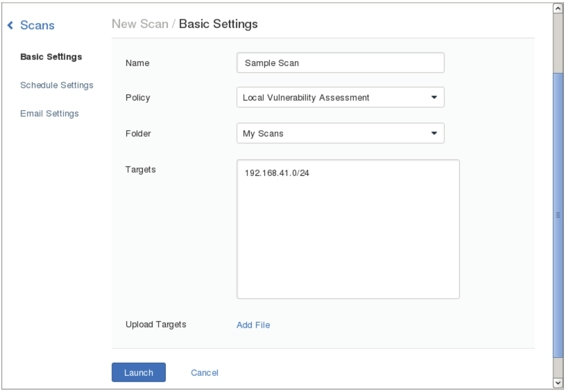
Figure 5.16
C. Set the scan task name, policy, folder, and target. Set them to “Sample Scan,” “Local Vulnerability Assessment” (the previously created policy), “My Scans,” and “192.168.41.0/24” respectively. Click “Launch” to display the interface shown in Figure 5.17.
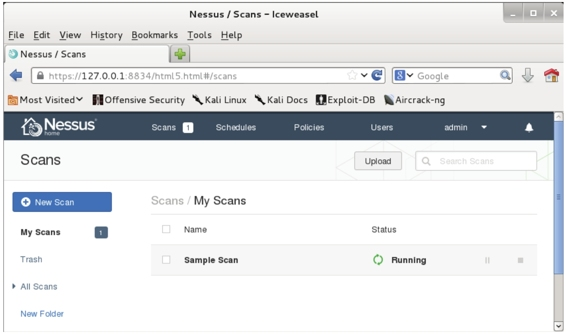
Figure 5.17
D. The scan task status “Running” indicates that the “Sample Scan” task has been successfully added.
Step 3. UseNessus to Scan Local Vulnerabilities
After introducing the installation, configuration, login, and creation of policies and scan tasks, you can start scanning for security vulnerabilities. This section lists the necessary plugins and analyzes the scan information for scanning local vulnerabilities.
The steps for scanning local vulnerabilities are as follows:
A. Create a policy named “Local Vulnerability Assessment.”
B. Add the necessary plugins:
a. Ubuntu Local Security Checks: Scans local Ubuntu security checks.
b. Default Unix Accounts: Scans default Unix accounts.
C. Create a scan task named “Sample Scan.”
D. Scan for vulnerabilities. After the task completes, the interface shown in Figure 5.18 is displayed.
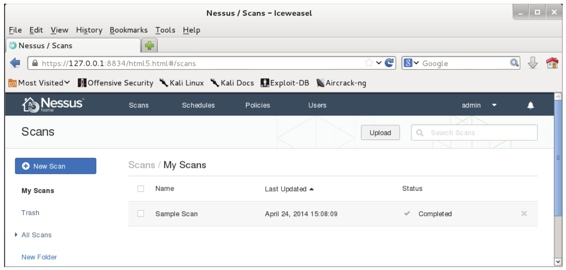
Figure 5.18
E. Double-click the scan task name “Sample Scan” to display detailed information, as shown in Figure 5.19.
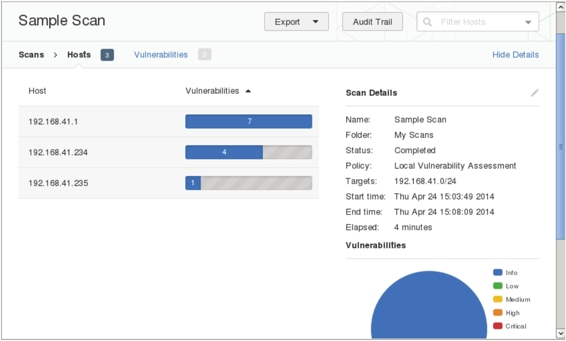
Figure 5.19
F. The scan results show three hosts. The “Vulnerability” column indicates the number of findings. Detailed information, including host IP, OS type, and scan times, is displayed. The pie chart shows the severity of vulnerabilities. For more information, click any address in the “Host” column, as shown in Figure 5.20.
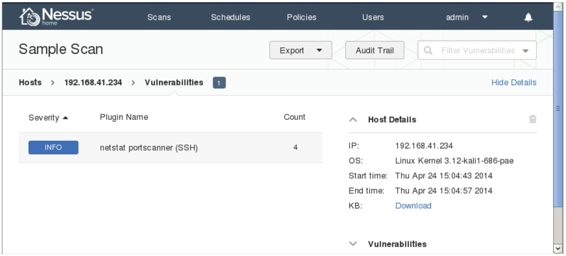
Figure 5.20
G. Click the “INFO” button to display specific vulnerability details, as shown in Figure 5.21.
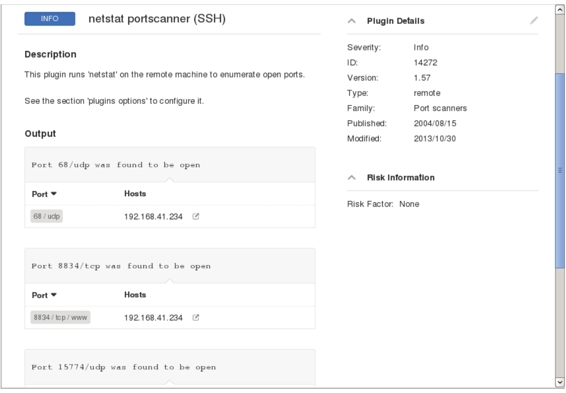
Figure 5.21
H. This page displays the description of the vulnerability and the information that was scanned. For example, ports 68, 8834, and 15774 are turned on the host. Nessus also allows you to view vulnerability information in Nessus, PDF, HTML, CSV, and Nessus DB file formats. Here’s how to export the file:
Click on the Export button in Figure 5.20 and select the format of the export file. Select the PDF format here, click the PDF command, and the interface as shown in Figure 5.22 will be displayed.
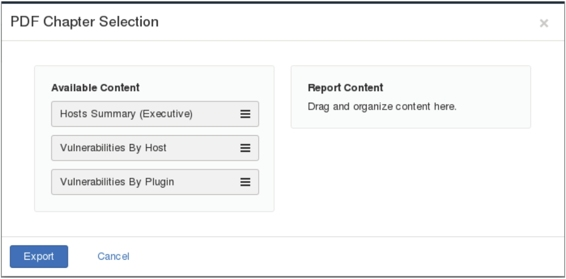
Figure 5.22
I. The interface is divided into two sections, including Available Content and Report Content. This screen shows the contents that can be included in the exported PDF file, including host summary information, host vulnerabilities, and plug-in vulnerabilities. In Figure 5.22, drag the content to be exported to the Report Content box with the mouse, and the interface shown in Figure 5.23 will be displayed.
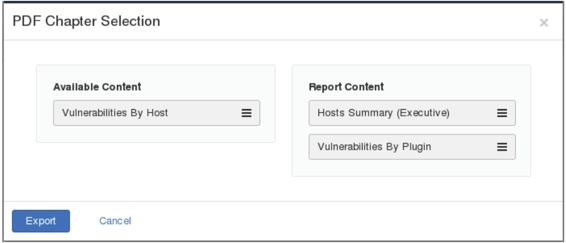
Figure 5.23
J. The interface shows what will be exported. Click the Export button and the interface as shown in Figure 5.24 will be displayed
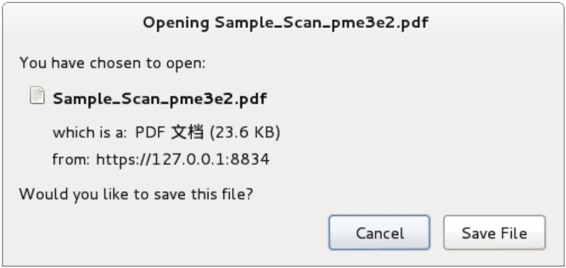
Figure 5.24
K. Click the Save File button on this page and specify the location where the file is saved, that is, the PDF file is exported successfully.
Step 4. Use Nessus to Scan a Network for Vulnerabilities
If you want to use Nessus to attack a widespread vulnerability, you need to configure an assessment vulnerability list and specify an assessment list to obtain information. This section describes configuring Nessus to look for network vulnerabilities on target hosts, which are referred to as target hosts or other network protocols.
Example 5-2: The following describes how to scan for network vulnerabilities.
(1) Create a policy named Internal Network Scan.
(2) Add the required plug-in programs, as shown in Table 5-1.
Table 5-1 Required plug-in programs
| CISCO | SCAN THE CISCO SYSTEM |
|---|---|
| DNS | Scan the DNS server |
| Default Unix Accounts | Scan for local default user accounts and passwords |
| FTP | Scan the FTP server |
| Firewalls | Scan proxy firewalls |
| Gain a shell remotely | Scan the remotely obtained shell |
| Geeral | Scan for frequently used services |
| Netware | Scan the network operating system |
| Peer-To-Peer File Sharing | Scan for shared file detection |
| Policy Compliance | Scan PCI DSS and SCAP information |
| SCADA | Scan Settings Management Tool |
| SMTP Problems | Scan for SMTP issues |
| SNMP | Scan for SNMP-related information |
| Service Detection | Scanning service reconnaissance |
| Settings | Scan the basic settings |
(3) Create a new scan task named Network Scan.
(4) The scan result is shown in Figure 5.25.
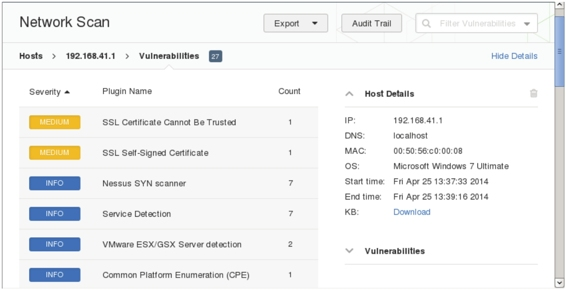
Figure 5.25 Network scan results
(5) From this interface, you can see that there are two serious vulnerabilities. If you want to analyze the vulnerability in detail, we recommend that you export this information as a file.
Step 5. Scans for Vulnerabilities in Specified Linux Systems
This section describes how to use Nessus to scan for vulnerabilities on a given Linux system.
Example 5-3: The following describes how to scan for vulnerabilities in a specified Linux system.
(1) Use Metasploitable 2.0 as the target host. Users can also use other versions of Linux.
(2) Create a Linux Vulnerability Scan policy.
(3) Add the required plug-in programs, as shown in Table 5-2.
Table 5-2 Required plug-in programs
| Backdoors | Scan for secret messages |
|---|---|
| Brute Force Attacks | Brute force attacks |
| CentOSo Local Security Checks | Scan for local security vulnerabilities in CentOS |
| DNS | Scan the DNS server |
| Debian Local Security Checks | Scan for local security vulnerabilities in Debian systems |
| Default Unix Accounts | Scans for default Unix user accounts |
| Denial of Service | Scan for denied services |
| FTP | Scan the FTP server |
| Fedora Local Security Checks | Scan Fedora systems for local security vulnerabilities |
| Firewalls | Scan firewalls |
| FreeBSD Local Security Checks | Scan the FreeBSD system for local security vulnerabilities |
| Gain a shell remotely | Scan remotely obtained shells |
| General | Scan for vulnerabilities |
| Gentoo Local Security Checks | Scan Gentoo systems for local security vulnerabilities |
| HP-UX Local Security Checks | Scan HP-UX systems for local security vulnerabilities |
| Mandriva Local Security Checks | Scan Mandriva systems for local security vulnerabilities |
| Misc | Scan for complex vulnerabilities |
| Red Hat Local Security Checks | Scan Red Hat systems for local security vulnerabilities |
| SMTP Porblems | Scan for SMTP issues |
| SNMP | Scan for SNMP vulnerabilities |
| Scientific Linux Local Security Checks | Scans the Scentifichlinux system for local security vulnerabilities |
| Slackware Local Security Checks | Slack systems are scanned for local security vulnerabilities |
| Solaris Local Security Checks | Scan Solaris systems for local security vulnerabilities |
| SuSE Local Security Checks | Scan the SuSE system for local security vulnerabilities |
| Ubuntu Local Security Checks | Scan for local security vulnerabilities in Ubuntu |
| Web Servers | Scan the web server |
(4) Create a Linux Vulnerability Scan task.
(5) Scan for vulnerabilities, as shown in Figure 5.26.

Figure 5.26 Specifying the Linux system scan result
(6) From this page, you can see that a total of 6 hosts have been scanned for vulnerabilities. Among them, there are seven serious vulnerabilities on host 192.168.41.142. The percentage of vulnerabilities can be found in the fan graph in the lower right corner. Again, users can view the details of the vulnerability using the two methods described earlier.
Step 6. Scan for Vulnerabilities in Specified Windows Systems
This section describes how to use Nessus to scan for vulnerabilities on a specified Windows system.
Example 5-4: Use Nessus to scan for vulnerabilities in a specified Windows system. In this example, the Windows 7 system is used as the target host. The following describes the scanning steps.
(1) Create a new policy named Windows Vulnerability Scan.
(2) Add the required plug-in programs, as shown in Table 5-3.
Table 5-3 Required plug-in programs
| DNS | Scan the DNS server |
|---|---|
| Databases | Scan the database |
| Denial of Service | Scan for denied services |
| FTP | Scan the FTP server |
| SMTP Problems | Scan for SMTP issues |
| SNMP | Scan SNMP |
| Settings | Scan settings information |
| Web Servers | Scan Webb Sepheus |
| Windows | Scan Windows |
| Windows:Microsoft Bulletins | Scan Windows for Microsoft announcements |
| Windows:User management | Scan for Windows User Management |
(3) Start scanning for vulnerabilities. The results of the scan are shown in Figure 5.27.
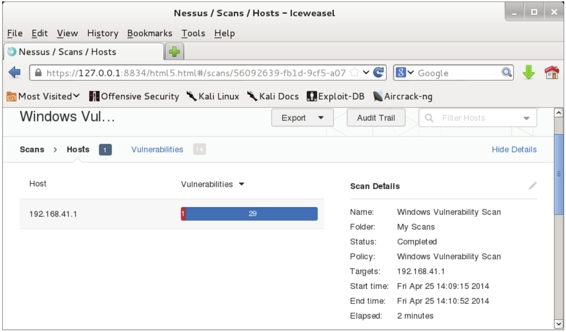
Figure 5.27 Scanning results of Windows system
(4) From this interface, you can see the vulnerability of host 192.168.41.1, and there is a serious vulnerability in the host. Similarly, you can use the two methods described above to view the details of the vulnerability and modify the vulnerability on the host.