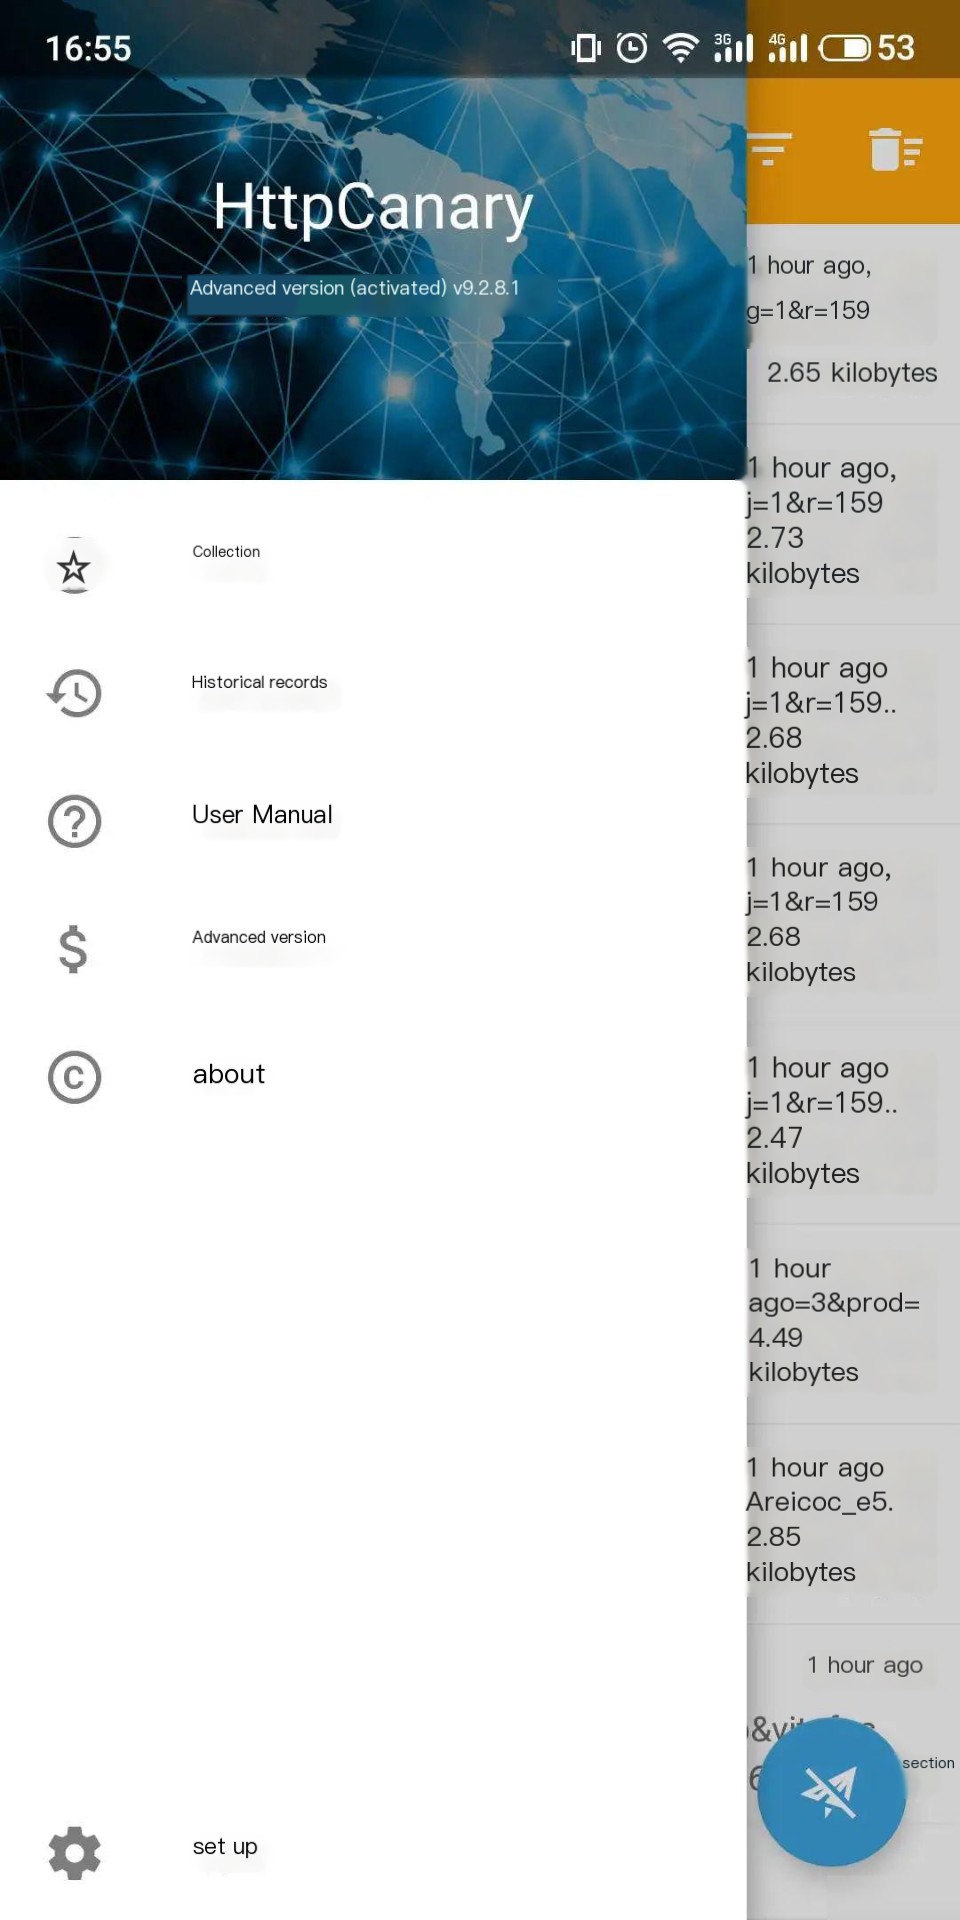
Introduction to HttpCanary
HttpCanary is the most powerful network analysis tool on the Android platform, supporting a variety of protocols such as TCP/UDP/HTTP/HTTPS/WebSocket. It can be considered the Fiddler or Charles equivalent for the Android platform.
Users of HttpCanary need to have a foundational knowledge of computer networking and it is only suitable for the following use cases:
Android, front-end, and back-end software engineers debuggingRest API, identifying bugs in network programming.- Test engineers editing network data to simulate different business scenarios, conducting white-box or black-box testing.
- Network security engineers testing and verifying risks in app-to-server network communication.
Features of HttpCanary
HttpCanary: Multi-Protocol Support
- Supports HTTP1.0/HTTP1.1/HTTP2/HTTPS protocols.
- Supports WebSocket protocol.
- Supports TCP/UDP protocols.
HttpCanary Data Analysis Support
- Supports parsing of common encoding formats such as gzip, brotli, chunked, etc.
- Search and filter packet contents; supports creating custom filter rules.
- Preview data contents, including JSON, images, audio, video, text, cookies, etc.
- Comprehensive data analysis views, such as Raw View, HEX View, TEXT View, etc.
- Network detail analysis, including HTTP detail overview, request/response data size, time statistics, etc.
- Supports marking, commenting, saving, sharing, and copying packets.
HttpCanary Debugging Support
- Intercept specific requests and modify data before submitting it.
- Injector support for creating custom rules to modify packets.
- Supports re-sending, editing and re-sending, and batch re-sending network requests.
- Configure blacklists or whitelists to freely specify targets for packet capture.
- Supports packet blocking, such as blocking specified packets from the client to the server.
HttpCanary Plugin Support
- Equipped with a variety of built-in plugins, such as automatic video download and WeChat location spoofing.
- Plugin injector creation, import, and export (some features are still under development).
Download and Installation
- Official download link: Google Play
- Domestic site download link: httpcanary v9.2.8.1
Device Requirements
- Android 5.0+/Real devices + emulators/WiFi + cellular network/No root required.
Packet Capture
Steps for Packet Capture
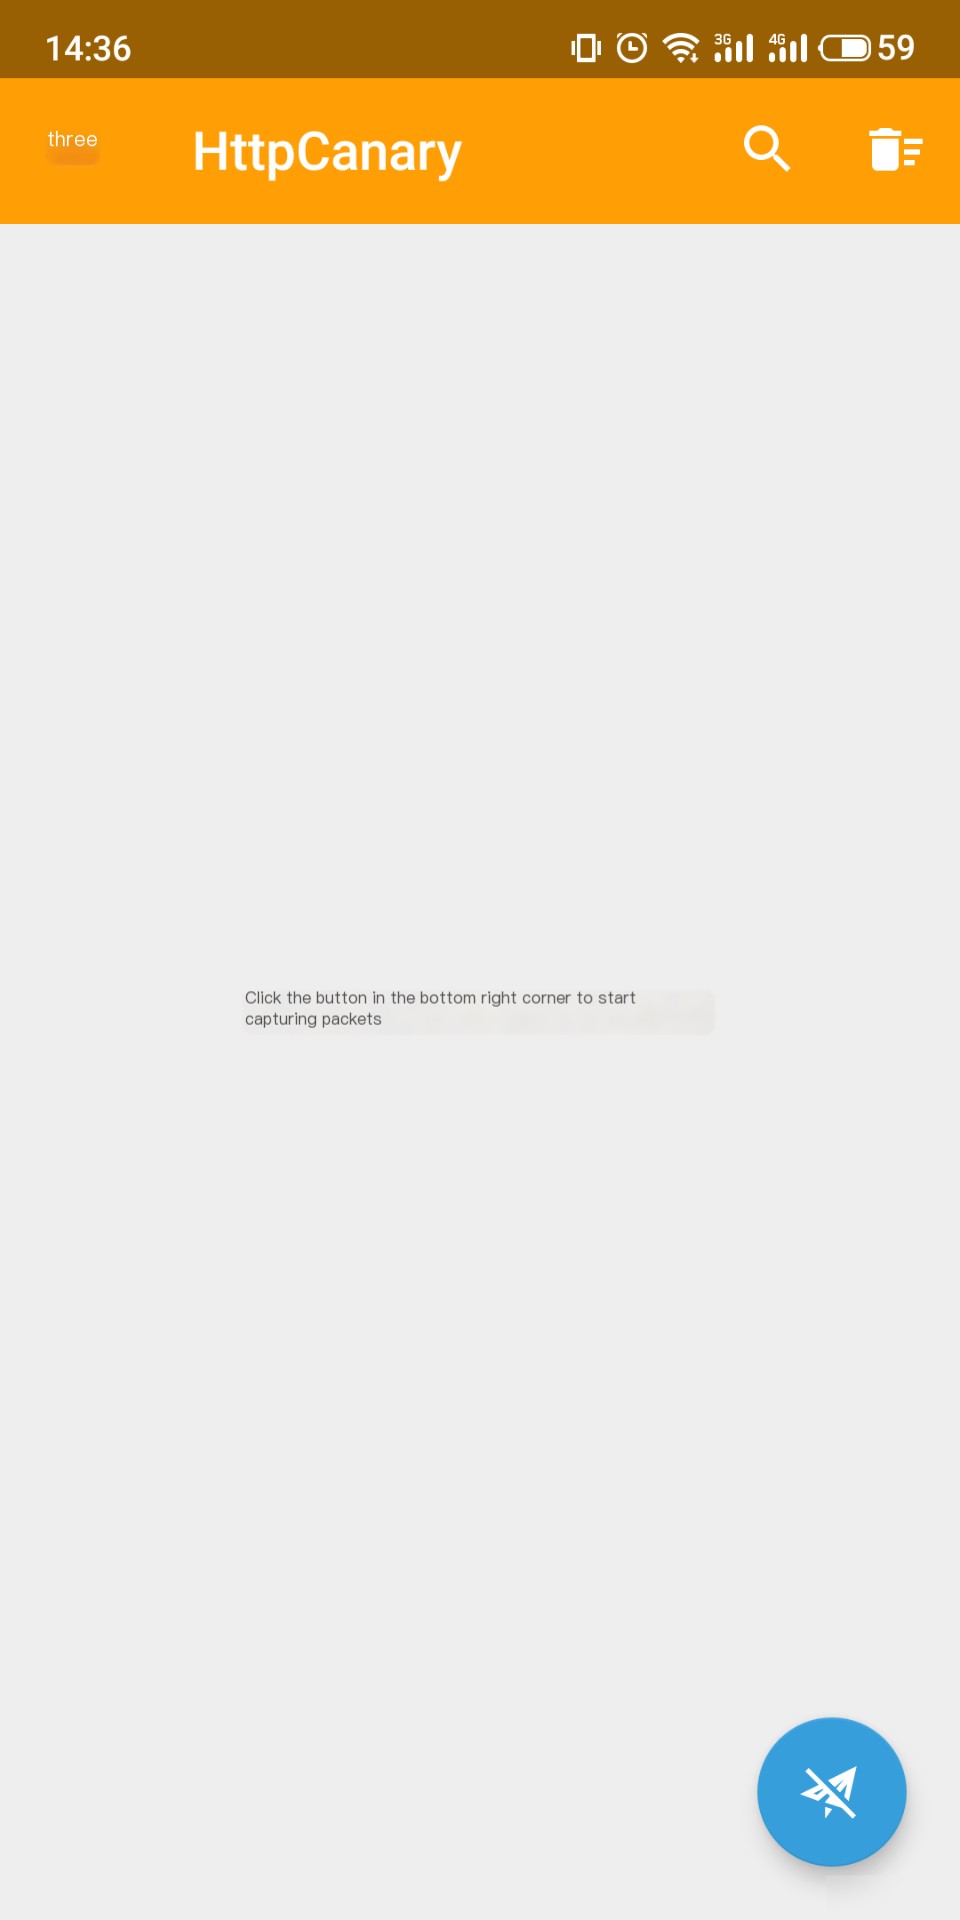
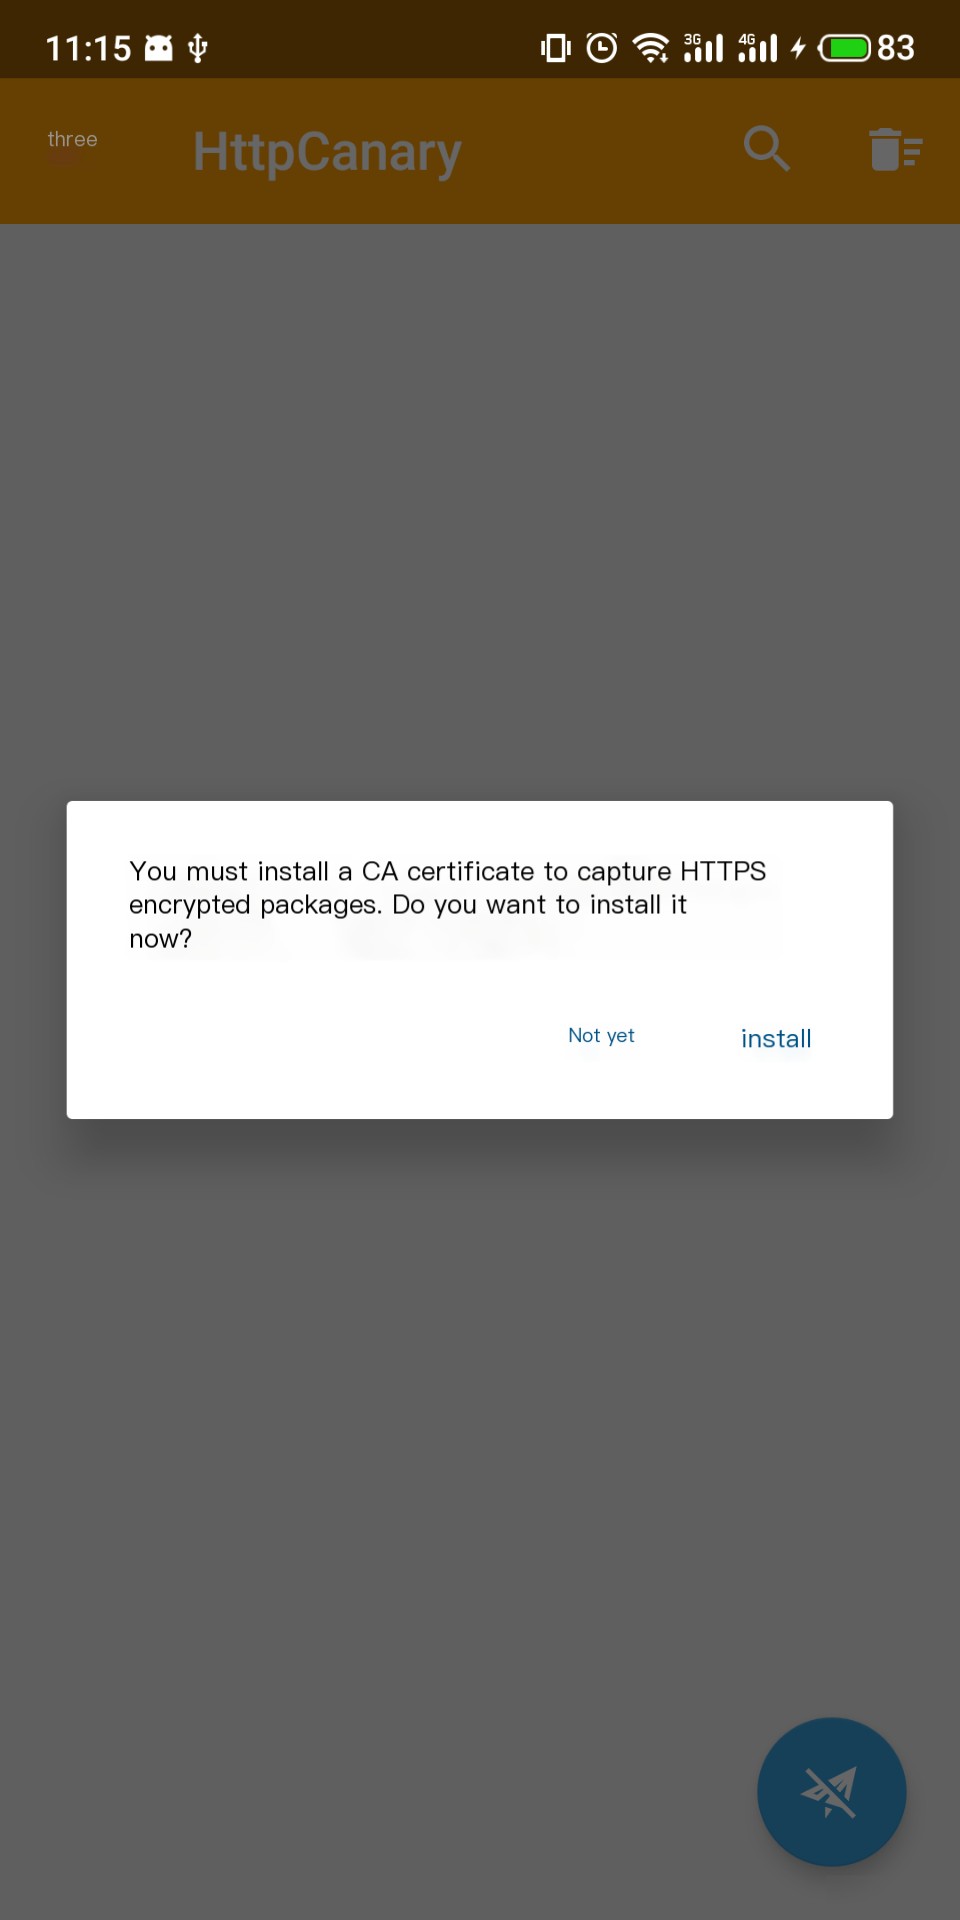
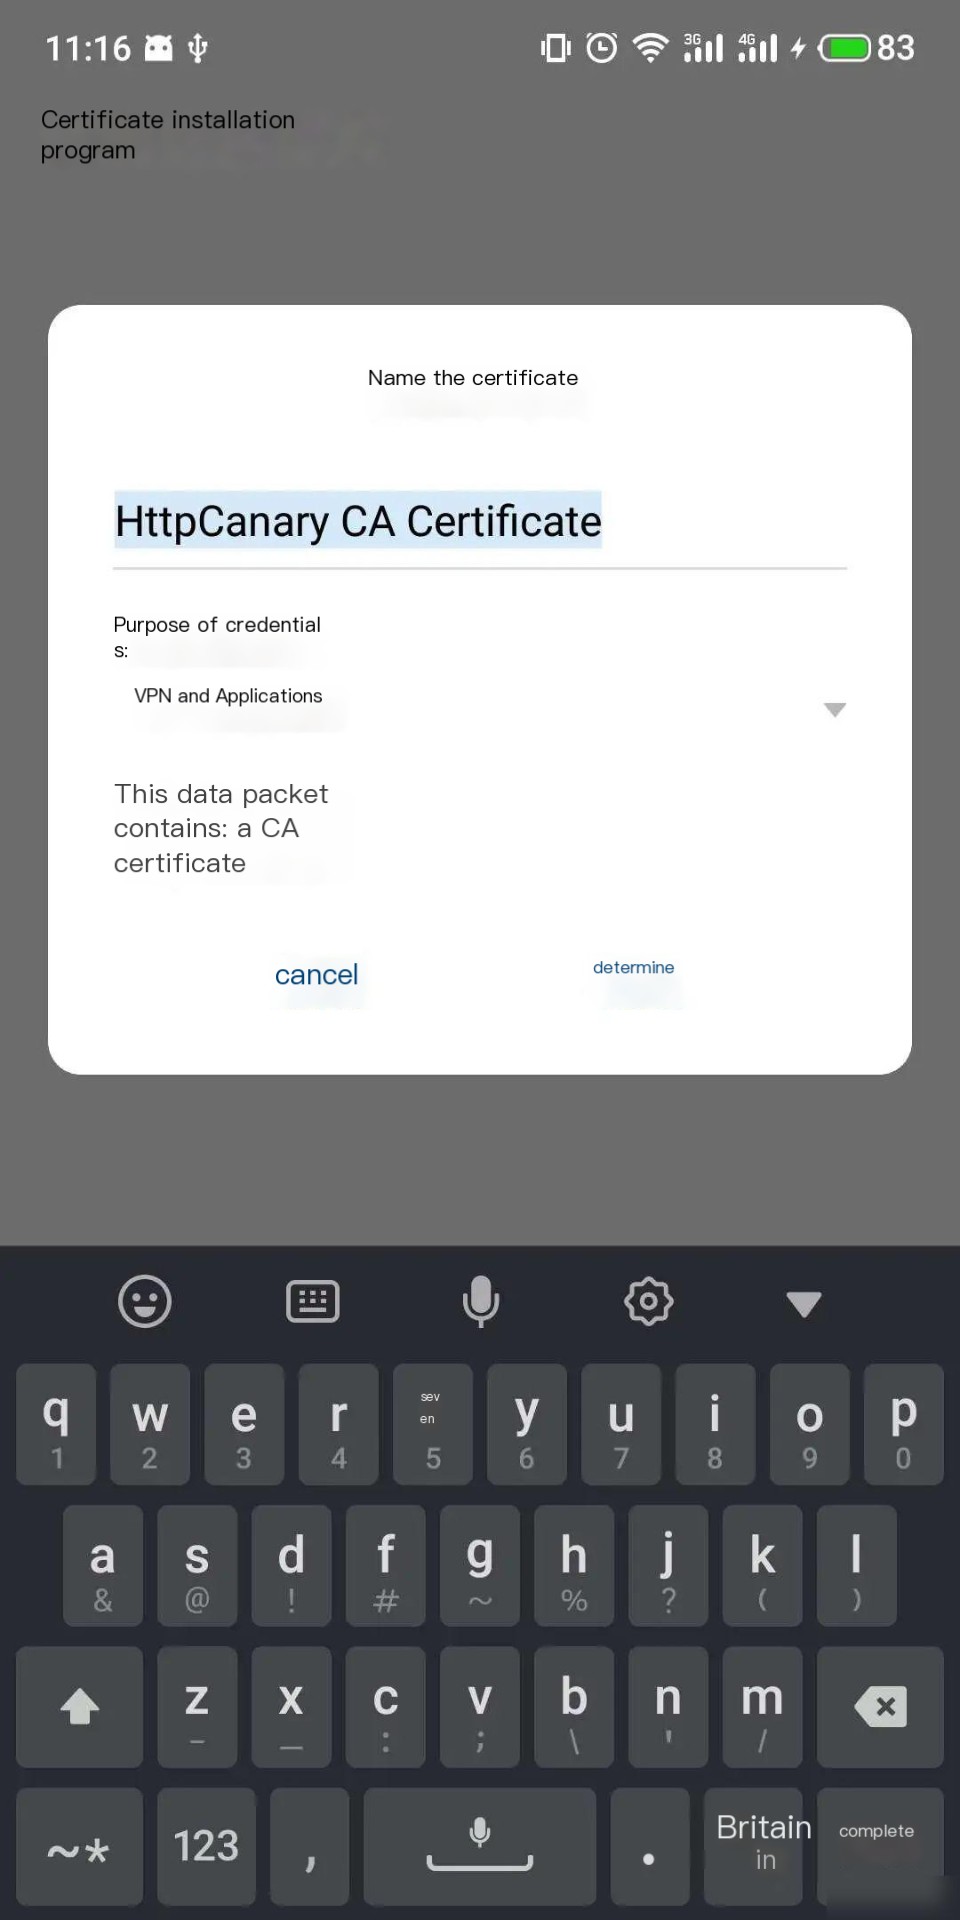
1. Launch the application and click the small airplane button in the lower-right corner to start packet capture. A pop-up window for installing the CA certificate will appear. Click Install.
2. You can assign a custom name for the certificate. For this example, we’ll use the default name.
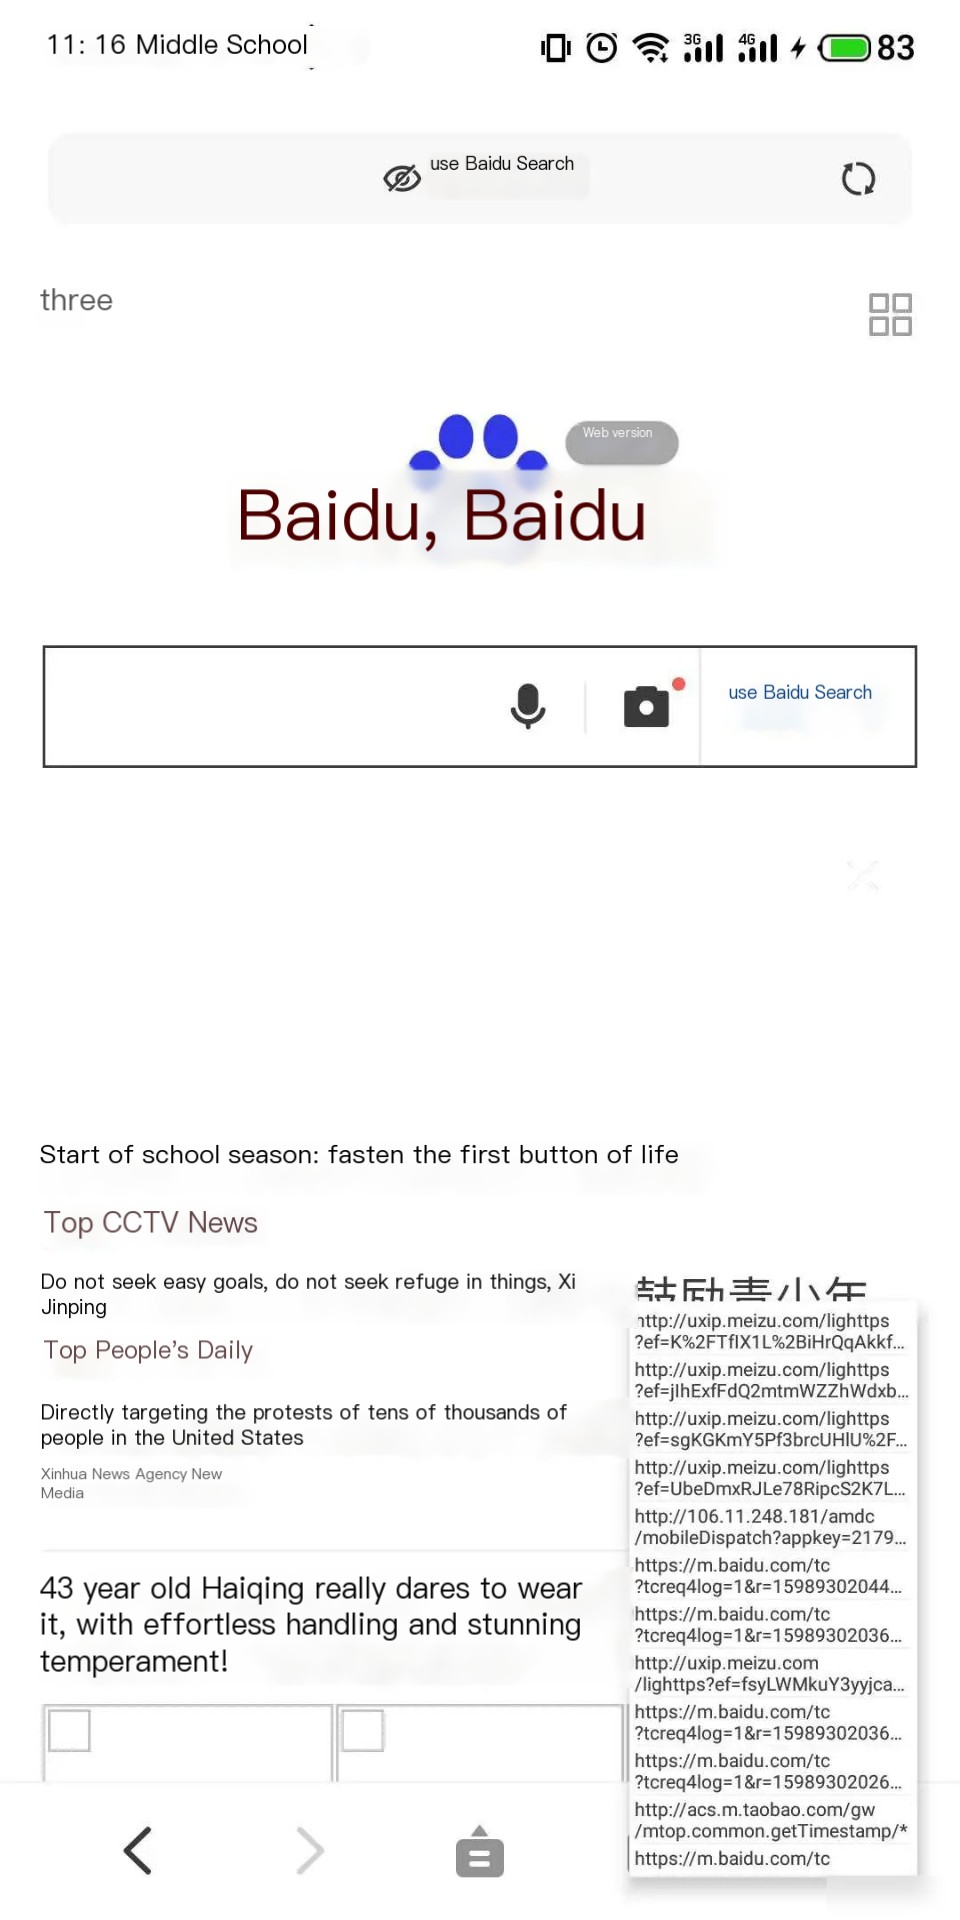
3. The interface will prompt you to create a VPN connection. Click OK.

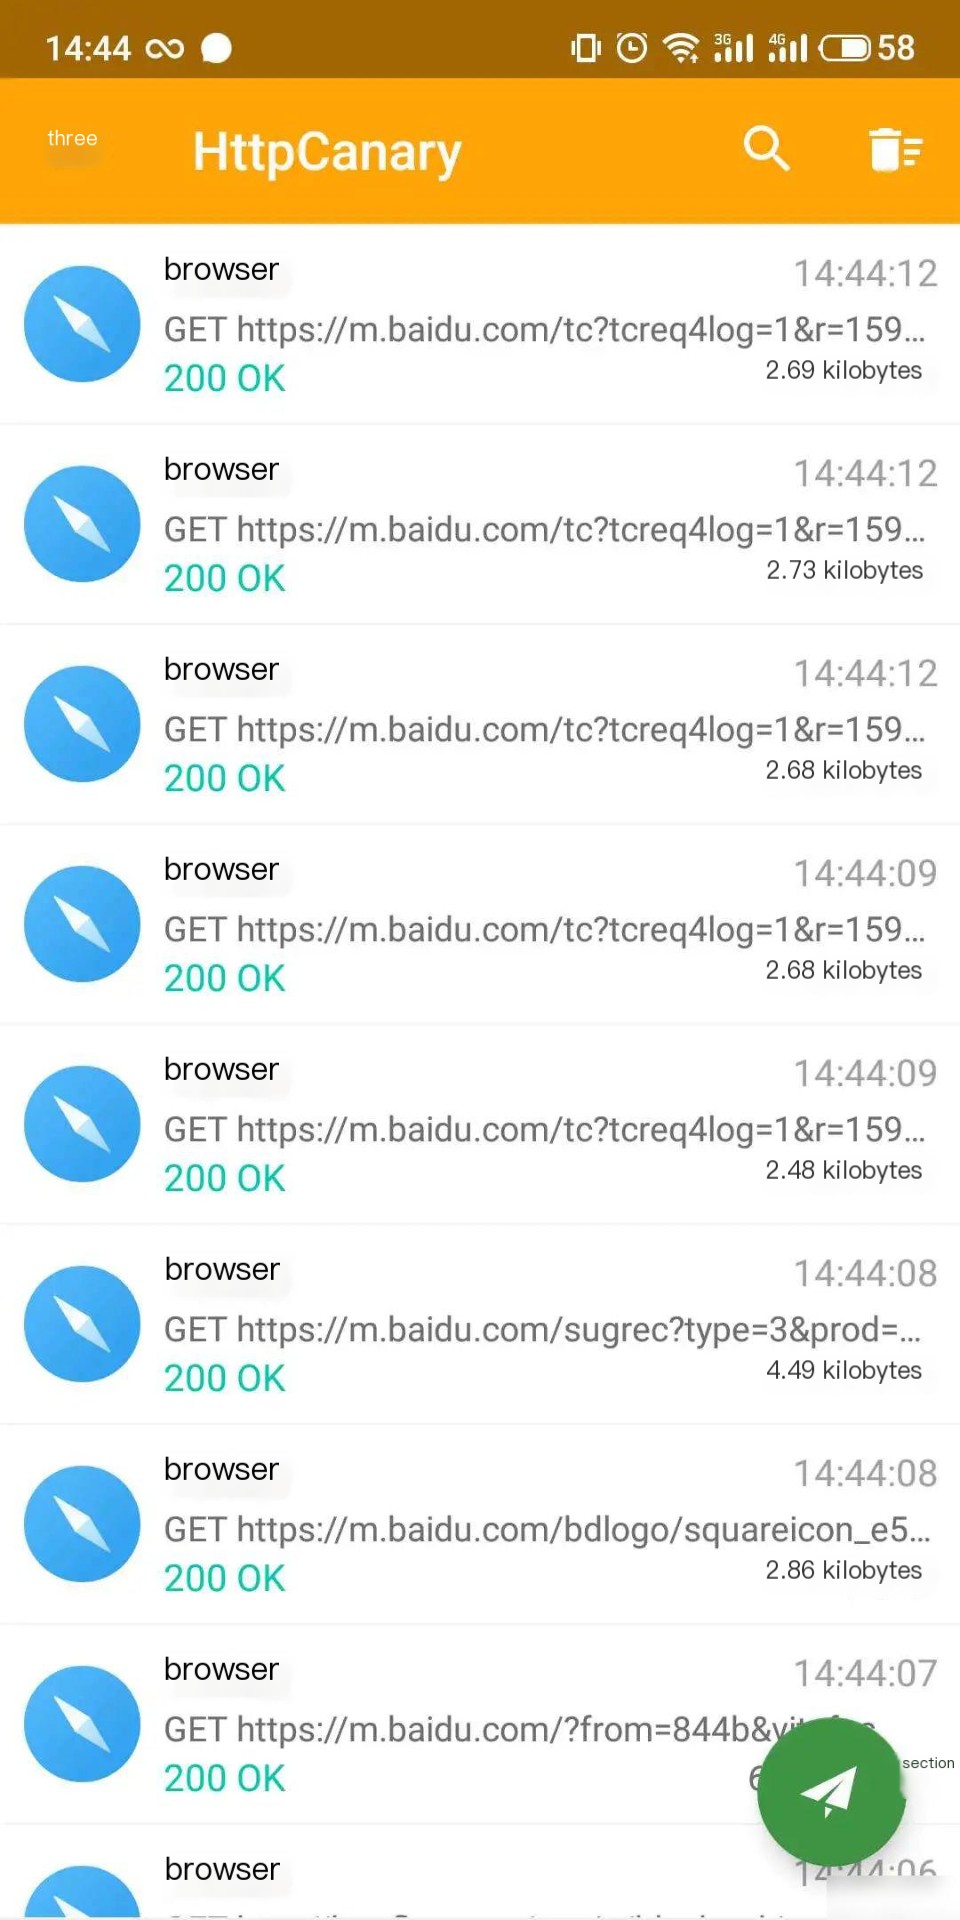
4. Launch the application again. A floating window for packet capture will appear in the lower-right corner.
5. Double-click the floating widget to view the packet capture request list.
Request Analysis
1. Click on any request in the request list to view detailed request information.

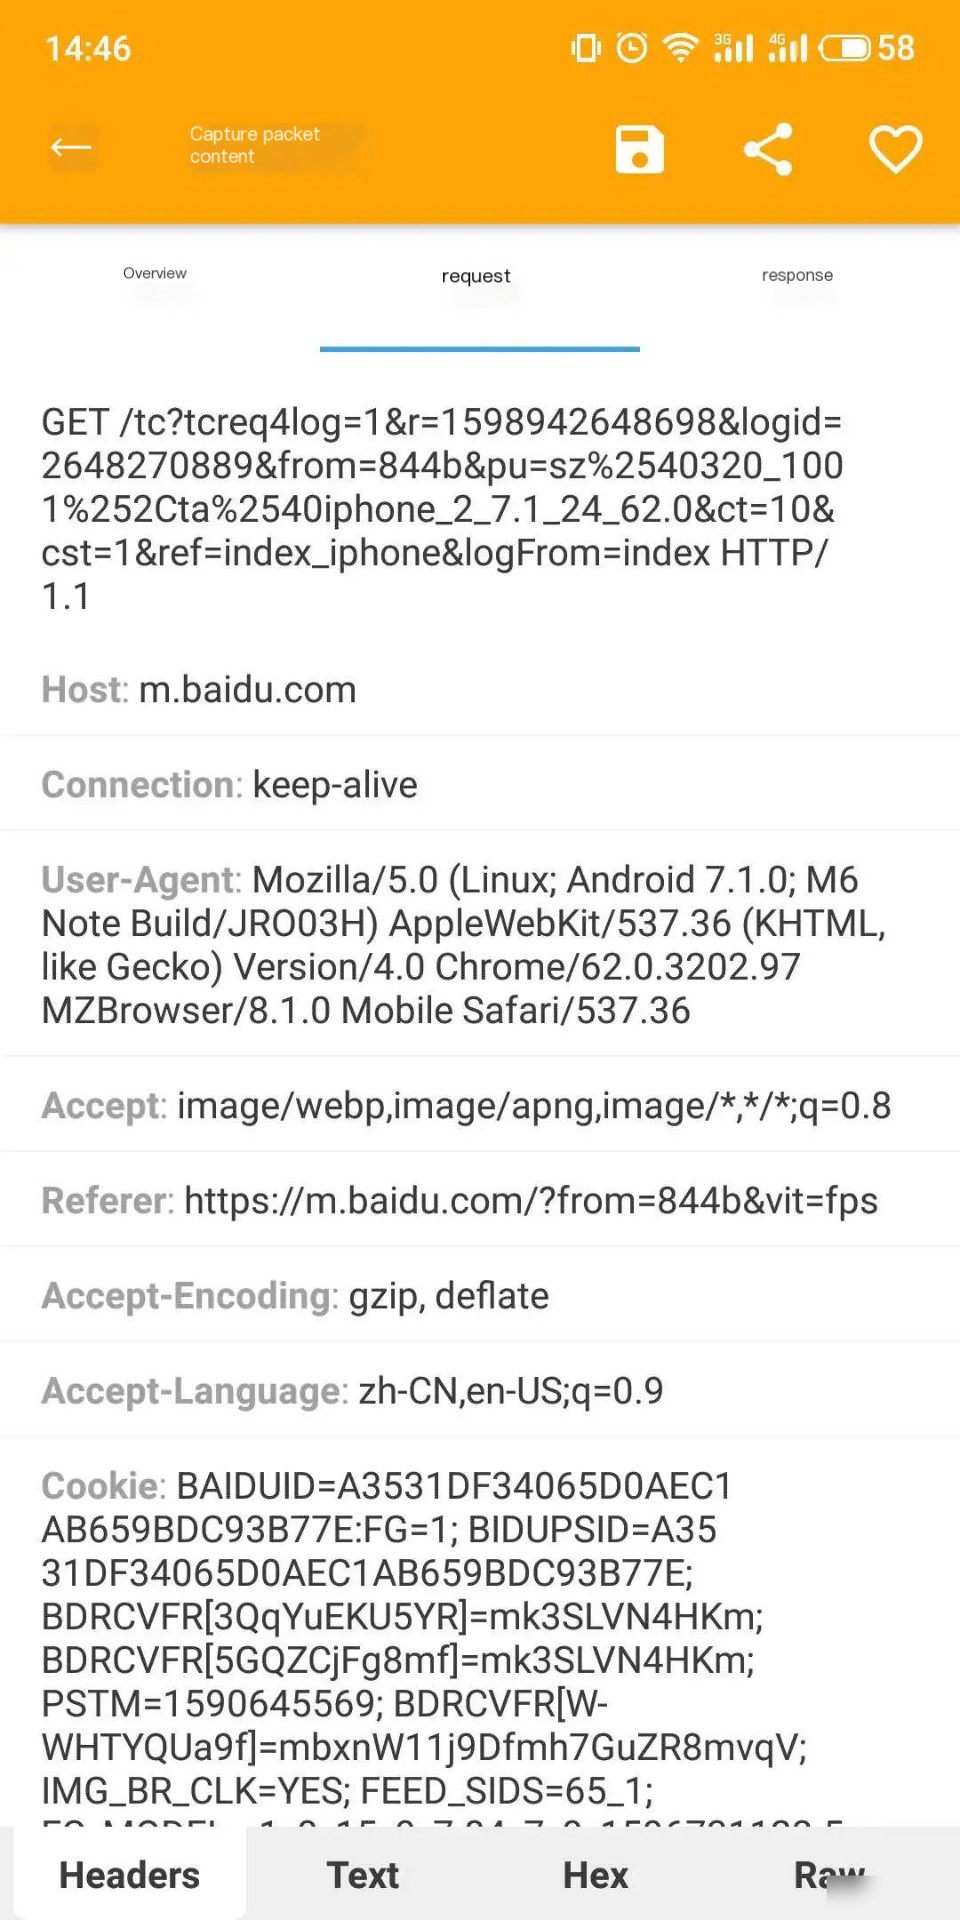
2. Click the Request menu to view detailed request information.
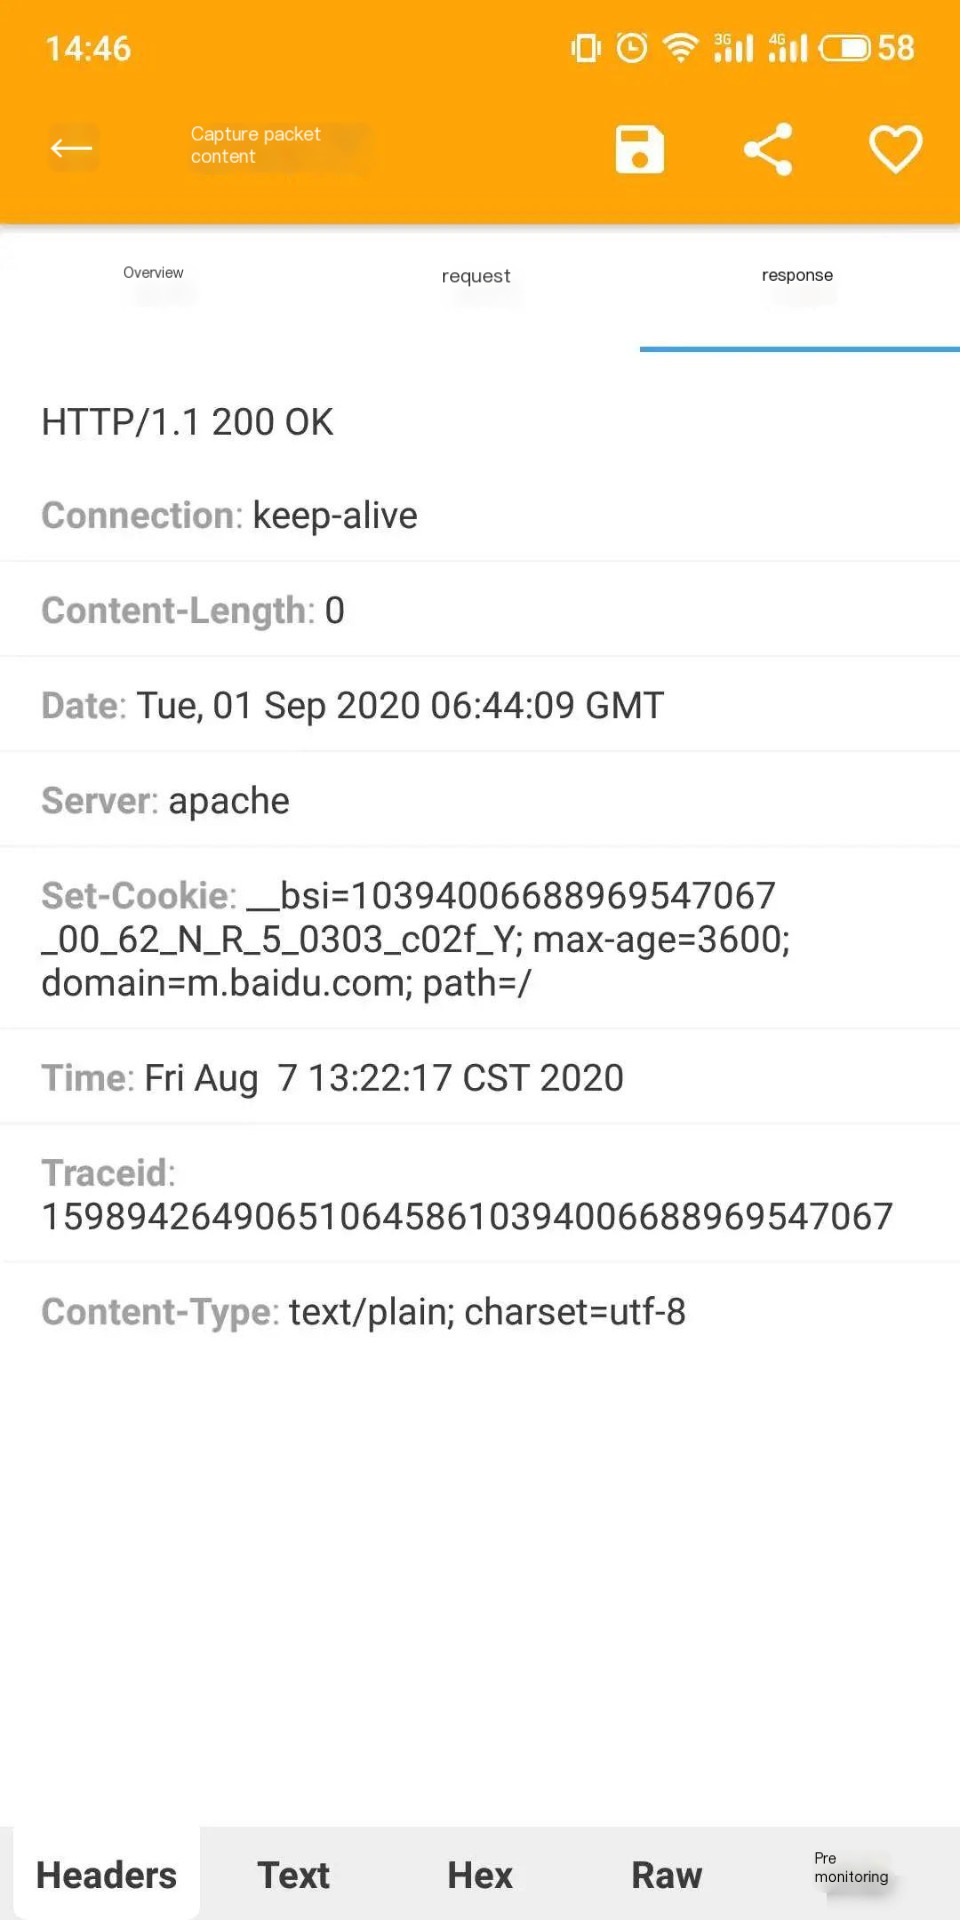
3. Click the Response menu to view response details.
Additional Features
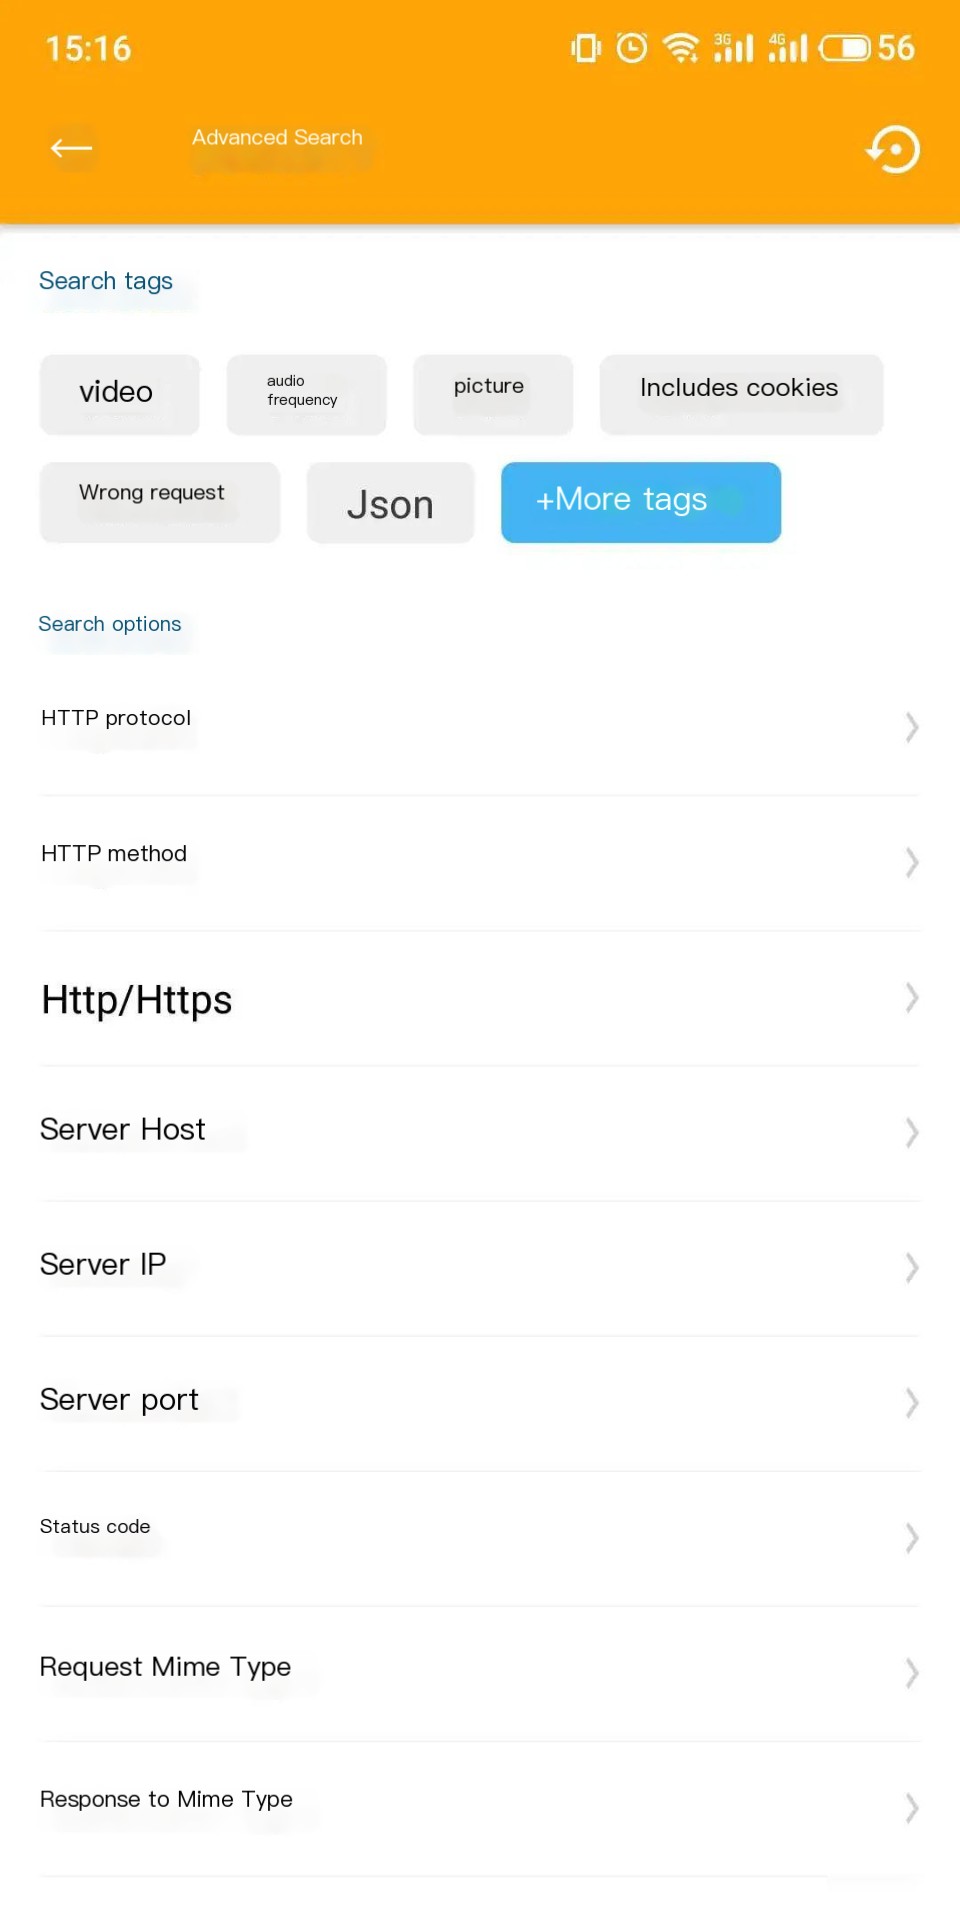
Request Search
HttpCanary captures all requests made on the device by default, which can result in a long list. How do we find the specific request we’re looking for? Click the search button in the top-right corner, and you’ll see many search options.
For instance, to filter by Host, select the domain m.baidu.com.
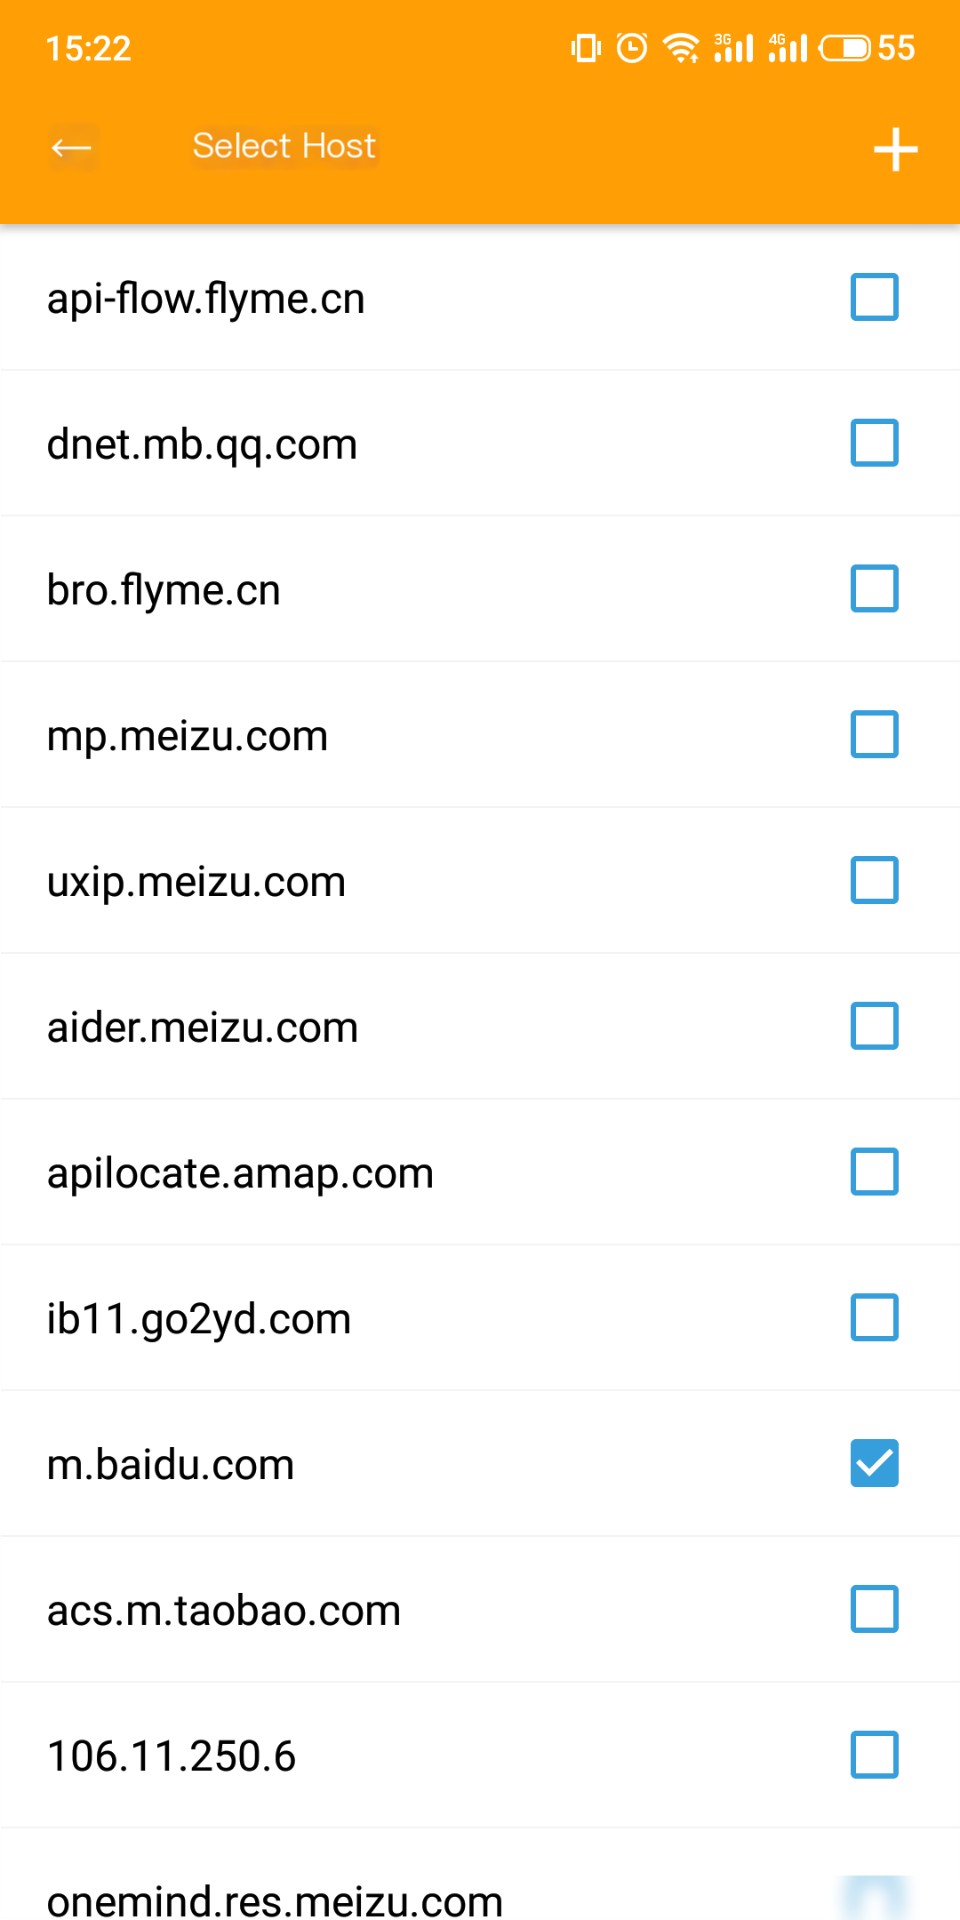
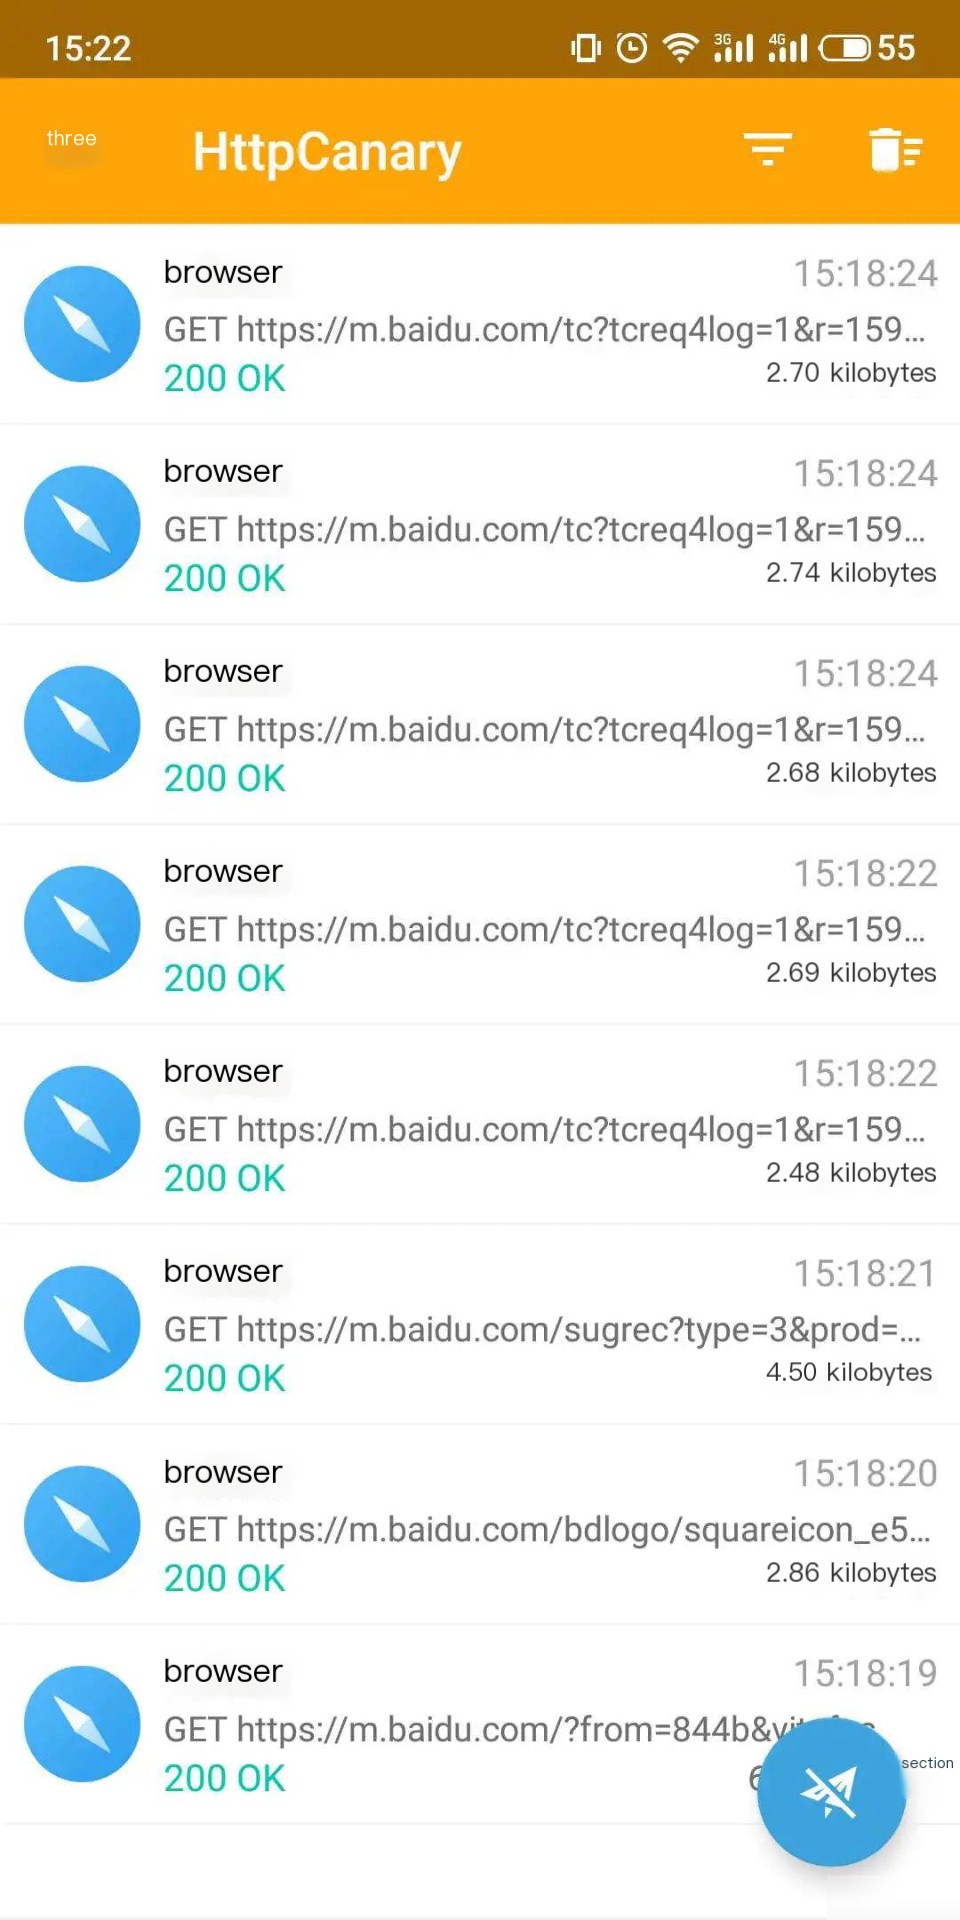
Once selected, return to the request list interface to see requests related to the m.baidu.com domain.
Request Bookmarking
In the request interface, click the bookmark button ♥ in the top-right corner to bookmark a request.
After bookmarking, click the main menu and go to the bookmarks section to view all bookmarked requests.
Target Applications
To capture packets for a specific application, you can set a target app. Click the main menu ☰ in the top-left corner, then click Settings to go to the settings screen.
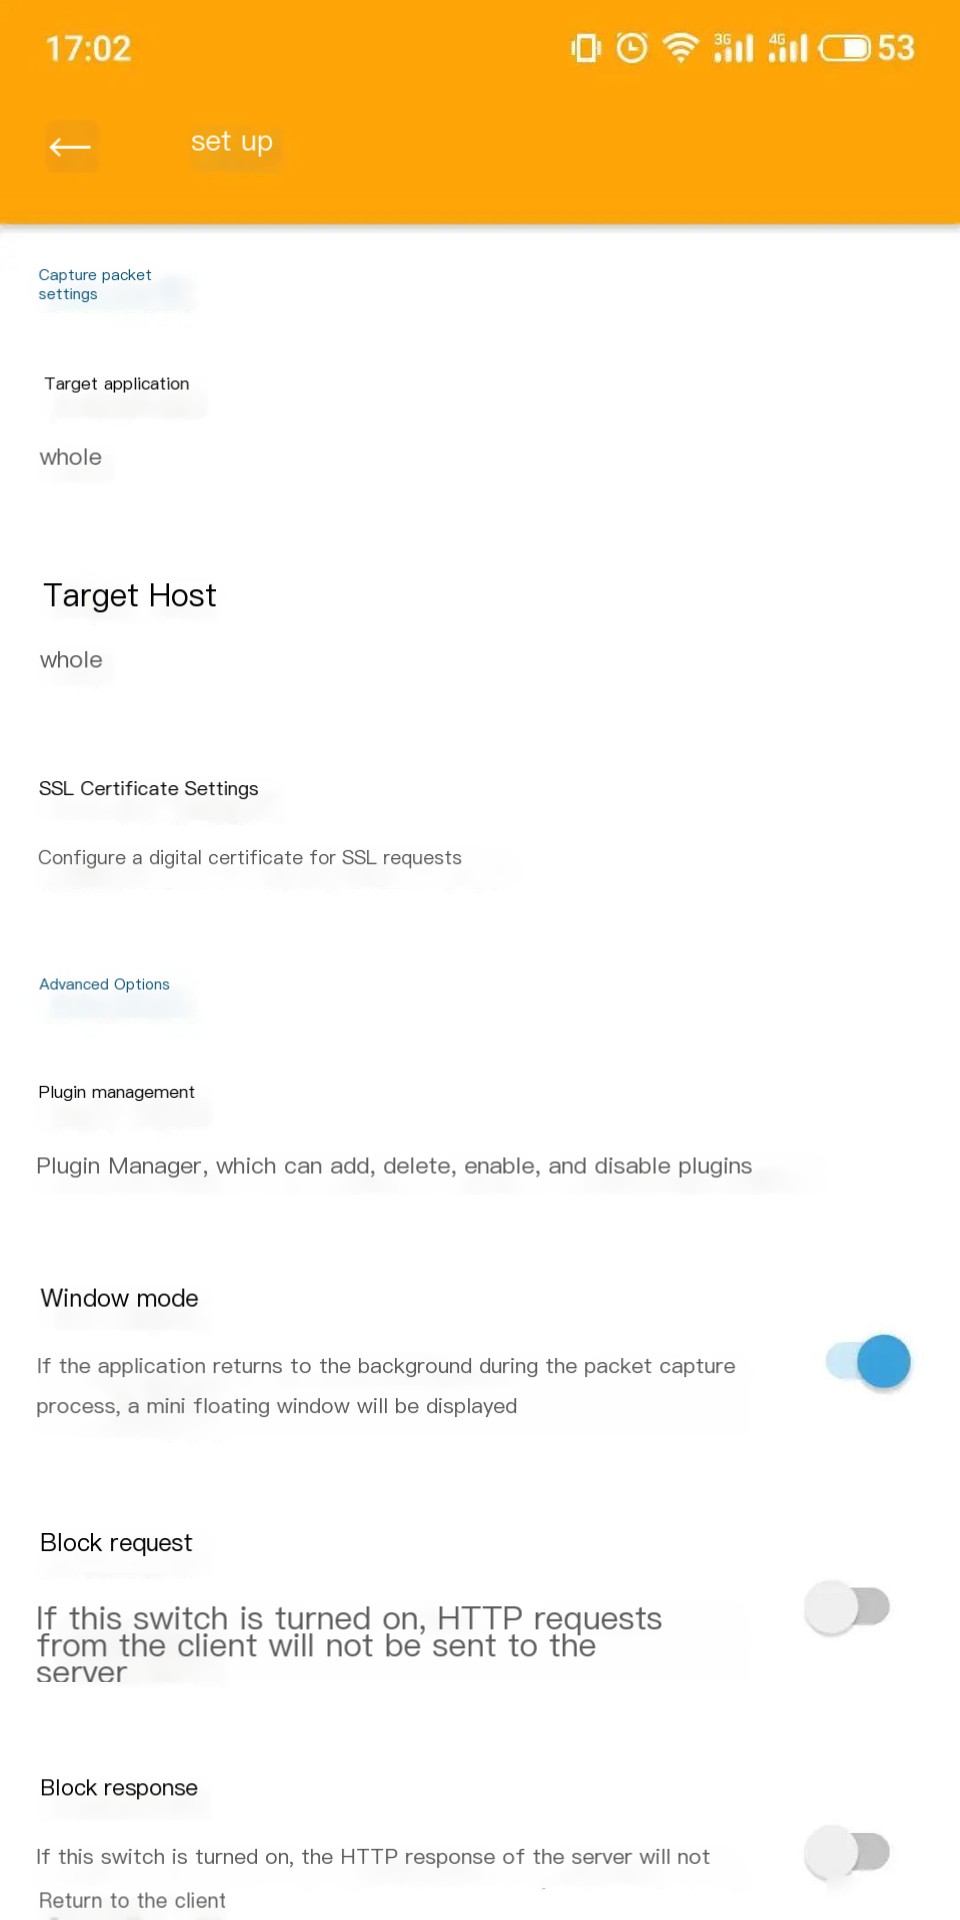
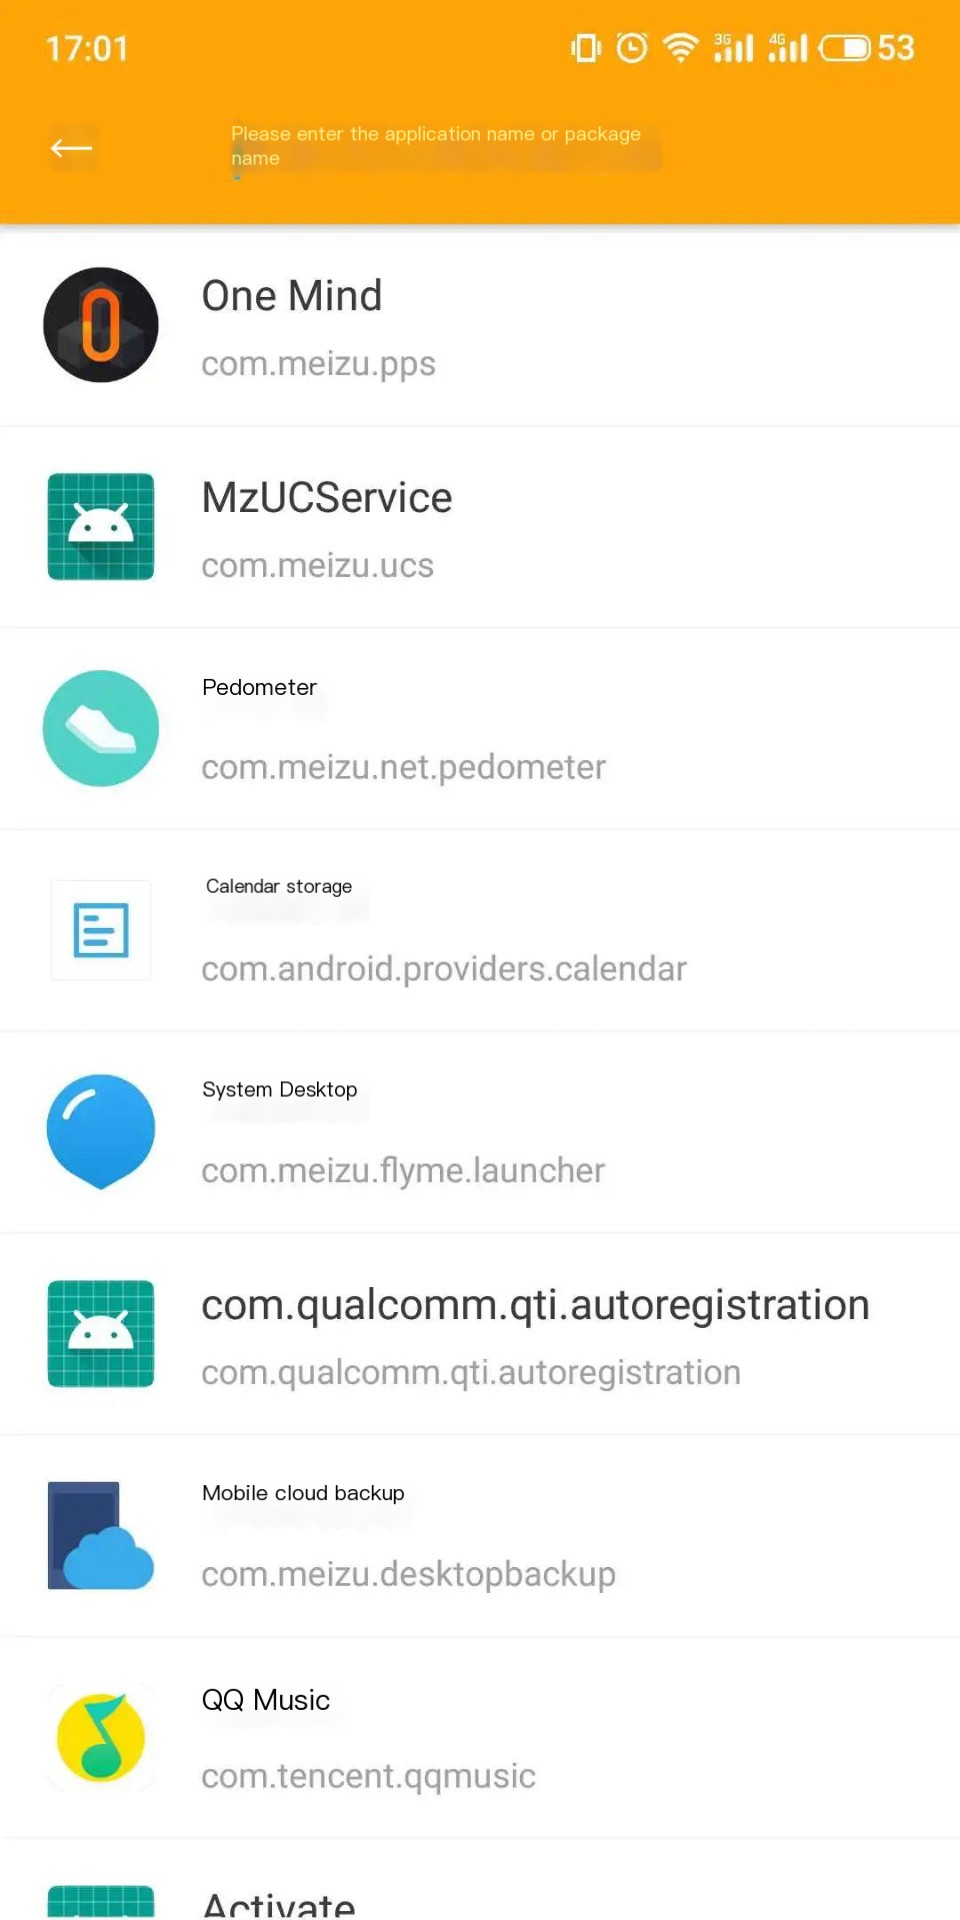
Click the Target Application menu to select an app from the device list or manually enter the app package name.
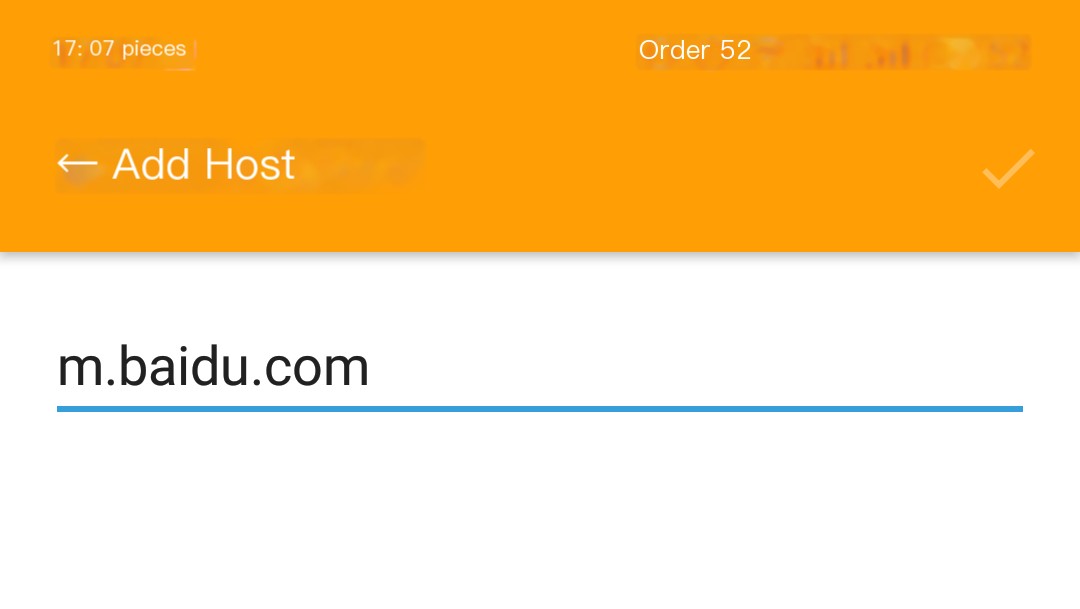
Target Host
To target specific domains for packet capture, click the Target Host menu in the settings screen and add an IP address or domain name to save and apply the configuration.
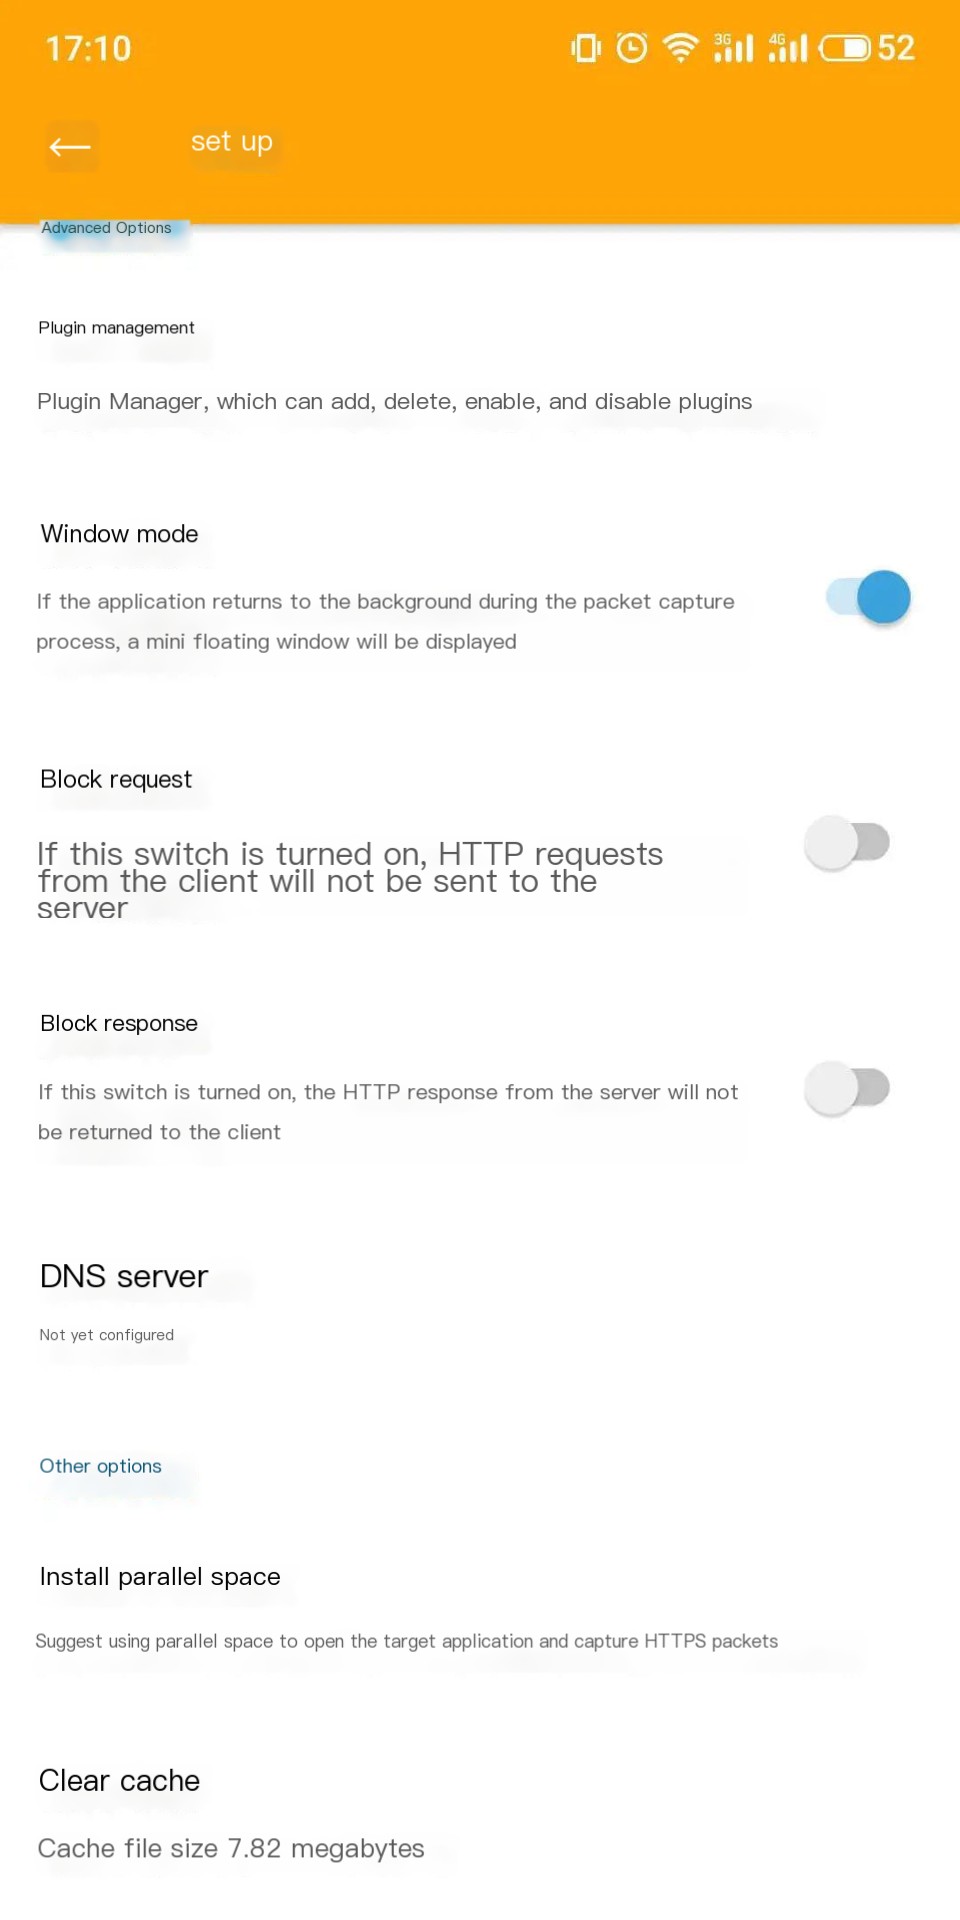
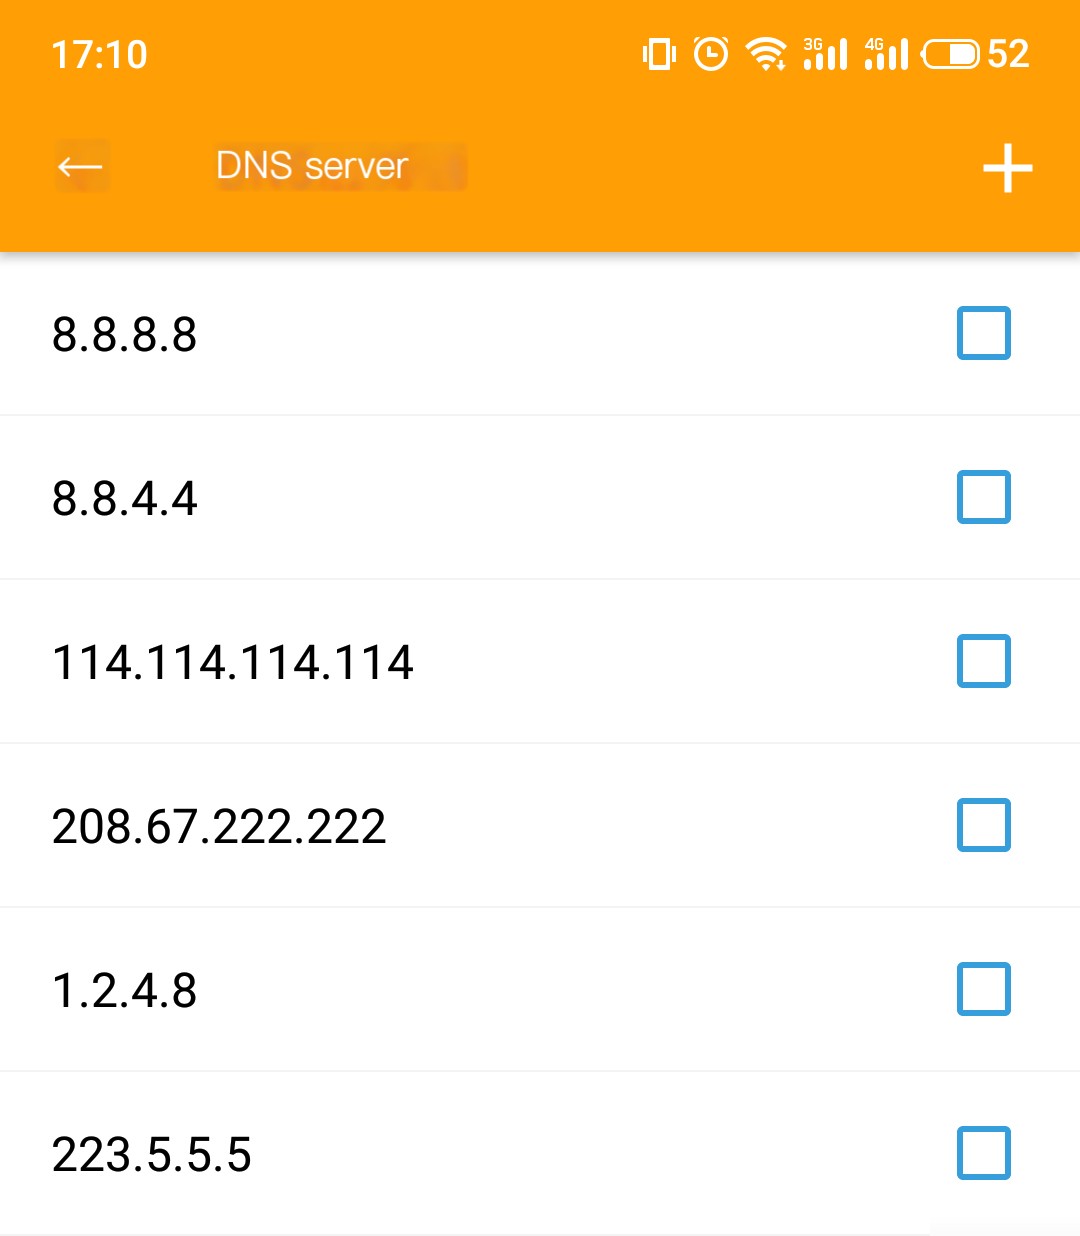
DNS Server
In the settings screen, click the DNS Server menu to configure the DNS. By default, HttpCanary provides several public DNS options. Click the + button in the top-right corner to add a custom DNS address.