

The BCVP framework is based on ASP.NET Core.
Core technologies like ASP.NET Core 5.0, VUE.js, and IdentityServer4, implementing a front-end and back-end separation with a dynamic authentication and authorization integrated platform. It has been officially running for two years and has become a very mature framework. However, there has been a small core issue that I haven’t had a chance to verify, but today I finally have the opportunity to confirm it, and I’d like to thank my friends for providing technical support—backend service packet capture and service protocol analysis.
Let’s briefly explain the background story:
Regarding the authentication and authorization process, which is the OAuth2.0 protocol process, when our client (Vue) makes a request to the resource server (core), it first checks if the Token is valid. If it’s empty or invalid, a 401 response is immediately sent back. If everything is normal, then access will proceed normally.
So here’s the problem:
1. Is the green validation request made every time?
2. What is the interface of the request and its returned content?
3. If I shut down the authentication center, can the access continue normally?
If you have these questions, or if you already have the correct answers, feel free to point out any issues in this article. If you’re uncertain, this article will help you understand them better.
Since requests are made from the resource server to the authentication center’s backend, you need a packet capture tool to view the specific content. Here, I recommend Wireshark, as network administrators use it to check network issues.
The installation process is straightforward, so I won’t elaborate on it. One thing to note is if you want to debug local localhost access requests, you’ll need to install another tool—NMap—to use alongside WireShark.
Once installed, you can see the main interface looks like this:
It’s mainly divided into three sections: the filter, the request area, and the five-layer sequence result area.
How do we verify the question raised at the beginning of our article? Don’t rush; before verifying, let’s review some related computer network knowledge.
Computer Network Layering Basics
Classic five-layer structure model for computer network requests:
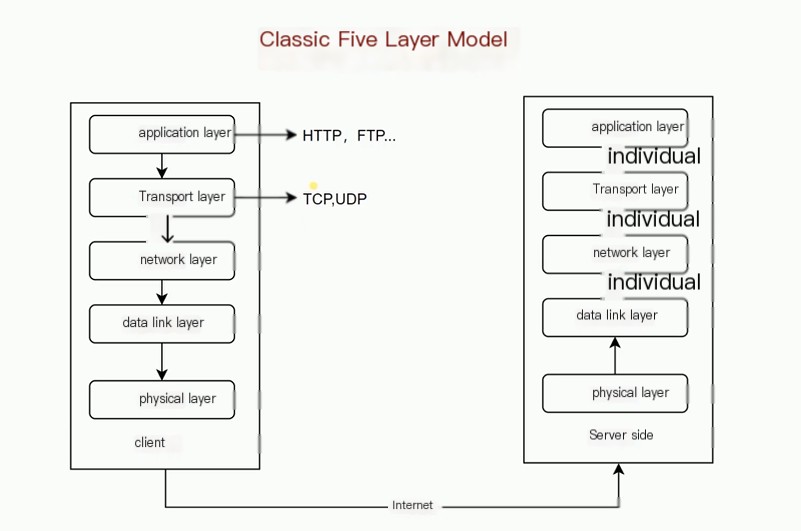
So, in detail, what is done at each step?
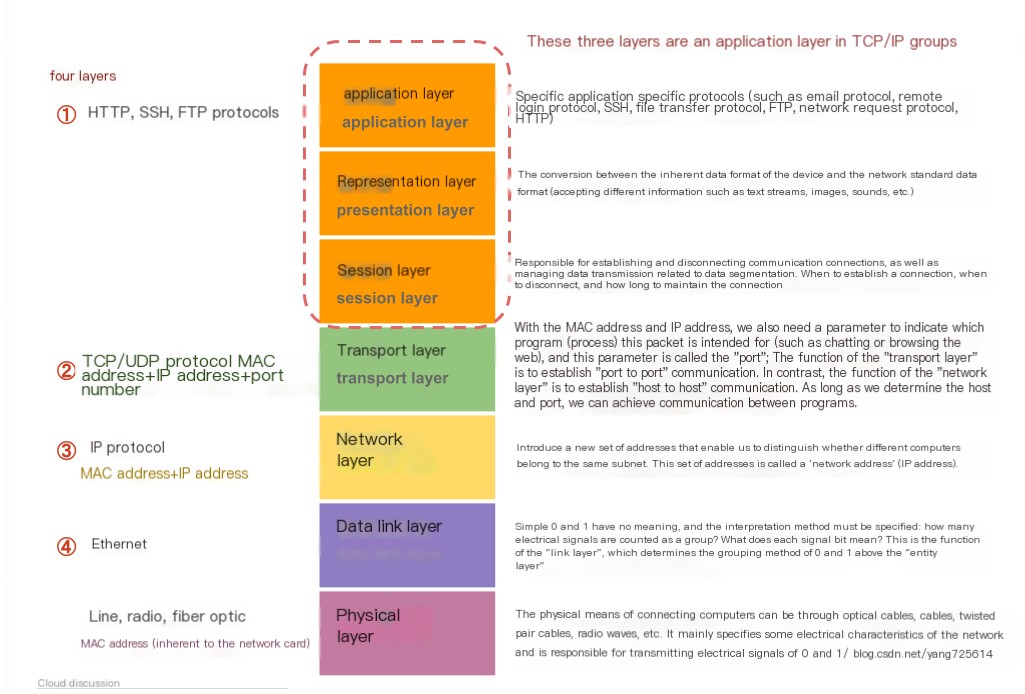
Nowadays, we often see the application layer being subdivided from the previous five-layer structure, ultimately resulting in the seven-layer model. Let’s provide a detailed diagram to explain the situation at each layer:

At this point, you might be feeling lost, but don’t worry! Just knowing the names of the five layers and what each does will be enough.
Try accessing any HTTP request and use WireShark to view the specific access process, where you can clearly see the five-layer structure and execution sequence:
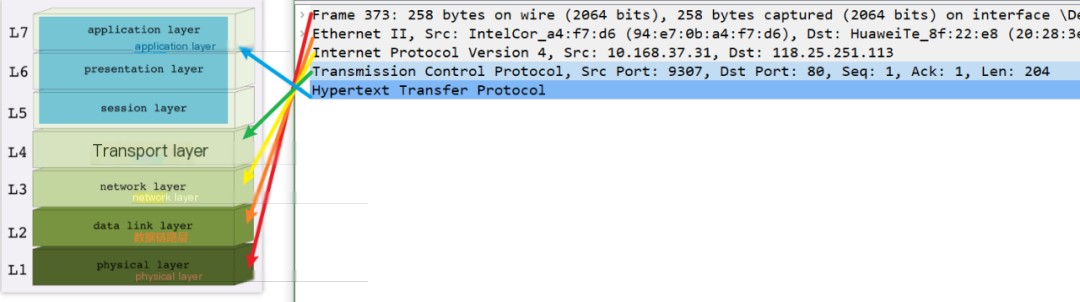
However, it’s still recommended to focus on understanding the transport layer and the network layer; the application layer isn’t necessary because we deal with applications every day.
If you don’t understand the transport layer, you surely know about TCP’s three-way handshake, which occurs at the transport layer, as the name suggests: Transmission Control Protocol.
Alright, let’s dive in.
TCP Three-Way Handshake Process
We can send a request using PostMan, ideally requesting a connection that hasn’t been established recently, for example, my http://tibug.neters.club.
Then, in WireShark, you can see the request process and apply a filter, as there would be too much data otherwise:

Let’s briefly analyze the three-way handshake process:
The first handshake packet involves the client sending a TCP segment with the SYN flag set and a sequence number of 0, representing the client’s request to establish a connection.
The second handshake packet involves the server sending back a confirmation packet with SYN and ACK flags set, setting the acknowledgement number to the client’s ISN plus 1, which is 0+1=1.
The third handshake packet involves the client sending another confirmation packet (ACK), setting the SYN flag to 0 and the ACK flag to 1. It then adds 1 to the server’s acknowledgement number and sends it back in the acknowledgment field.
Doesn’t it all look clear now!
With network knowledge and the support of tools, we are ready!
The “First” Request from the Resource Server
I specifically highlighted “first” in the title, so let’s validate whether it is indeed the first:
First, in the Blog.Core project, enable Ids4 authentication mode:

Then, run the two projects separately, obtain the Token, and then send a request to get the menu interface. The result of the first request is like this, wherein you can write http in the filter and apply a filter:
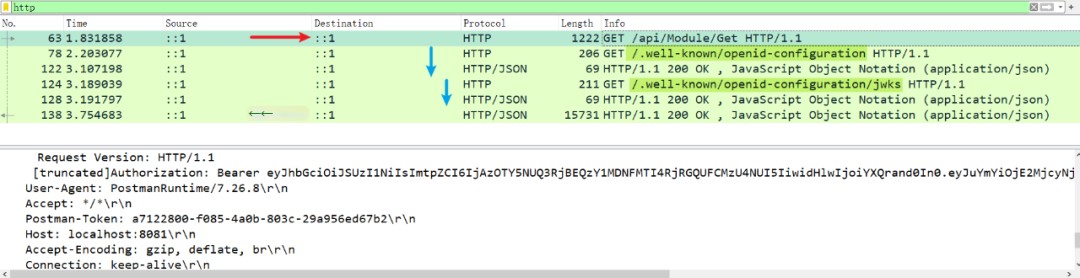
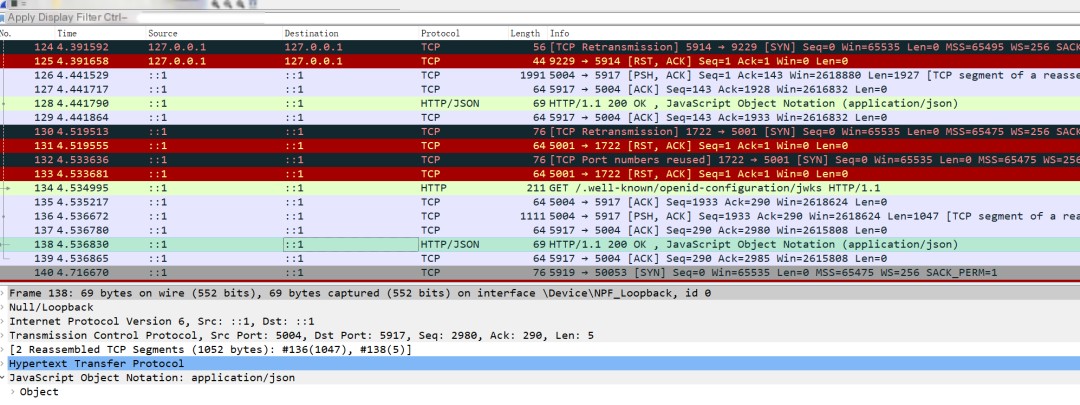
The overall process is quite simple: First, request the resource service, then call the authentication center, initiating two interfaces, with results as follows:
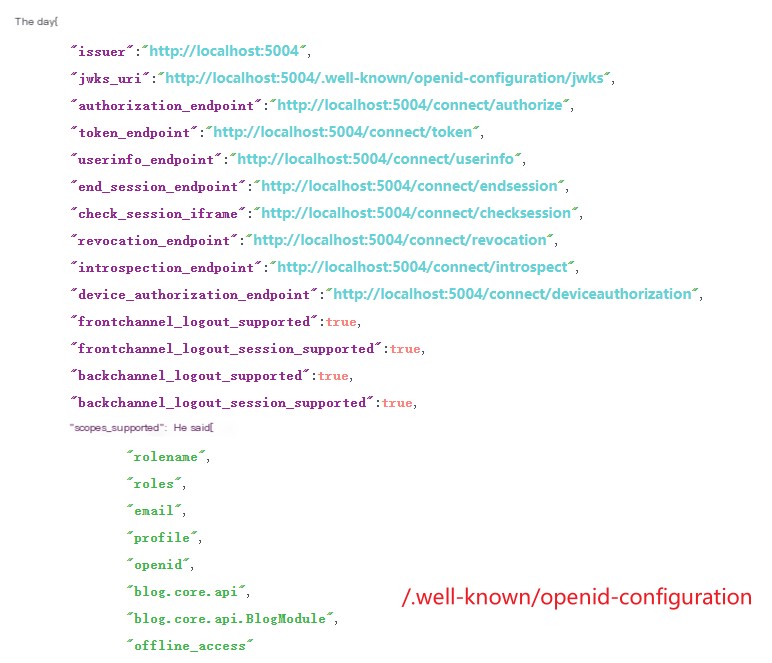
1. /.well-known/openid-configuration
2. /.well-known/openid-configuration/jwks
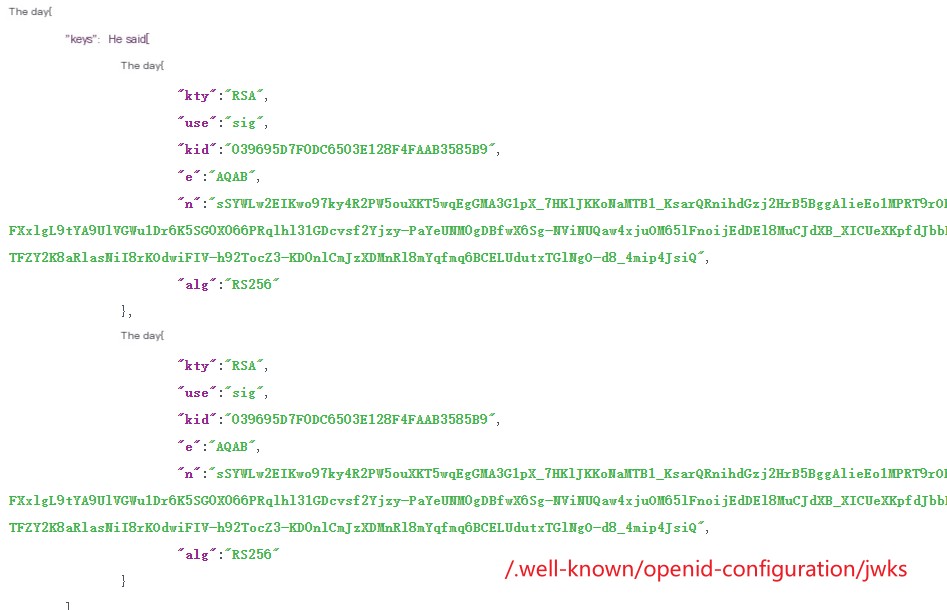
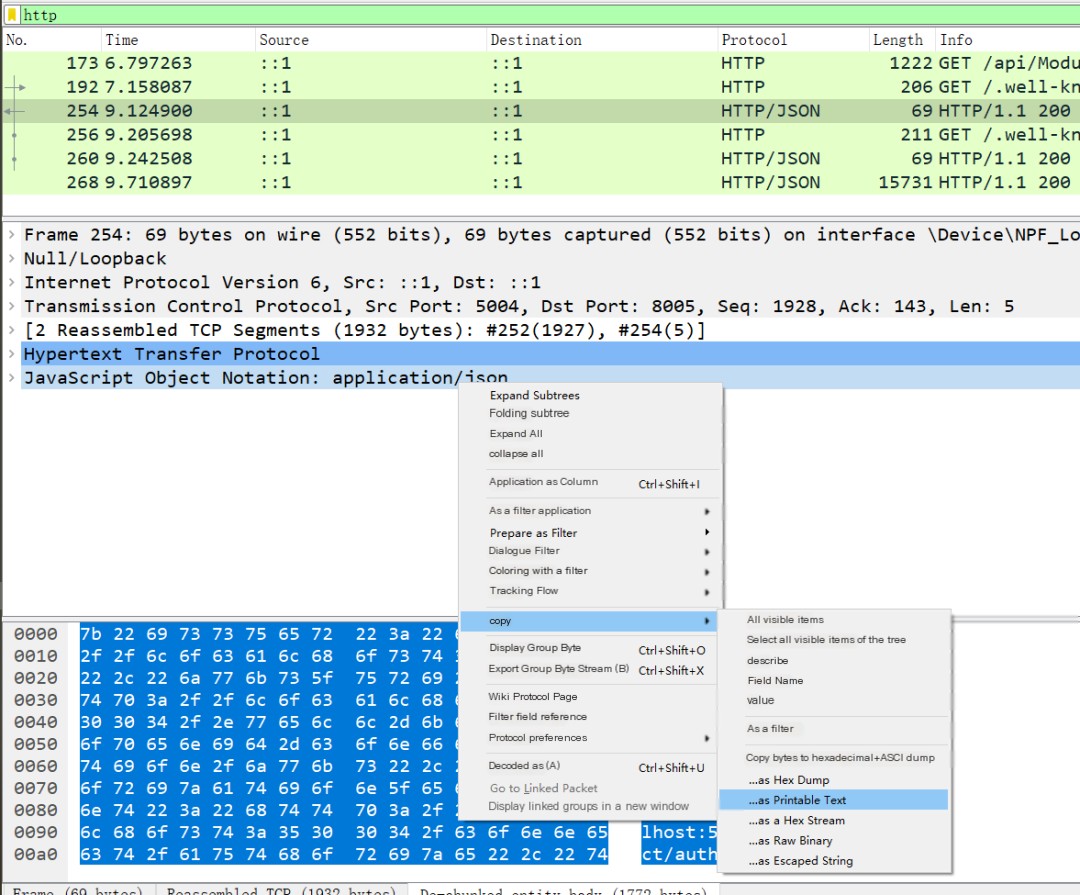
These results are stored in the resource server’s memory for future use. If you want to see the specific structure and results, you can directly copy the return results:
Here, the first two questions of the article have been perfectly answered.
Let’s start verifying the third question, simply by shutting down the authentication center service!
The “Subsequent” Request from the Resource Server
Based on the previous section, stop the authentication center service, but don’t restart the resource service. Still using the previous token, switch to a new interface /api/Permission/Get, or keep the current one, and initiate a request:
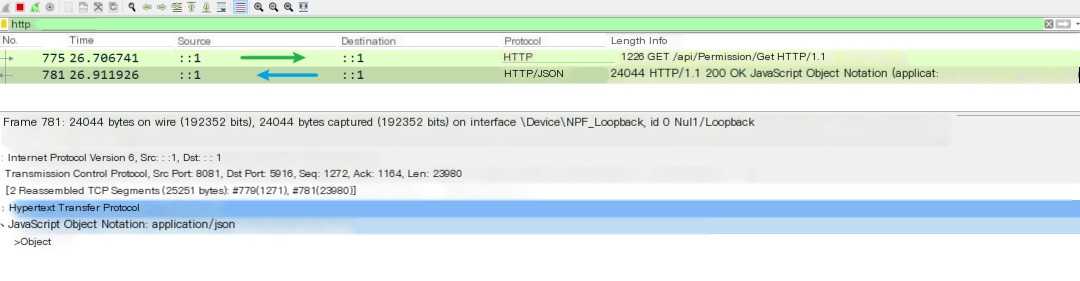
As expected, the request can still go through, and no new authentication was initiated. It is directly accessed from the previous step’s memory, followed by subsequent logic.
At this point, the three questions raised at the beginning of the article have been perfectly resolved, and you have also learned packet capturing and computer network knowledge along the way. Keep it up!