

In previous articles, I have discussed using Zabbix’s auto-discovery feature to automatically monitor the expiration dates of SSL certificates for all domains on a server. These articles are Simple Script to Monitor SSL Certificate Expiration and Configuring Zabbix Auto-Discovery for Automatic Monitoring of SSL Certificate Expiration for All Server Domains. You can check them out if interested.
Then, a colleague mentioned that during use, the script to retrieve the certificate expiration time reported an error.

As shown in the image, the error is clear: SSL handshake failed, and the protocol is SSLv3.
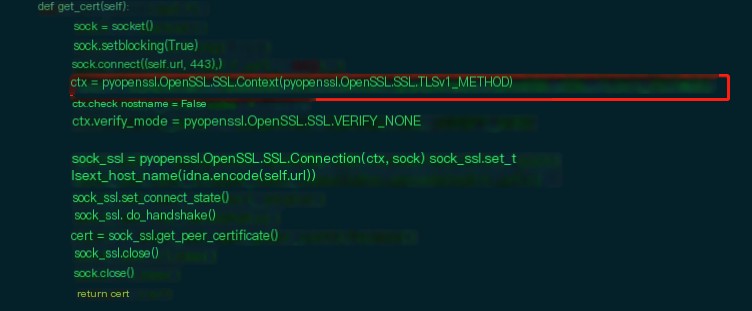
The script for retrieving SSL certificate information builds a context object via SSL.Context, specifying the use of TLSv1. However, the error is SSLv3.
So, I tested it locally, and it worked fine for me. I added output for the connection protocol version in the script.
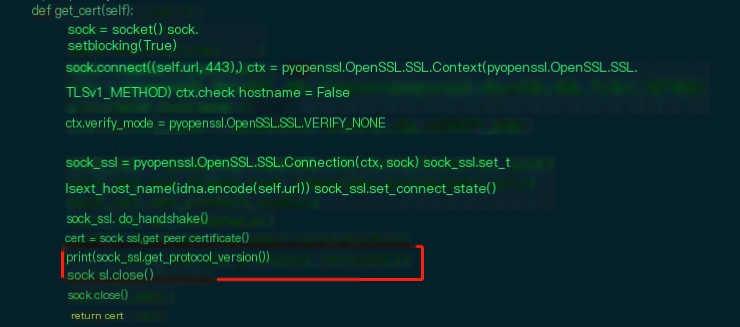
The output indeed shows that TLSv1 was used here, with get_protocol_version returning an int type, 769 being TLSv1.

So, I asked the colleague to send me the domain. I executed the script and encountered the same error.
The error occurred during the do_handshake execution at the handshake phase, so there was no output for the established connection protocol version. I had no choice but to capture packets for analysis.
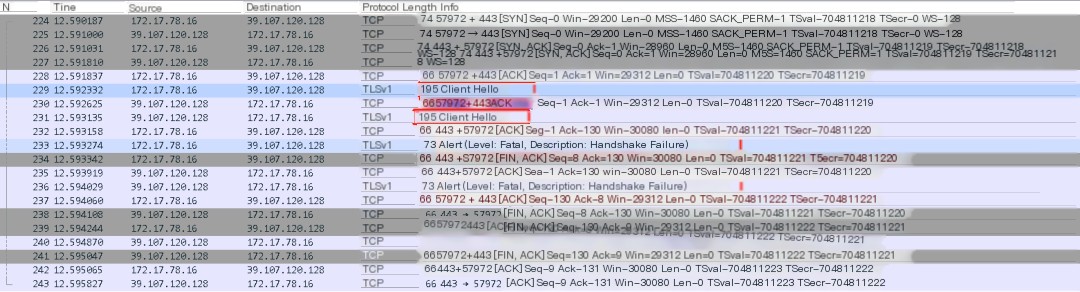
When capturing the packets, Wireshark analysis revealed that after the client hello, the handshake negotiation was unsuccessful. I had previously written an article about SSL handshake which you can check out Wireshark Packet Capture Helps Clarify the HTTPS Request Process if interested.
Here we analyze the client hello packet to check the cipher suites.
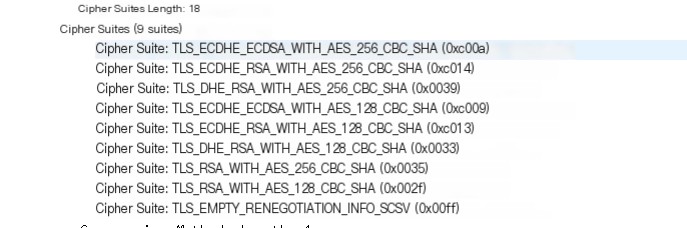
Then, I asked my colleague for the Nginx configured cipher suites.

It’s clear that they do not match the client’s cipher suites, explaining the handshake failure. The colleague’s cipher suite settings were too strict, so I had him reconfigure the cipher suites, and sure enough, it worked; a connection was successfully established.
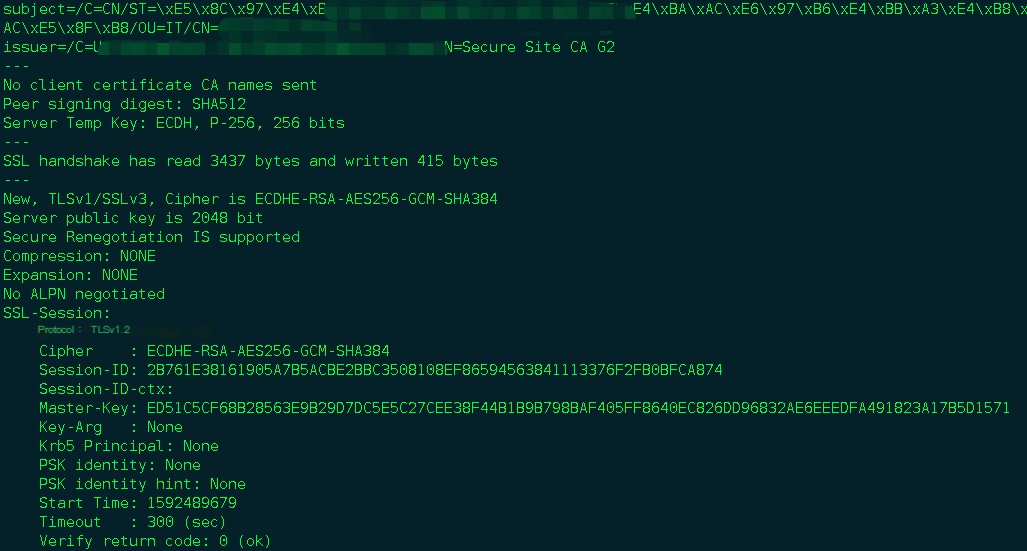
Besides packet capture, you can also use the OpenSSL tool to establish a connection and view the entire connection process, for example using openssl s_client -connect xxx.com:443 (make sure to include the port, or check usage instructions with -h).
Additionally, discussing the configuration of cipher suites in Nginx, these are specified through the ssl_ciphers directive. The cipher suites are usually separated by a colon (“:”) and written in a single line. What do these cipher suites contain?
Let’s take the one I had my colleague configure: ECDHE-RSA-AES128-GCM-SHA256
ECDHE: Key exchange algorithm
RSA: Signature algorithm
AES128: Symmetric encryption algorithm
GCM-SHA256: Signature algorithm
Typical cipher suites consist of these parts.
The following part HIGH:!aNULL:!MD5:!RC4:!DHE
This is a macro definition in the cipher suite, a string representing a type of cipher suite. You can view cipher suites using openssl’s ciphers utility. Let’s look at HIGH.
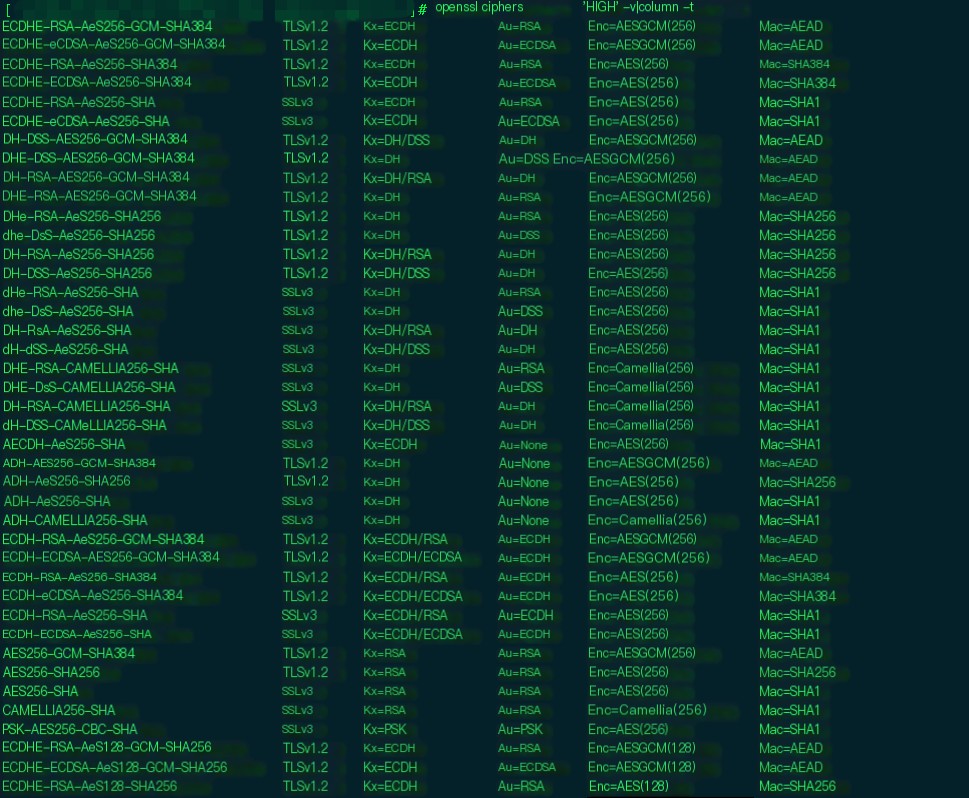
For clarity, I’ve organized them with columns. You can see that HIGH represents a category of cipher suites with their detailed version numbers and separated unit algorithms.
Here, HIGH signifies high-grade cipher suites with key lengths greater than 128 bits. In openssl’s ciphers, there are also MEDIUM and LOW, but LOW has been disabled in OpenSSL 1.0.2g. More information on ciphers can be found on the official OpenSSL documentation at https://www.openssl.org/docs/man1.0.2/man1/ciphers.html.
In summary, when configuring Nginx, avoid setting particularly stringent cipher suites for general services to prevent mismatches and compatibility issues with older client versions.