

Source Article | MS08067 SRC Vulnerability Practicum Homework
Author: **Student A** (SRC Vulnerability Practicum, Class 1): The discussion focuses on the concept of MAC address mapping.
Homework attempt as per instructor’s requirements:
1. Using WireShark for packet capture, analyze the ARP packet structure based on actual data packets.
1.1 ARP Overview
The full name of the ARP protocol is the Address Resolution Protocol (ARP), which is used to map an IP address to a MAC address, effectively a protocol for identifying the MAC address corresponding to a target IP. ARP is extremely important in IPv4.
1.2 Packet Format
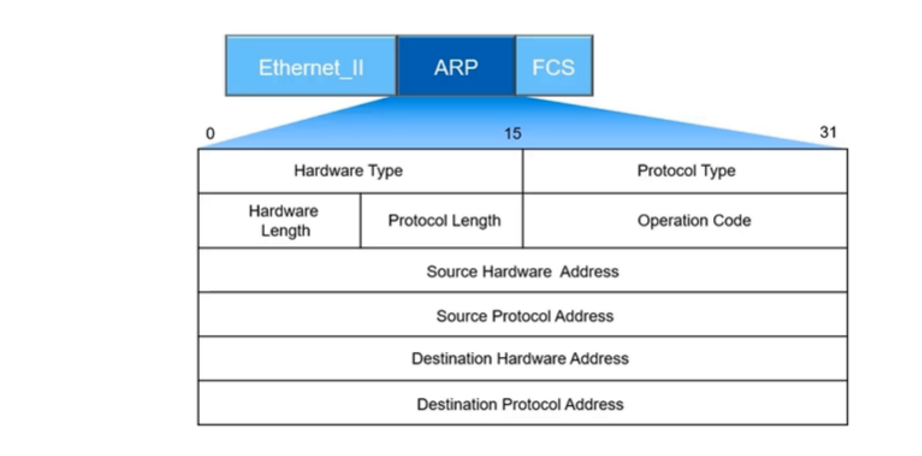
ARP packets cannot traverse routers and cannot be forwarded to other broadcast domains.
Focus here on the following special fields:
Hardware Type: Generally Ethernet
Protocol Type: ARP Protocol
Operation Code: Determines whether it is an ARP request or ARP reply packet
1.3 ARP Packet Details
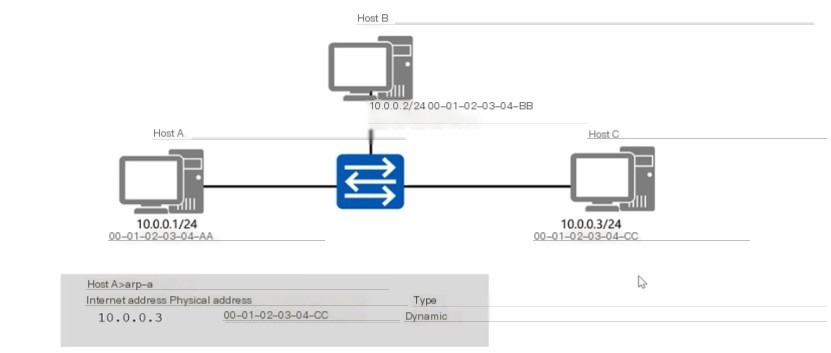
ARP Cache Table: Check if the destination MAC address is present by using arp -a, with a cache time of 20 minutes.
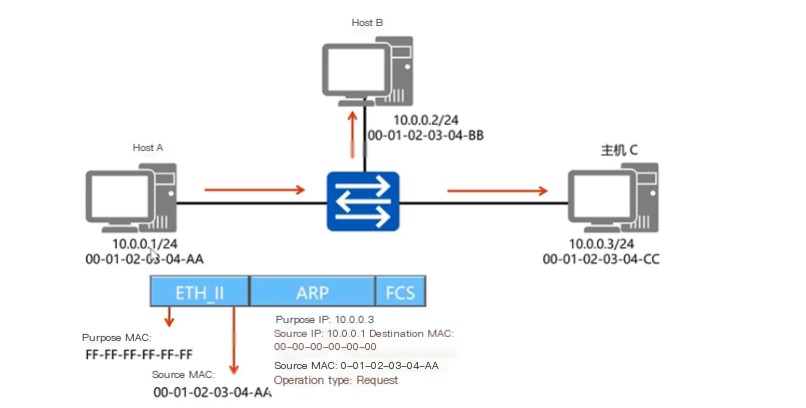
ARP Request Packet
Diagram is as follows:
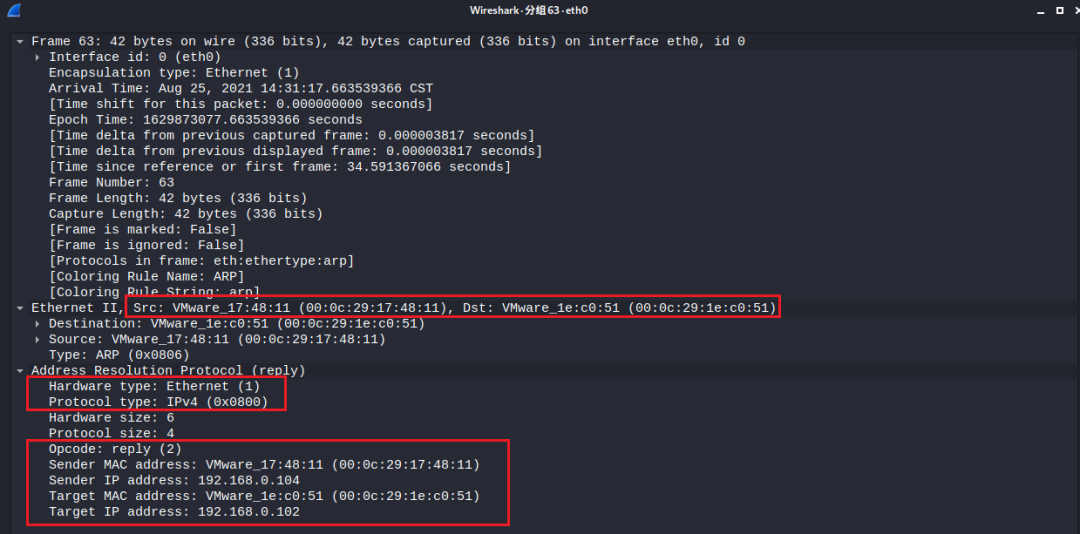
Data packet captured with Wireshark is as follows:
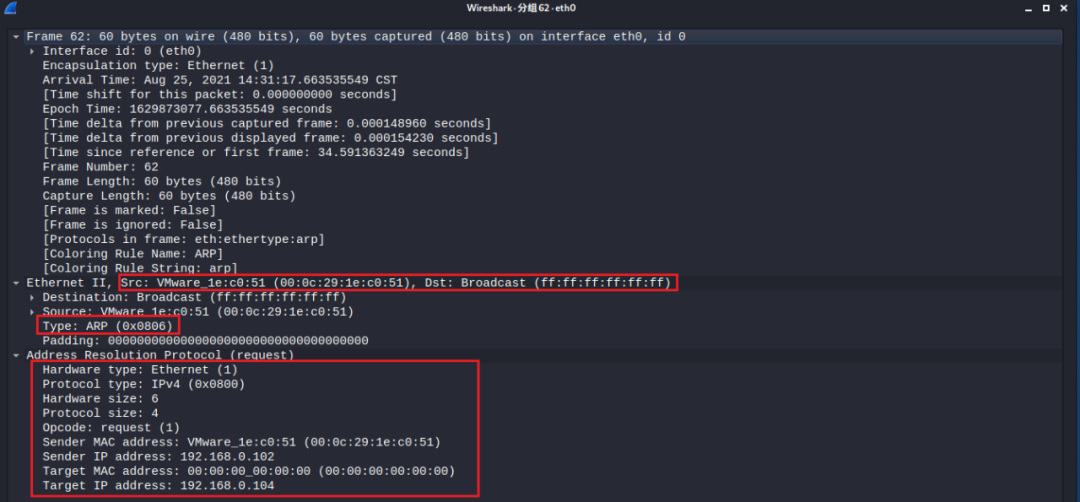
The captured information shows that the source host initiating the ARP request has an IP address of 192.168.0.104 and a MAC address of 00:0c:29:1e:c0:51; the sent packet is an ARP request packet. It is a broadcast packet since the target MAC is all F’s. The target IP address is 192.168.0.102, and because the target MAC is unknown, it is filled with all zeros.
ARP Response Packet
Diagram is as follows:
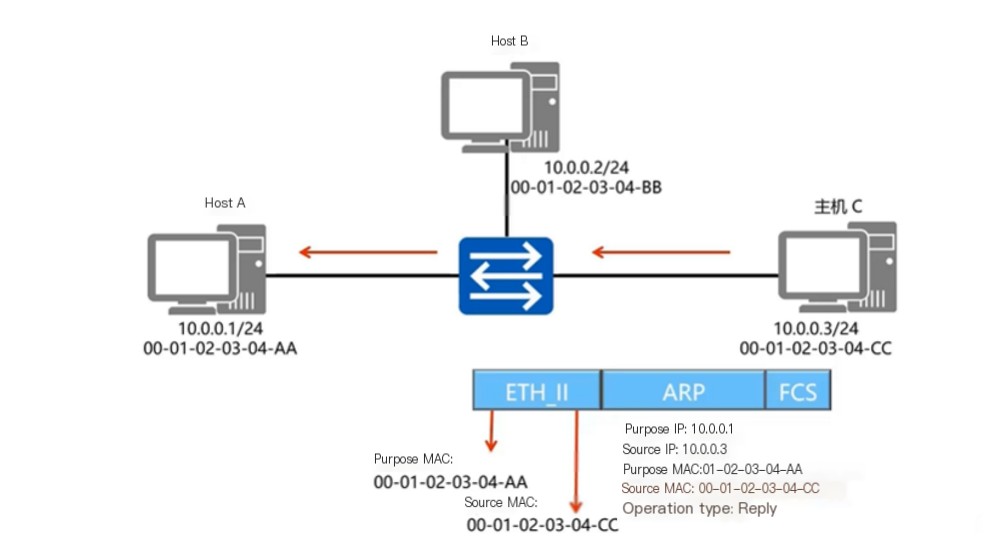
Data packet captured with Wireshark is as follows:
The captured information shows that the source host initiating the ARP response has an IP address of 192.168.0.102 and a MAC address of 00:0c:29:17:48:11; the sent packet is an ARP response packet. It is a unicast packet. The target IP address is 192.168.0.104, and the target MAC is 00:0c:29:1e:c0:51.
2. Using Ettercap to Complete an ARP Man-in-the-Middle Attack
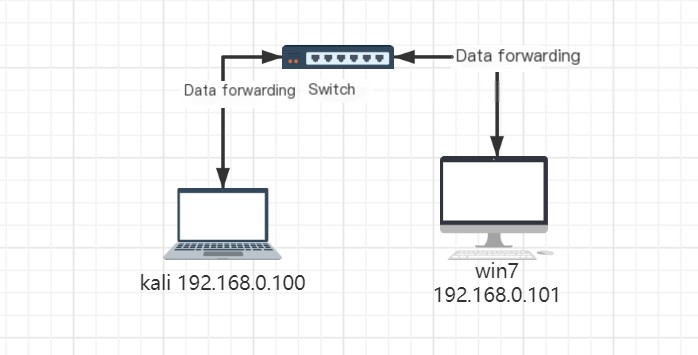
2.1 Attack Environment
Before Attack
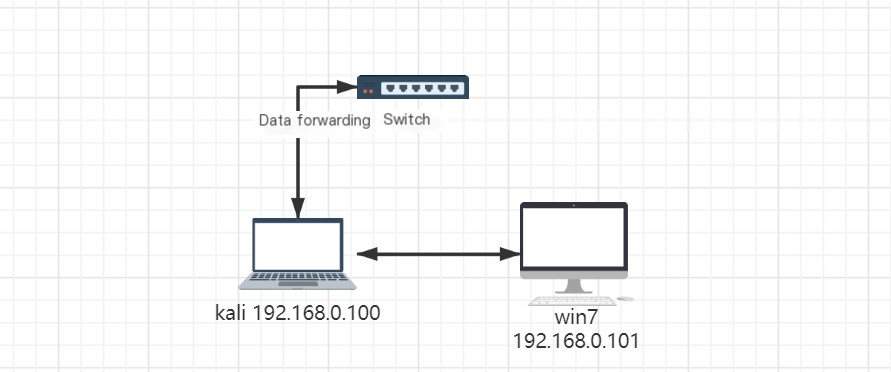
After Attack
2.2 Attack Principle
When the Win7 (192.168.0.101) machine sends data, it follows its own ARP and routing tables to decide where to send it, whether within or outside the LAN. All data go through its default gateway. If the local ARP table lacks the gateway 192.168.0.1 MAC information, it will broadcast to ask who owns IP address 192.168.0.1. All hosts in the LAN will receive this message, and normally 192.168.0.1 should respond with its MAC, updating the ARP table. However, at this time, the host Kali (192.168.0.100) responds claiming it is 192.168.0.1 and sends its MAC to Win7, updating its ARP table such that 192.168.0.1 now points to Kali’s MAC. Data transfer begins with the source being the Win7 MAC and destination being the gateway MAC (actually Kali’s MAC). The switch forwards this because its CAM table matches Kali’s MAC to the correct port. Thus, data meant for the gateway is sent to Kali, achieving deception. Kali not only deceives Win7 but also tells the gateway it is Win7.
2.3 Attack Process
1. Open Ettercap -G as root

2. Set the network interface to sniff
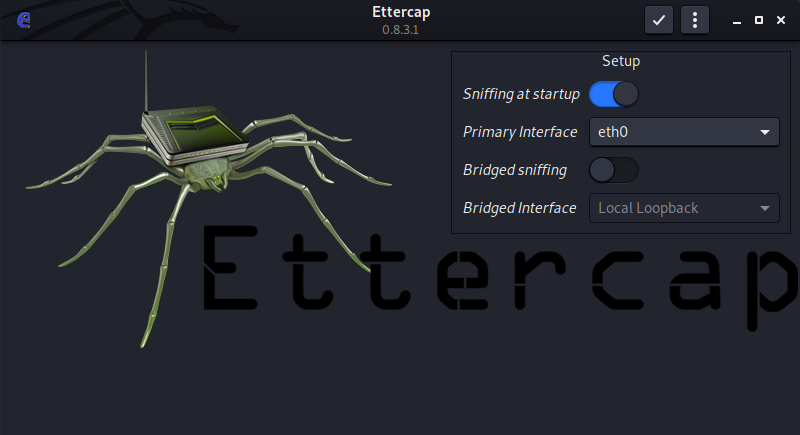
Here, we choose the eth0 interface.
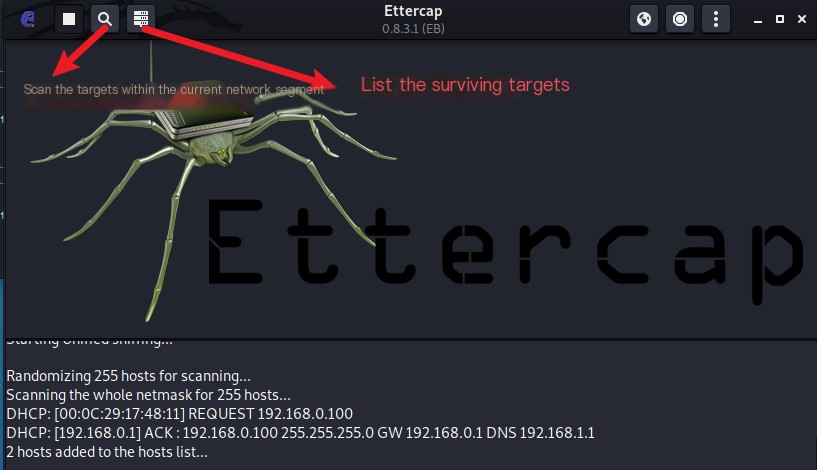
3. Scan and list active hosts in the current segment
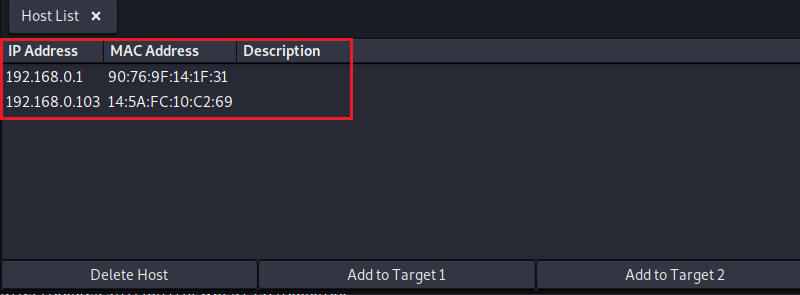
4. Add targets for ARP attack
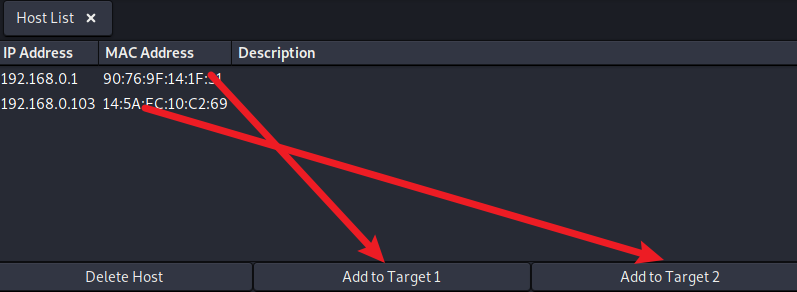
We add the gateway to Target 1 and the host to deceive to Target 2.
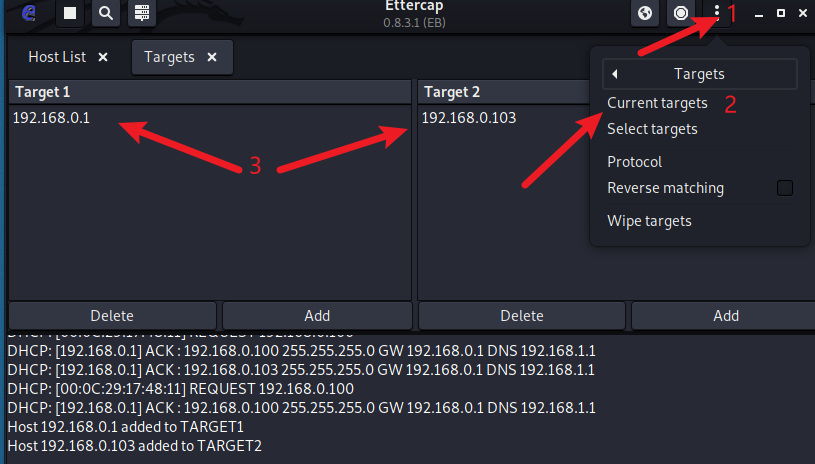
We can also view the status of targets we added.
5. Initiate ARP attack
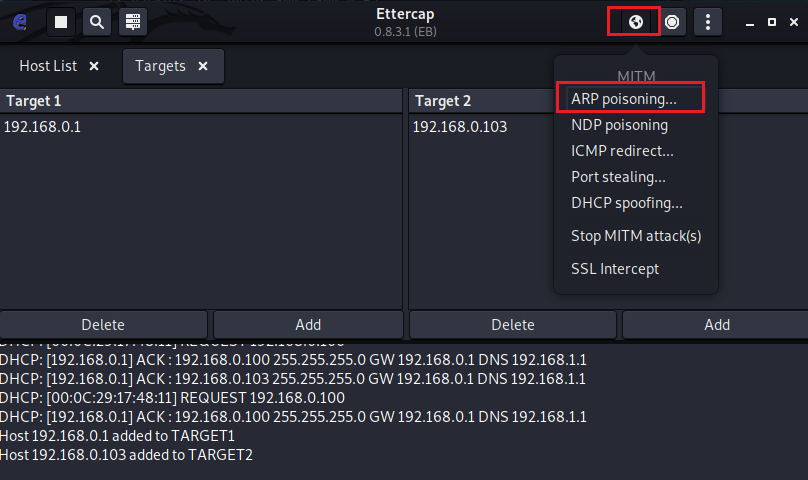
Click ARP poisoning to execute the ARP attack.
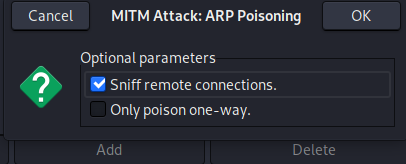
Select the mode of attack; here, we choose bidirectional deception.
With this, the ARP attack is completed. Return to Win7 to observe the attack status.

Checking the ARP table reveals that Kali’s MAC address matches the gateway’s MAC, indicating the attack’s completion.
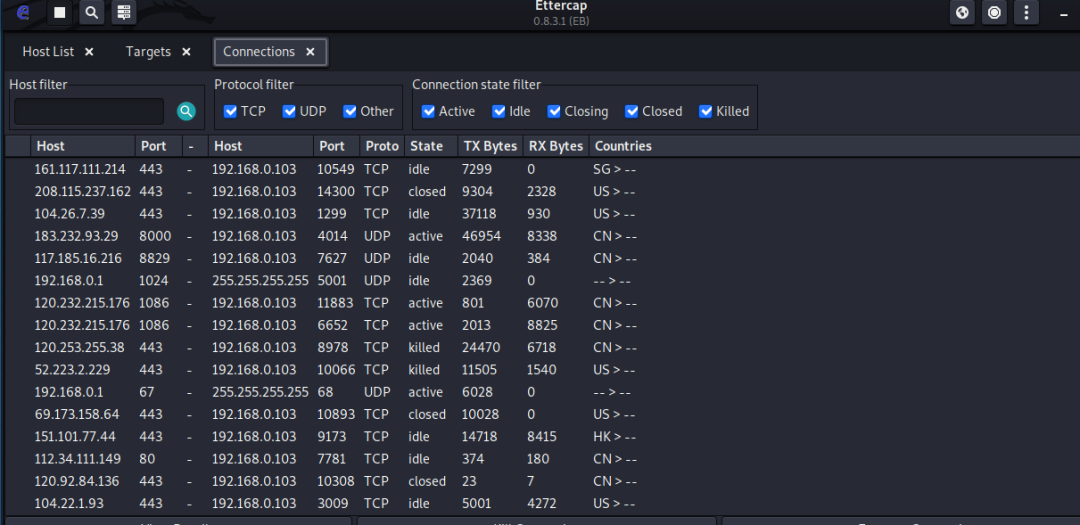
Ettercap can be used to inspect traffic from the victim.
6. Cooperate with DNS hijacking for attack
Configure the etter.dns file, adding an A record
File path: /etc/ettercap/etter.dns
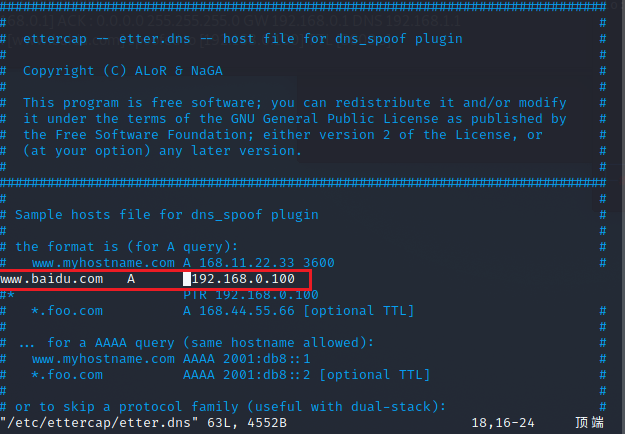
This record aims to direct the hijacked host to a malicious site hosted on the local machine (Kali) instead of the intended site.
Next, we clone a Baidu page on Kali.
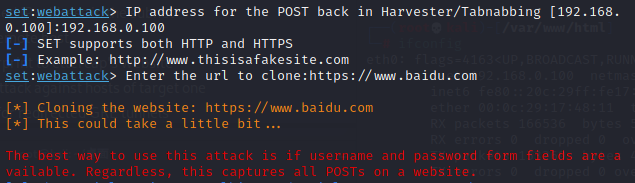
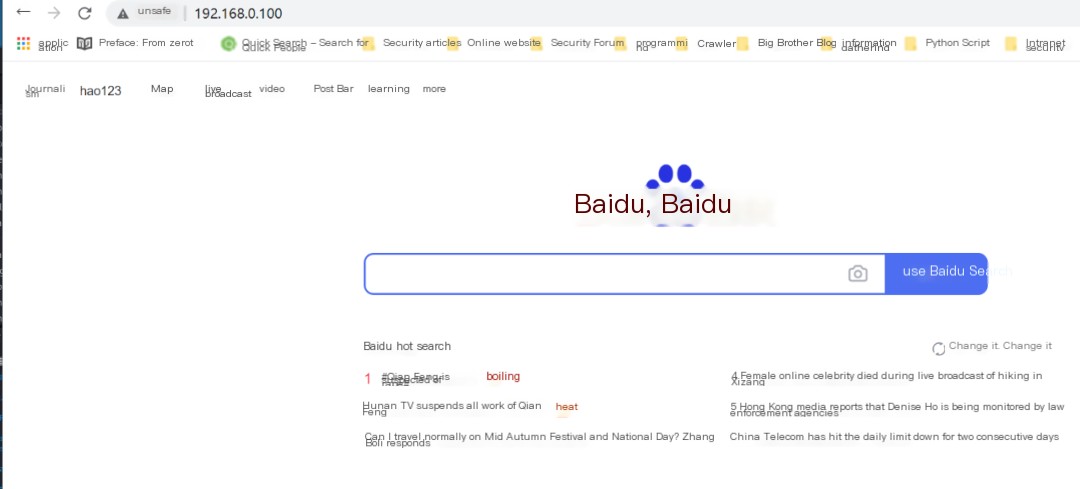
When accessing the Kali IP address, the page indeed appears to be Baidu’s.
Then, proceed with DNS hijacking.
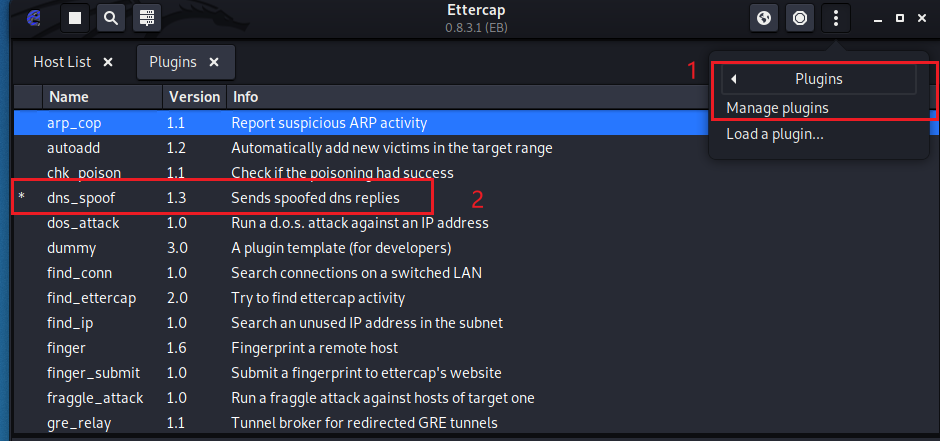
Enable dns_spoof to hijack the victim host.
At this point, visiting Baidu on the victim’s machine will receive responses from Kali, confirming successful DNS hijacking.
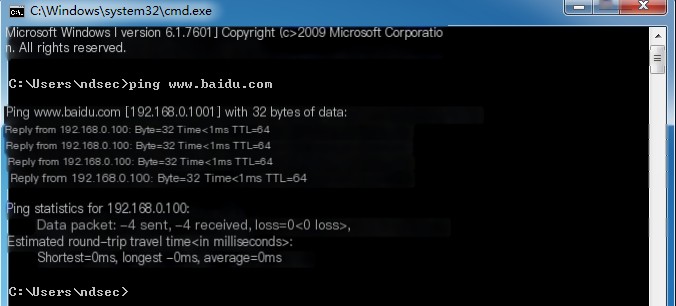
Accessing the web page shows that Baidu’s page has been accessed successfully.
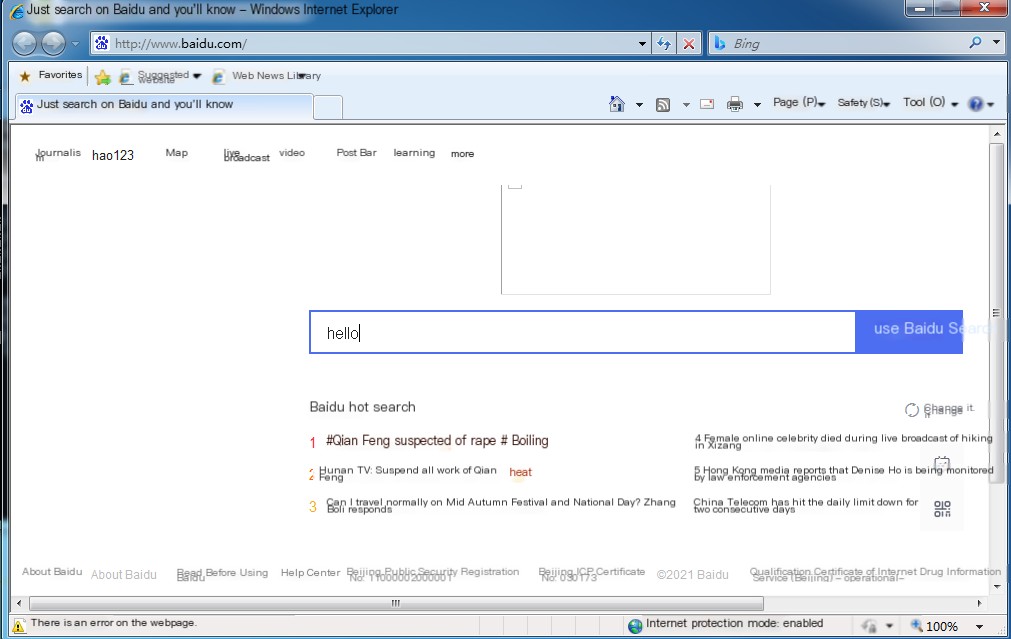
After submission, it shows that content has been successfully returned to Kali, thus completing the DNS+ARP attack.

In a real-world scenario, we can create a phishing site that users frequently visit to capture their login credentials.