
0x00 Introduction:
In this section, we are going to discuss the BlueKeep vulnerability, understanding its implications and how it affects systems.
BlueKeep is a software security vulnerability that affects computers using older versions of the Microsoft Windows operating system; Windows 8 and Windows 10 are not affected. It is said that this vulnerability can be used to initiate self-replicating worm malware. The 2017 WannaCry attack, associated with ransomware infections, was devastating, shutting down computers worldwide.
BlueKeep was disclosed in May 2019 as CVE-2019-0708, also known as the Remote Desktop Services Remote Code Execution Vulnerability.
As of June 1, 2019, nearly a million computers are potentially at risk of the “notorious” BlueKeep Remote Desktop Services (RDS) Remote Code Execution (RCE) Remote Desktop Protocol (RDP) vulnerability. Scanners determine if a particular computer (or group of computers) is affected by the flaw. Microsoft considers the vulnerability “critical” and advises quickly installing available security patches for affected systems to mitigate the vulnerability and disabling Remote Desktop Services when not needed.
0x01: Preparation Tools
Code Language: javascriptCopy
1. Raspberry PI3Code Language: javascriptCopy
Essential Packages 1. Wireshark2. tcpdump3. bro4. rdpy5. tcpickInstallation
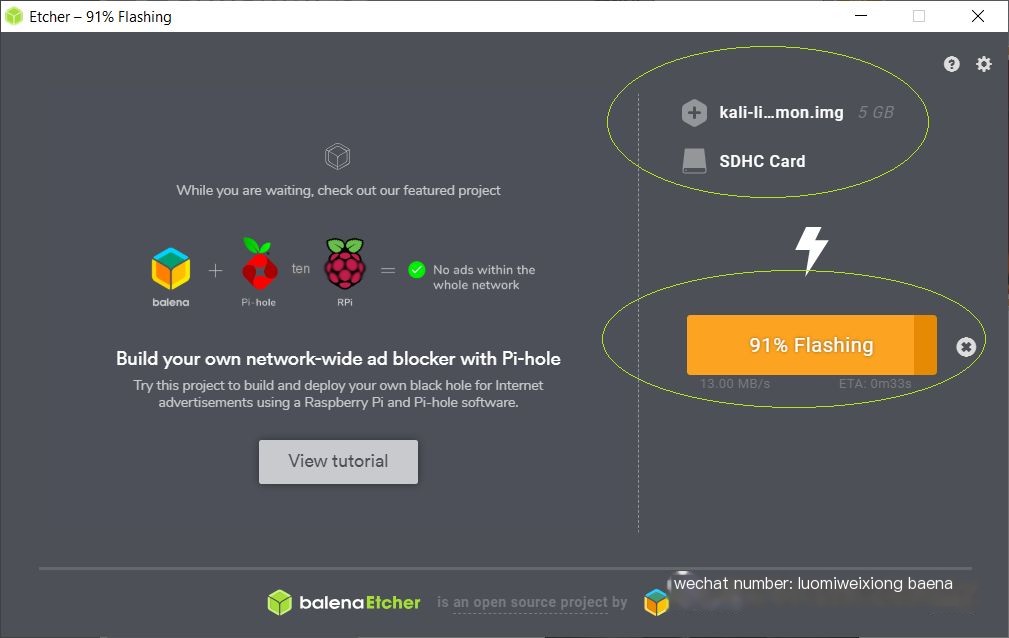
Step 1: Flash your Kali image onto your Raspberry PI3, I chose this one https://images.offensive-security.com/arm-images/kali-linux-2019.2-rpi3-nexmon.img.xz, I used the Etcher software to flash the SD card in a Windows environment (simple and quick) https://www.balena.io/etcher/?ref=etcher_footer
 />
/>
Using Etcher to flash the SD card
Step 2: Once flashed, proceed to update/upgrade everything:
Code Language: javascriptCopy
#apt-get update && apt-get upgrade && apt-get dist-upgrade />
/>
Kali on Raspberry PI3
Step 3: Install the python-rdpy package
Code Language: javascriptCopy
#pip install twisted pyopenssl qt4reactor service_identity rsa pyasn1 #pip install rdpy #apt-get install python-qt4Step 4: Verify, if all is good, the following commands should be executable:
Code Language: javascriptCopy
#rdpy-rdpcredsspmitm.py #rdpy-rdpmitm.py #rdpy-rssplayer.py #rdpy-vncscreenshot.py #rdpy-rdpclient.py #rdpy-rdphoneypot.py #rdpy-rdpscreenshot.py #rdpy-vncclient.pyCode Language: javascriptCopy
Note: On Kali Linux I received some errors for the Twisted package, which I resolved with the following commands:Code Language: javascriptCopy
#wget -c https://twistedmatrix.com/Releases/Twisted/19.2/Twisted-19.2.0.tar.bz2#bzip2 -d Twisted-19.2.0.tar.bz2 #tar -xvf Twisted-19.2.0.tar #python setup.py installExecute rdpy-rdpclient.py and rdpy-rdphoneypot.py
Step 5: Create a MiTM attack and record the session (RSS file), the idea is to display a visible screen to the intruder (fake remote desktop):
Code Language: javascriptCopy
#rdpy-rdpmitm.py -o /root/honeypots_arsenal/ 192.168.1.17Code Language: javascriptCopy
Where 192.168.1.17 is the real Windows Server 2008 IP address with RDP service enabledCode Language: javascriptCopy
Start an RDP connection to your localhost or 127.0.0.1 using xfreerdpCode Language: javascriptCopy
#xfreerdp --no-nla 127.0.0.1Code Language: javascriptCopy
To see:Code Language: javascriptCopy
[*] INFO: *******************************************[*] INFO: * SSL Security selected *[*] INFO: *******************************************
Record RDP session (RSS file)
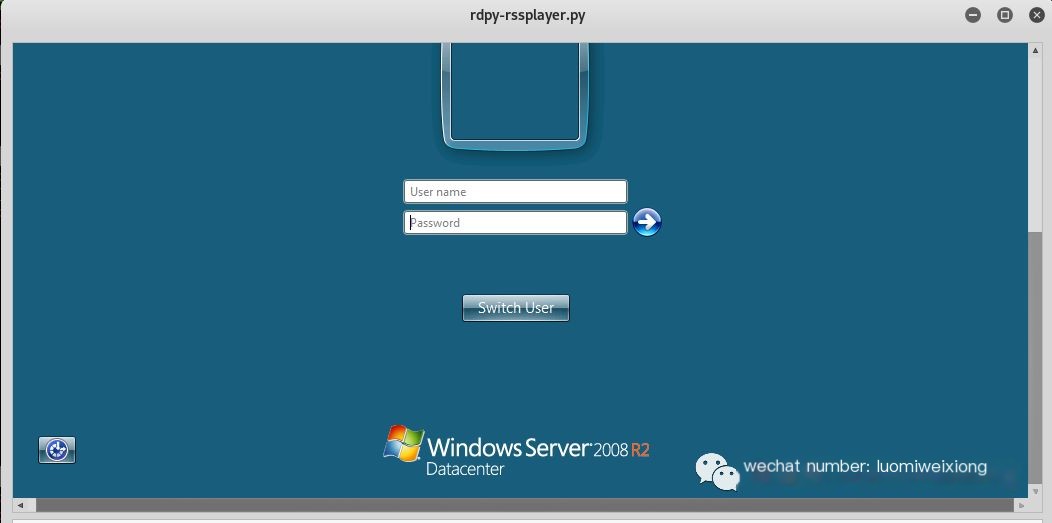
Step 6: Replay the session recorded with rdpy-rssplayer.py command, this is what the intruder would see (screen):
#rdpy-rssplayer.py 20190601025837_127.0.0.1_1.rss
Step 7: Time to run the RDP Honeypot, simply execute the following command:
#rdpy-rdphoneypot.py 20190601025837_127.0.0.1_1.rss

Execute rdpy-rdphoneypot.py and record session (RSS file)
Step 8: Use nmap to check if the RDP service is listening on port 3389 on the Raspberry PI
#NMAP -F ip
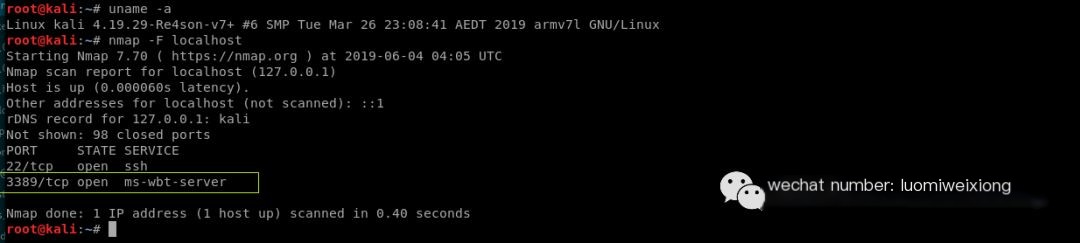
Run nmap to check if RDP service is listening locally
Step 9: Set up the router to expose the invaders to the service on 3389 (Remote Desktop Protocol) and use nmap to test if the RDP service is listening on port 3389
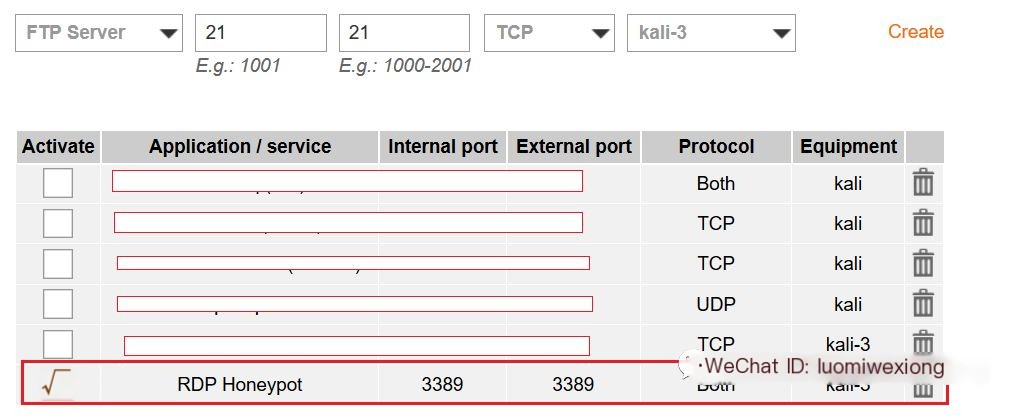
NAT/PAT Settings Orange Router
nmap -F (Your IP address)

Run nmap to check if RDP service is listening remotely
Step 10: Enable tcpdump and capture all traffic arriving on port 3389
#tcpdump tcp port 3389 -i eth0 -vvX -w rdp.pcap

Capture traffic on port 3389 using tcpdump
Packet Analysis
Step 11: Install tcpick, wireshark, bro and analyze the pcap file (rdp.pcap)
Code Language: javascriptCopy
#apt-get install tcpick #apt-get install wireshark #apt-get install cmake make gcc g++ flex git bison python-dev swig libpcap-dev libssl-dev zlib1g-dev -y #apt-get install libgeoip-dev -y #apt-get install libmaxminddb-dev #apt-get install bro broctl bro-aux -yCode Language: javascriptCopy
Perform packet analysis with tcpick#tcpick -C -yP -r rdp.pcap | moreVoila!
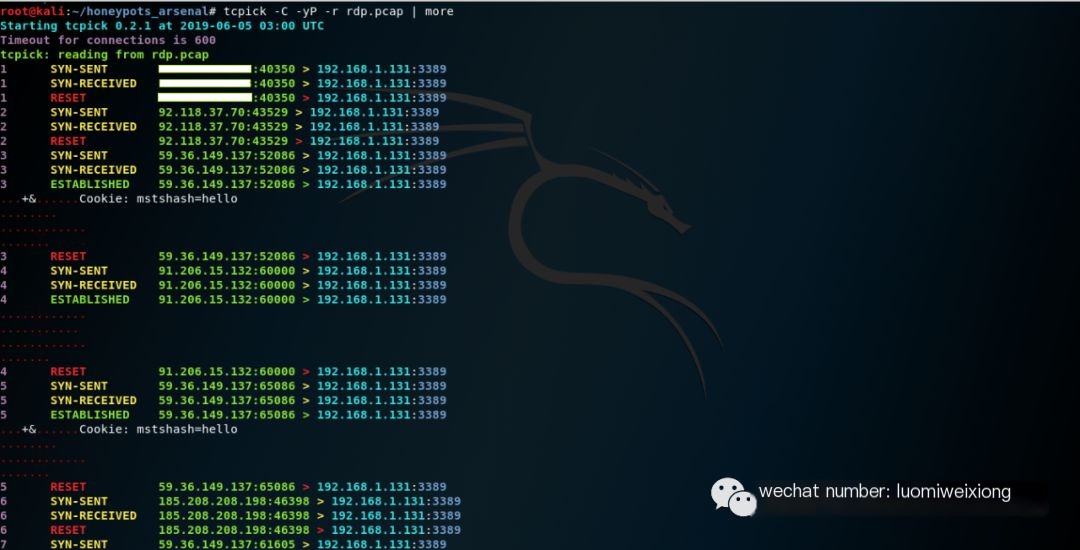
Execute tcpick (Packet Analysis)
Step 12: Use bro to see in-depth, human-readable logs (the following command will create log files)
#bro -r rdp.pcap -C
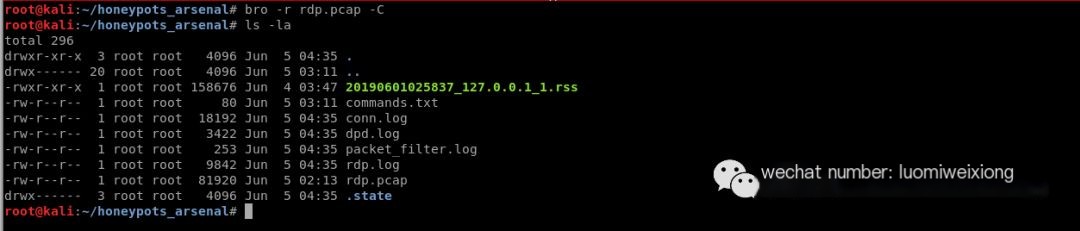
Generate readable logs using bro command
Code Language: javascriptCopy
#cat rdp.log | bro-cut id.orig_h id.orig_p id.resp_h id.resp_p cookie result security_protocol keyboard_layout client_build client_name | more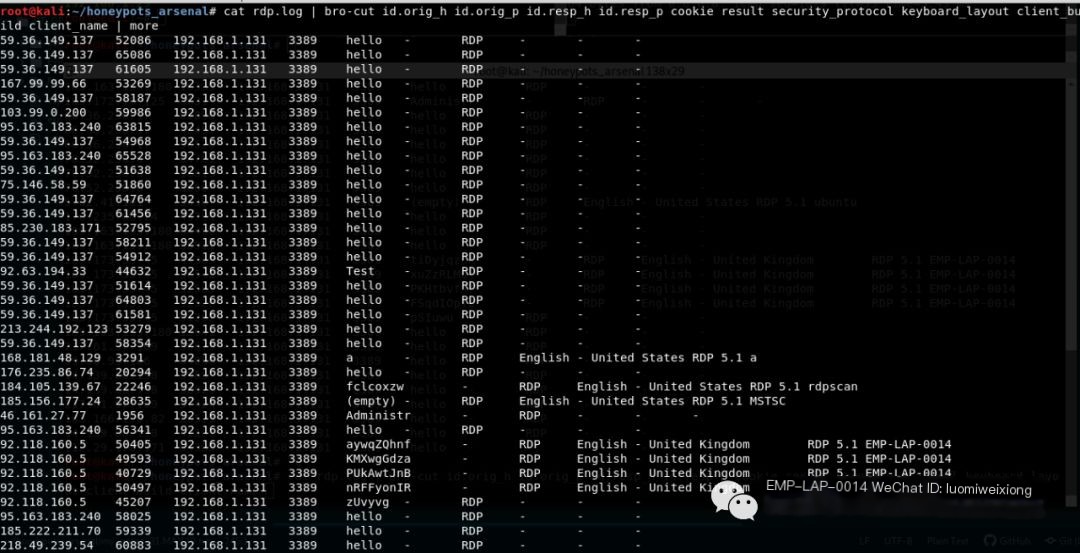
Read rdp.log file using bro-cut