

1. Introduction
The previous article primarily discussed an introduction to the software and the principles of packet capture, specifically focusing on Wireshark Windows 10.
Wireshark Windows 10: Installation and Deployment Environment
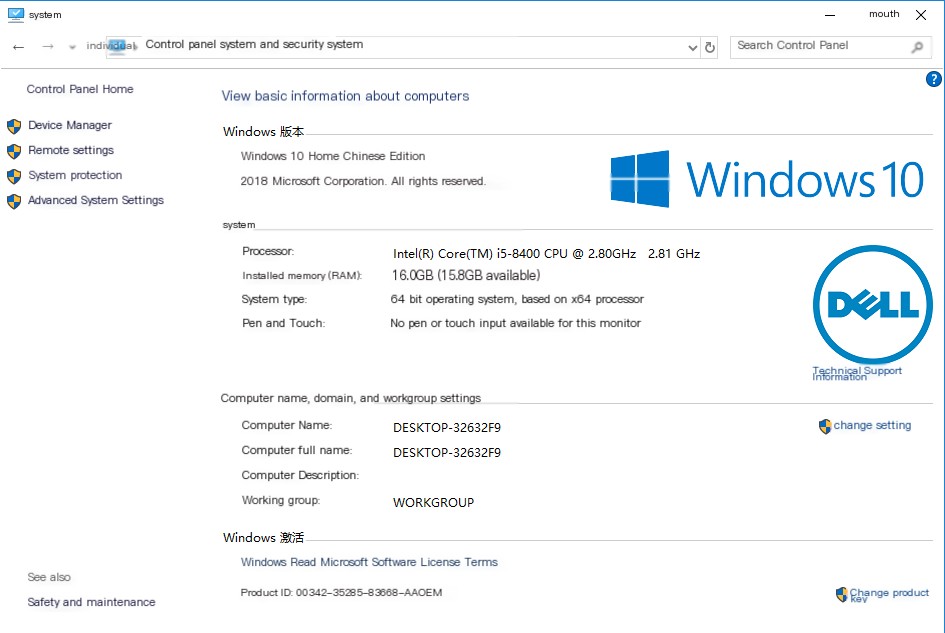
2.1 Operating System
1. Brother Hong’s environment is Windows 10 version 64-bit system (32-bit users need to find their own way). Actually, Brother Hong feels that regardless of the platform or bitness, installation is quite similar and very easy. As shown in the figure below:
 />
/>
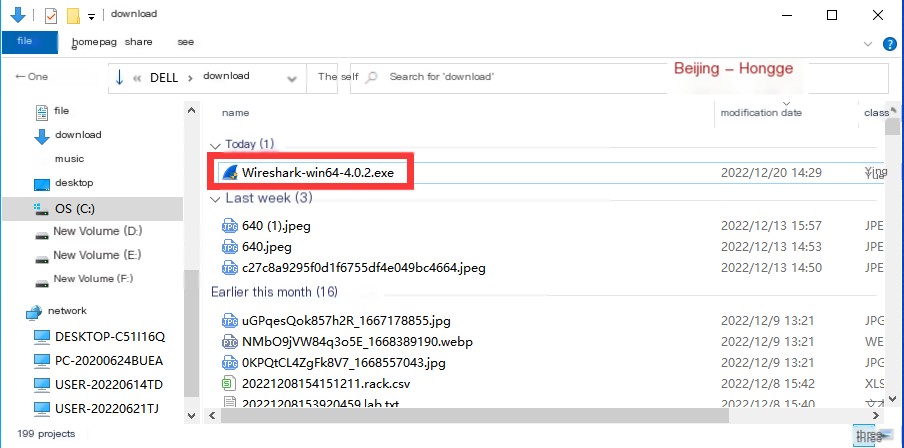
2.2 Wireshark Windows 10 Software Version
1. As for the Wireshark version, Brother Hong downloaded the latest version 4.0.2 from the official website, as shown in the figure below:
 />
/>
3. WireShark Download and Installation
3.1 Wireshark Windows 10 Download
The official download site for Wireshark: https://www.wireshark.org/
Wireshark is a very popular network packet analysis software with powerful features. It can capture various network packets and display detailed information about them.
Wireshark is open source software and can be used with confidence. It runs on both Windows and Mac OS. On Linux, the corresponding packet capture tool is tcpdump. Users of Wireshark must understand network protocols, otherwise they won’t understand Wireshark.
1. Open the website https://www.wireshark.org to enter the official Wireshark website, as shown in the figure below:

2. Click the download icon in the picture to enter the download page, as shown in the figure below:
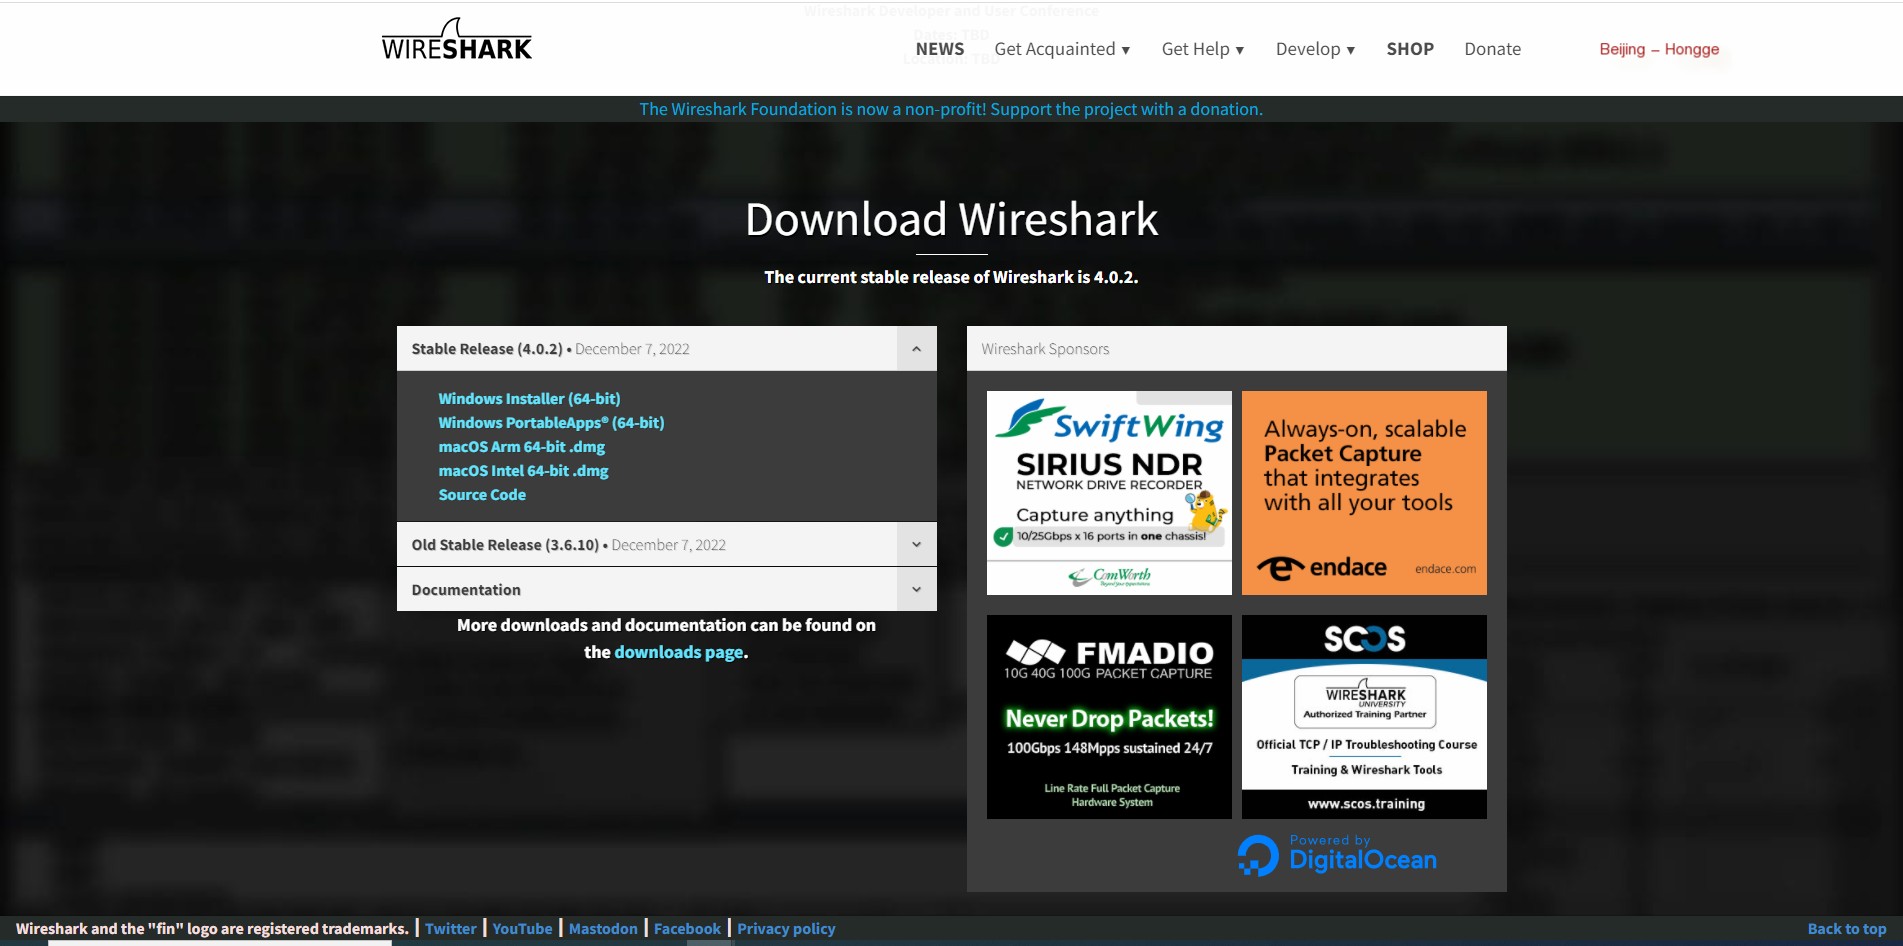
In the Stable Release section, you can see that the latest version of Wireshark is 4.0.2, and download locations for Windows (64-bit), Mac OS, and source packages are provided. Users can download the corresponding package according to their operating system.
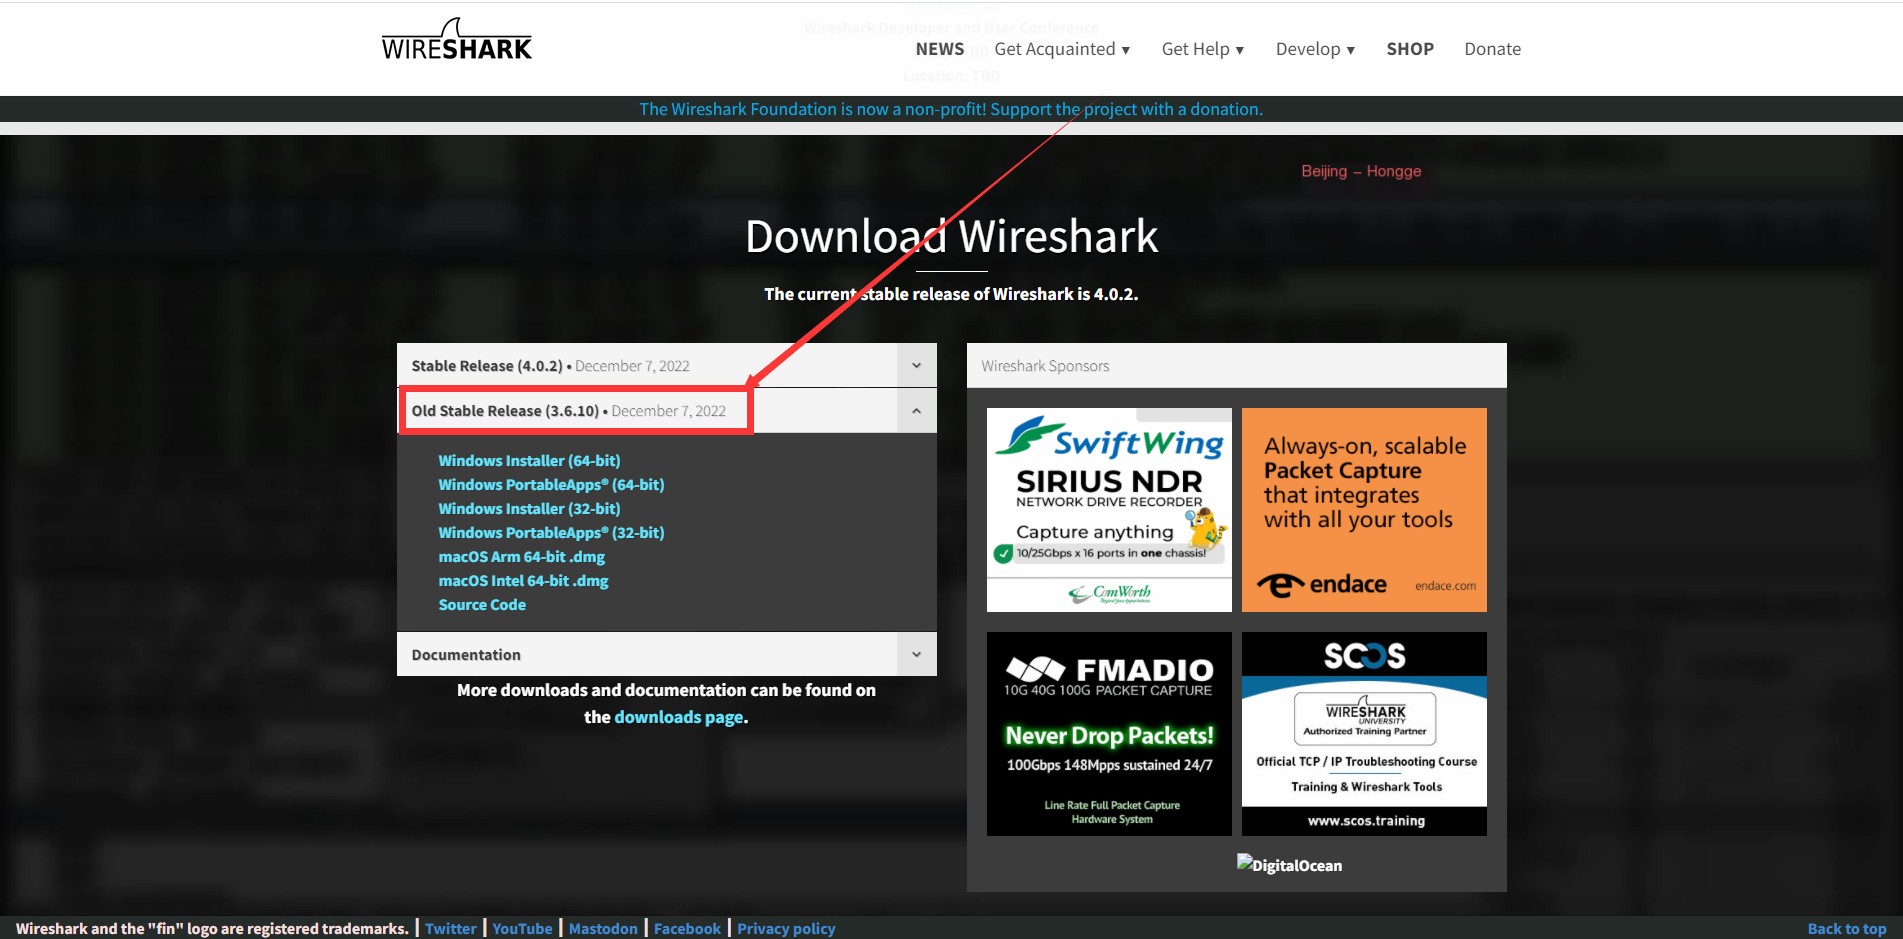
Here, the latest version, 4.0.2, is downloaded. If you want to download an older version, you can click the [Old Stable Release] below the download interface, as shown in the figure below:
3. Here, the 64-bit Windows installation package is downloaded. Click the Windows Installer (64-bit) link to download it. The downloaded file is named Wireshark-win64-4.0.2.exe, as shown in the figure below:

3.2 Wireshark Windows 10 Installation
1. Double-click the downloaded package to begin installation. Installation is relatively simple; just use the default values and click the Next button to successfully install.

2. Click “Next,” as shown in the figure below:

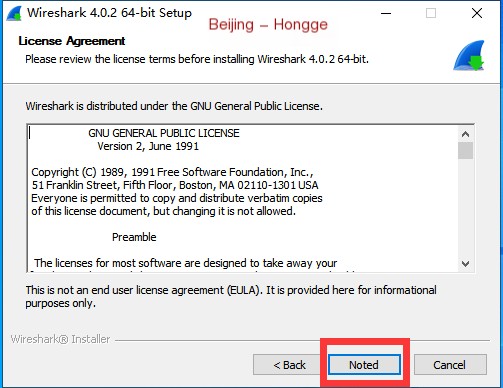
3. Click “Next” to proceed to the license agreement authentication, click “Noted,” as shown in the figure below:
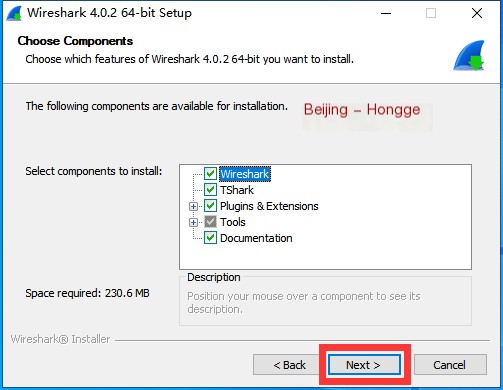
4. During installation, the default is selecting all components, do not modify, click “Next,” as shown in the figure below:
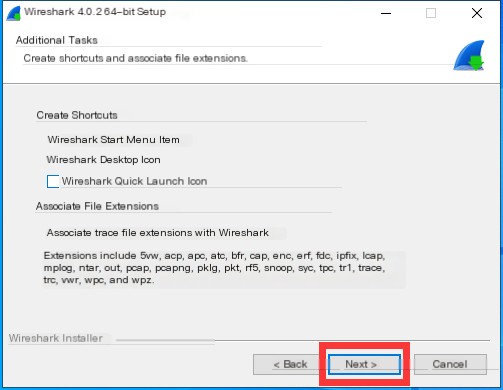
5. The first is selecting the software shortcut, and the second checkbox is to support multiple other network packet analysis tools file formats, default is fine! Click “Next,” as shown in the figure below:
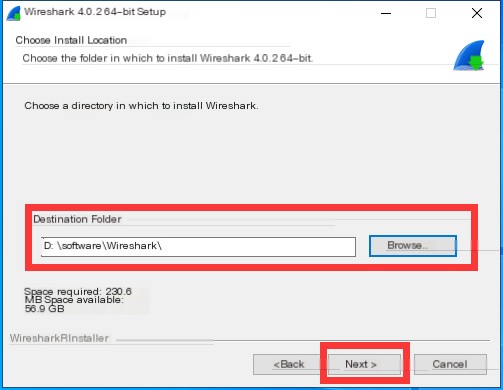
6. Select the installation directory for Wireshark (try to use English paths without Chinese characters), then click “Next,” as shown in the figure below:
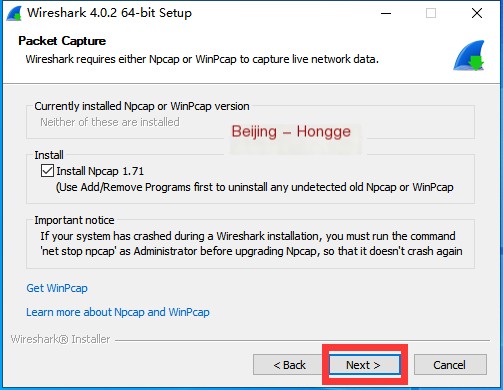
7. Wireshark’s installation files come with the latest version of Npcap (during installation, it checks if the local machine does not have Npcap or WinPcap drivers, select to install), choose install, default is fine! Click “Next,” as shown in the figure below:
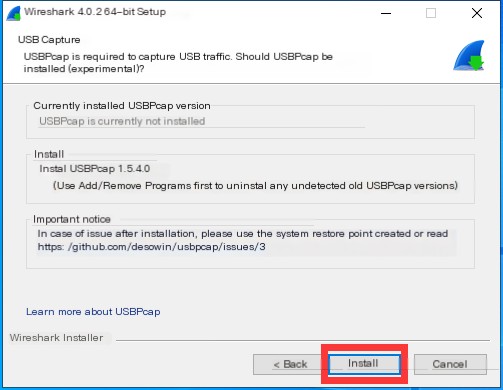
8. USBPcap is an open-source USB data packet capture tool. If you need it, you can select to install it, otherwise just keep the default! Click “Install” to start the installation… as shown in the figure below:
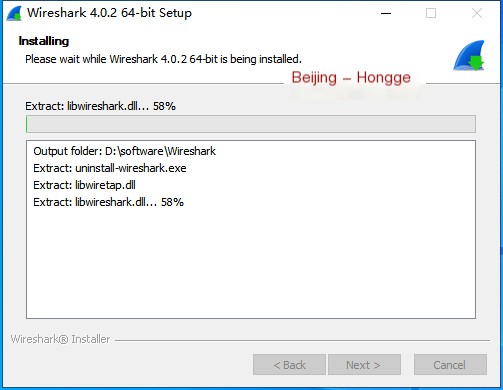
9. Wait a moment for the installation to complete, as shown in the figure below:
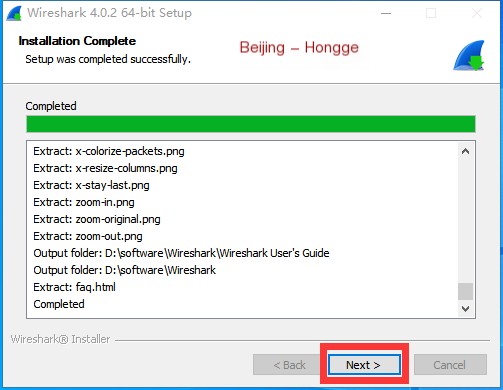
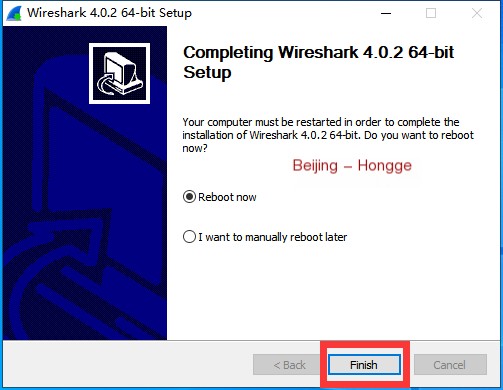
10. After installation is complete, click “Next,” as shown in the figure below:
11. Choose to immediately restart the computer or restart it manually later. If you select Reboot now, the computer will restart, and the installation will finish after reboot. If it’s inconvenient to reboot now, you can choose the I want to manually reboot later option. Click “Finish,” as shown in the figure below:
12. After installation, a Wireshark icon will appear in the Windows “Start” menu, as shown in the figure below:

4. New Features in Wireshark Windows 10
Users who are interested can check this link: http://wireshark.org/docs/relnotes/
5. Trying Your Hand
Now that the software is installed and set up, we are eager to try it out, so let’s give it a go with Brother Hong.
5.1 Initial Interface
When you start Wireshark, you’ll see the following startup interface, as shown below:
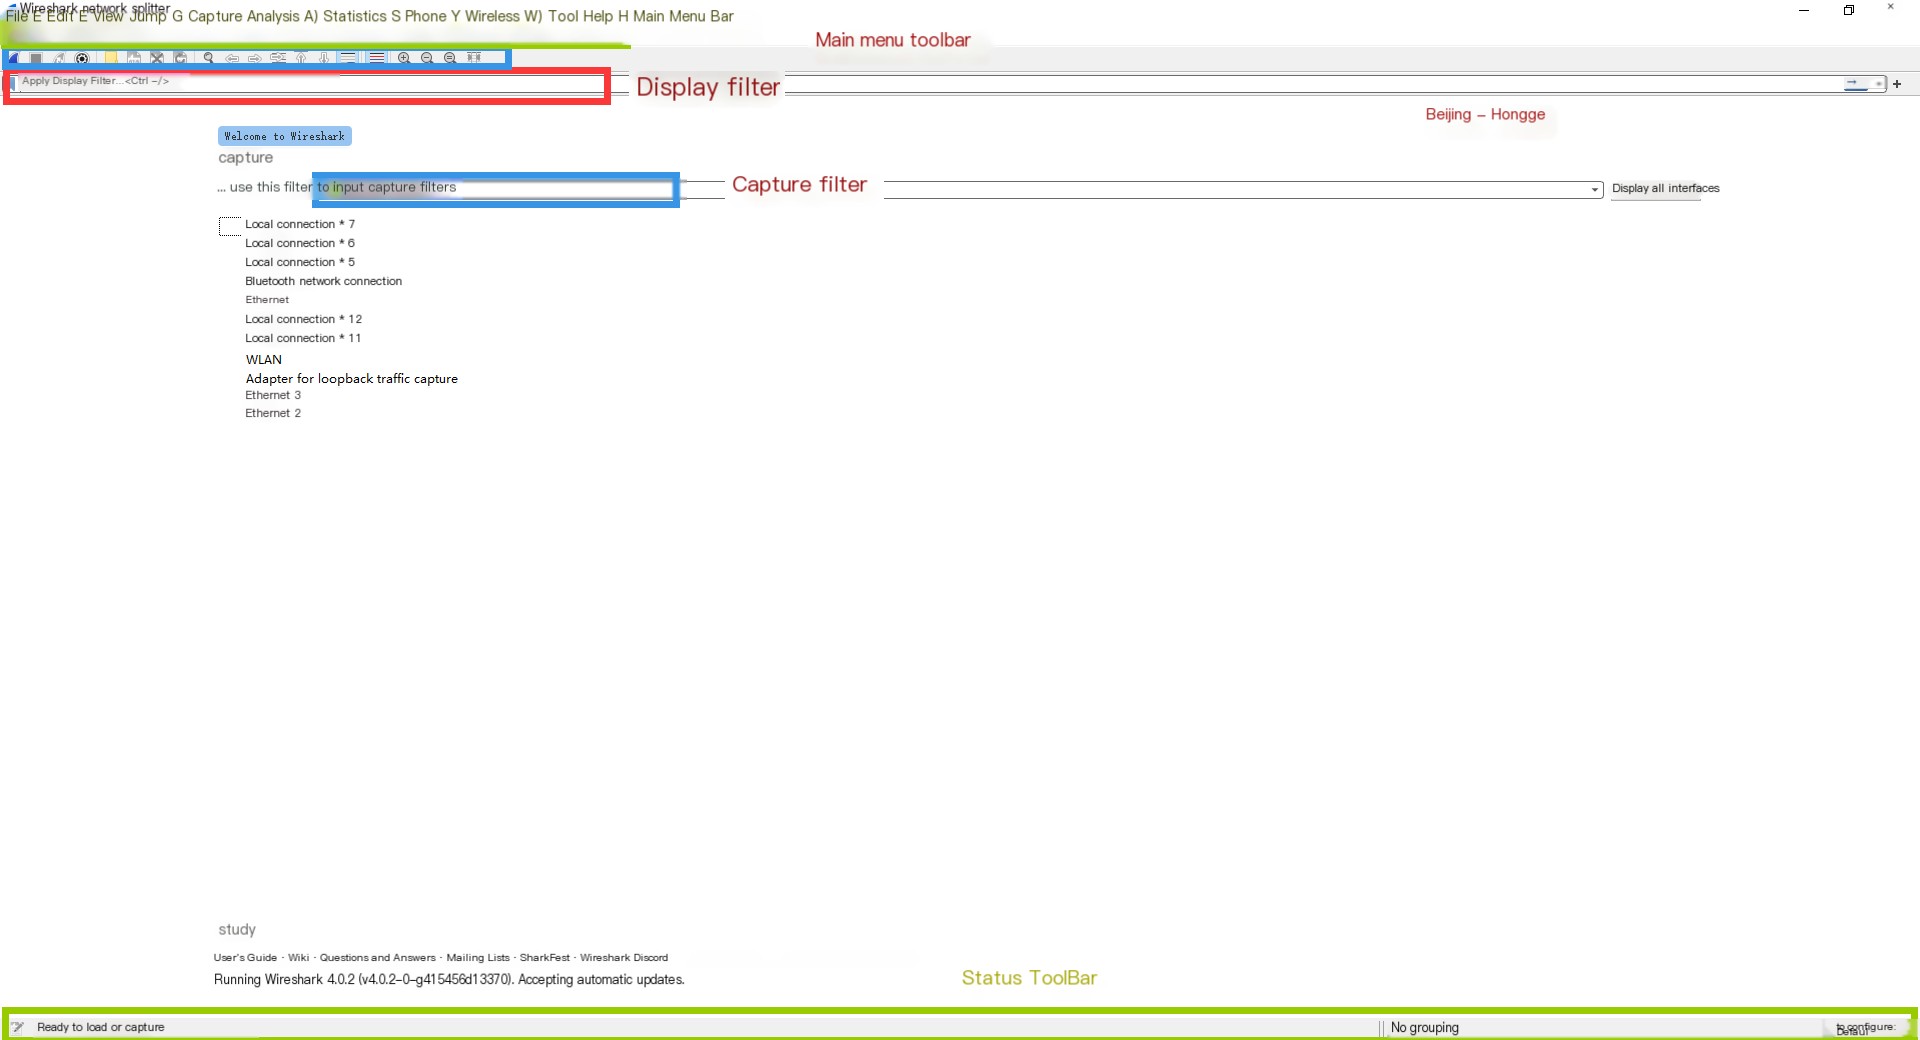
Brother Hong divides the whole interface into six parts:
- Title bar (Wireshark Network Analyzer) not marked by Brother Hong
- Main menu
- Toolbar
- Filter tools
- Interface list (Network adapter list)
- Status toolbar
5.2 Quick Packet Capture
1. Select a network card for packet capture, right-click on “Start capture,” as shown in the figure below:
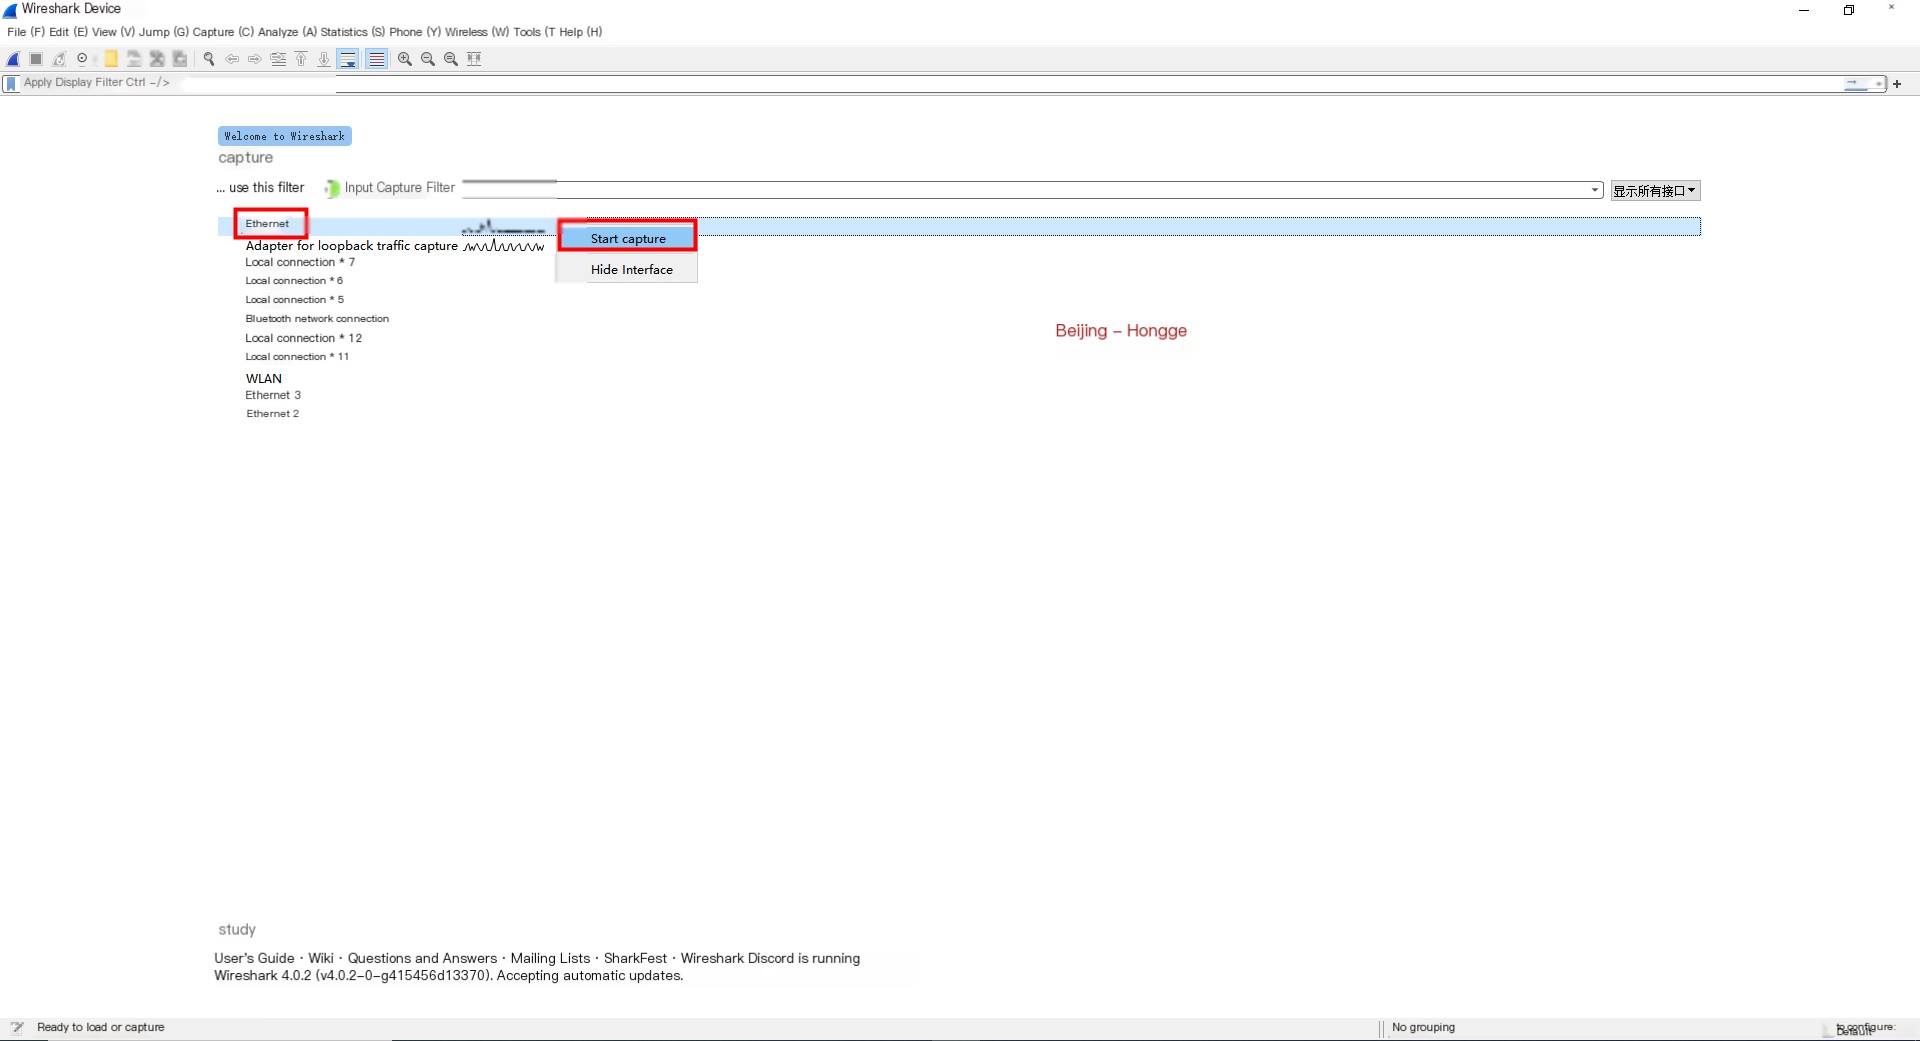
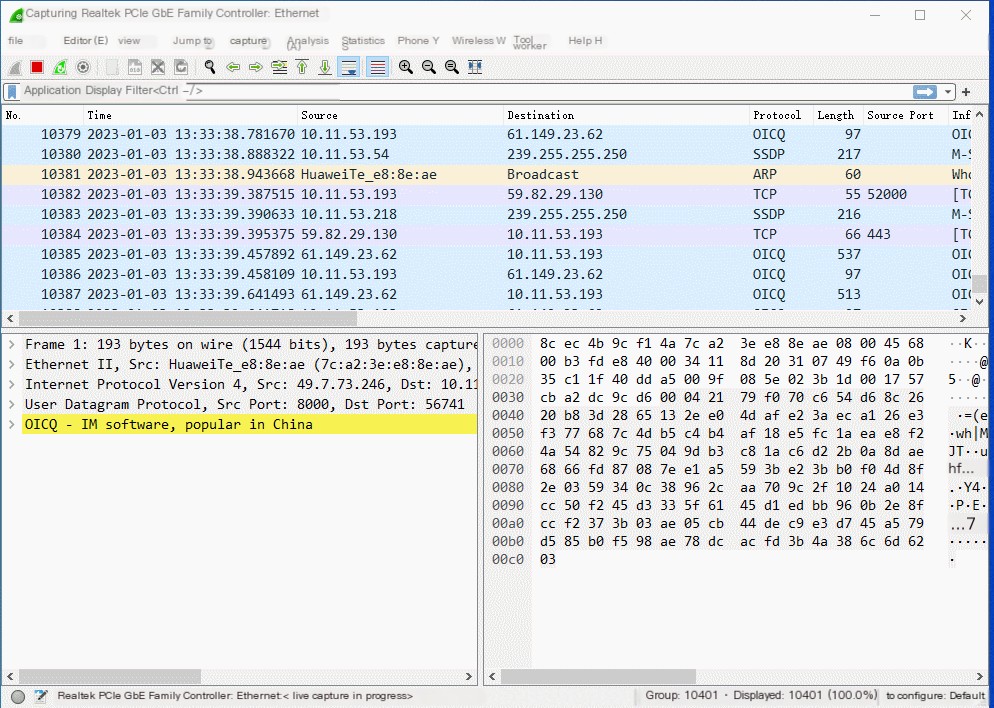
2. Start capturing packets (the title shows: capturing for that network adapter), as shown below:
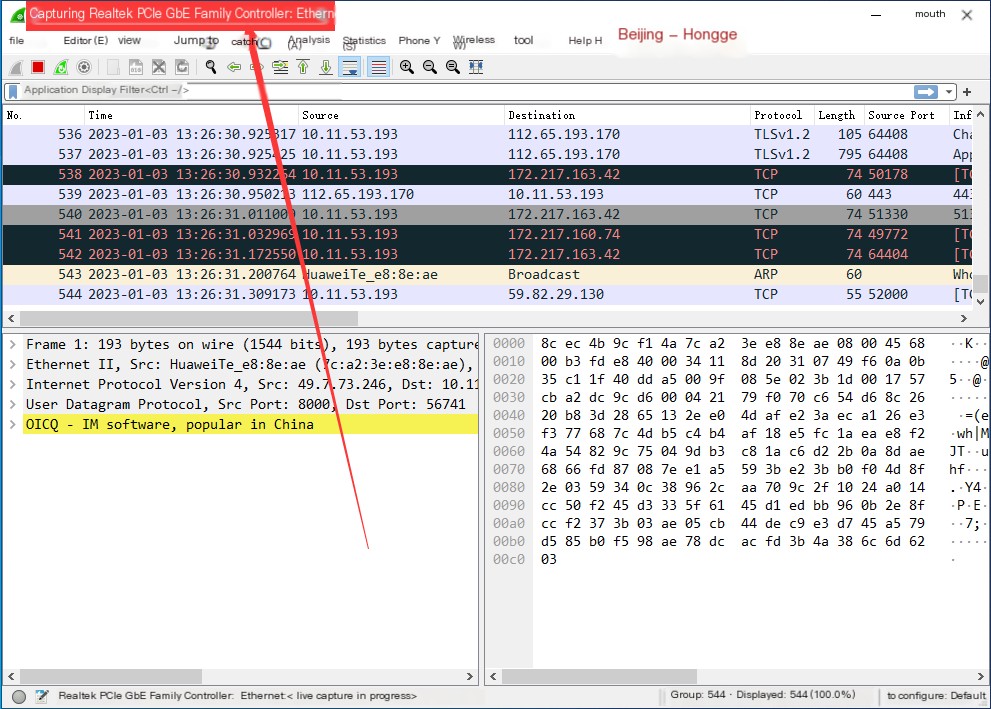
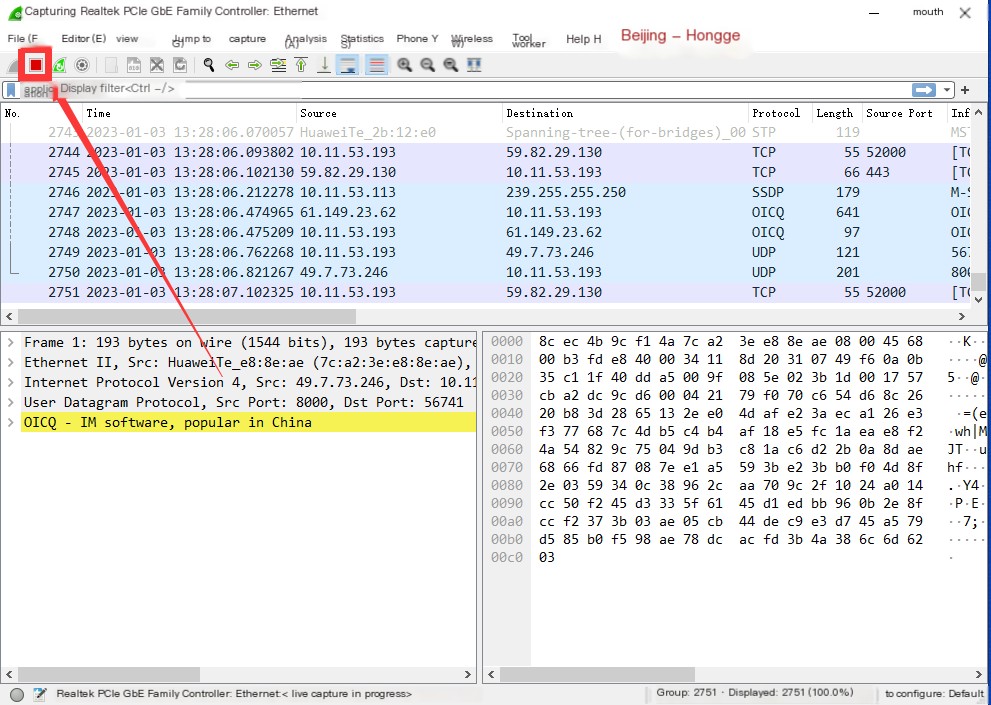
5.3 Stop Packet Capture
Click on the “red button” in the upper left corner to stop the capture, as shown below:
5.4 Save Data
Note!!! Be sure to stop packet capture before saving data, otherwise the “Save” button will be grayed out and not allow saving. This is similar to how software like Word doesn’t allow changing the file name while open. As seen in the figure below:
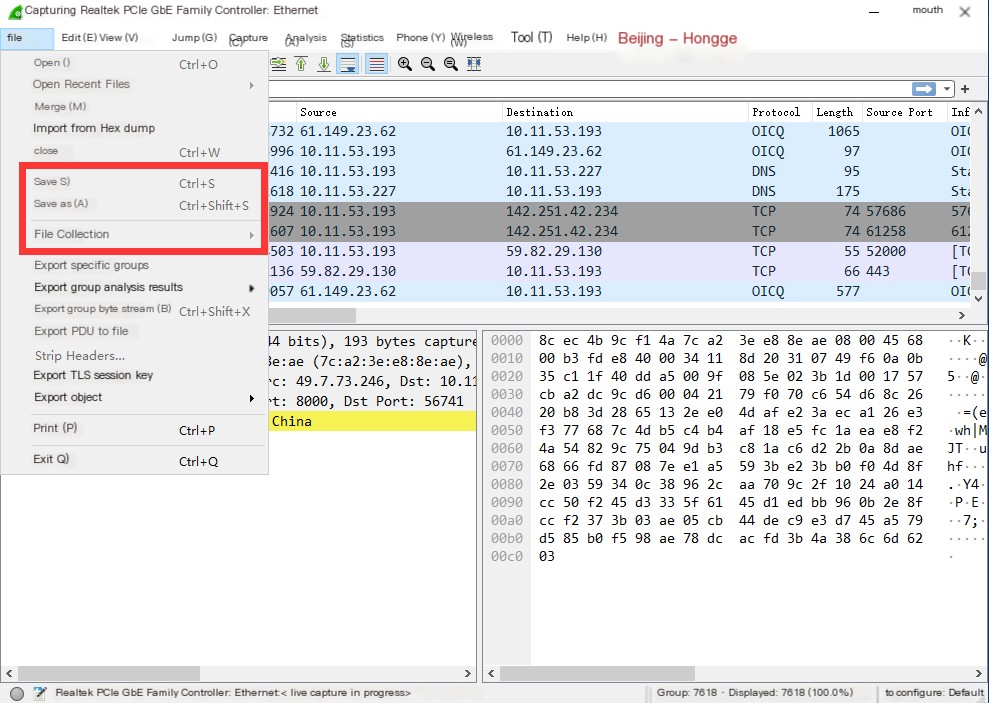
1. First, you must stop the packet capture, then save the data, as shown below:
2. After clicking “Save,” when pulling down the file type dropdown, you can see many formats, which might be required by other packet capture tools. Save it in the corresponding format, and then it can be opened by other tools. Wireshark’s default first format is shown below:
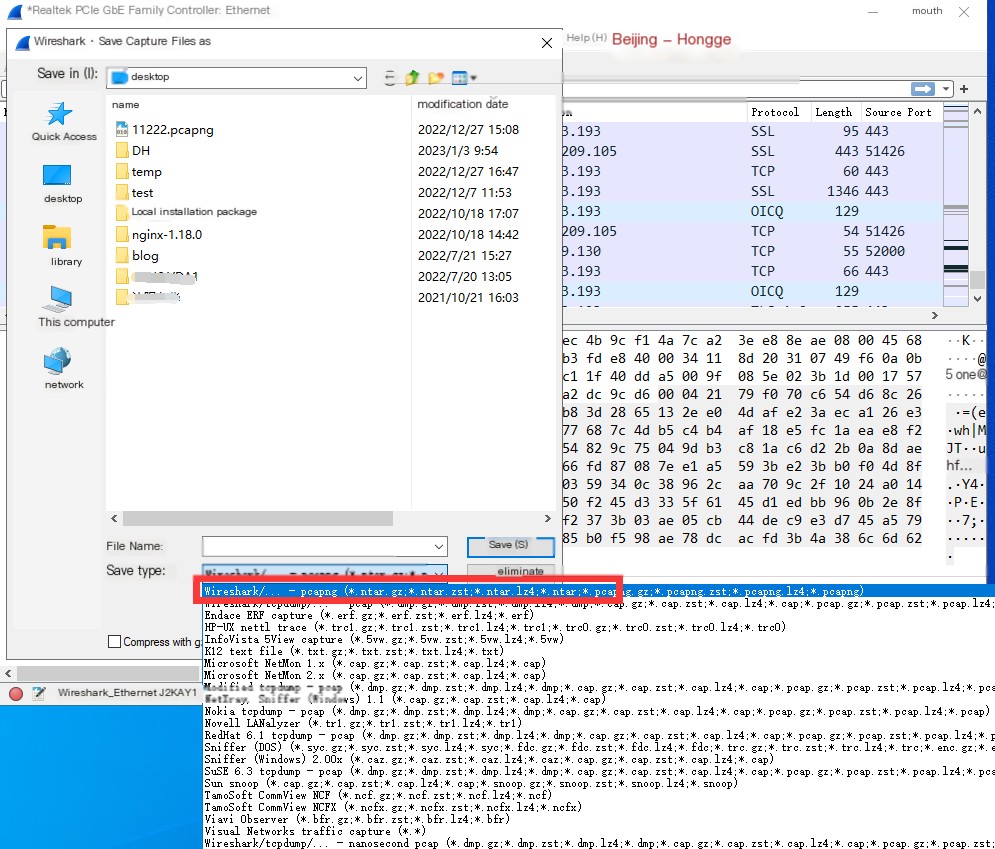
3. Save to the desktop, as shown in the figure below:

6. Summary
This article mainly explained and shared WireShark installation and simple operational applications. The installation is very simple and straightforward, basically just click Next all the way. The difficult part is using it afterward. Anyway, it’s getting late today and Brother Hong will stop the explanation and sharing here. Thank you very much for your patience in reading!!!
I am participating in the third session of Tencent Technology Writing Training Camp 2023 with prize-winning articles; join and earn big!